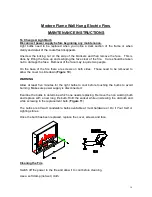
8
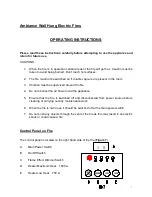
Remote Control
DIMMER
ON/OF
H
I
G
H
L
O
W
A
Infrared Window B
On/Off Switch
C
Flame Effect Dimmer
D
Heater Maximum Heat
E
Heater Low Heat
Prior to use, the remote control handset requires installation of 2 x AAA batteries, as
supplied.
(Figure 8
)
Remove the cover on the rear of the remote handset by sliding backwards. Install the
batteries as shown and then slide the cover back into the original position.
To enable the remote control to function the power to the fire must be switched on.
At a distance of 5 to 6 feet, point the remote control handset directly towards the bottom
right hand side of the fire. (
Figure 9
)
B
On/Off Switch Press on/off switch to turn fire on.
C
Flame Effect Dimmer ~ To operate press once to commence dimming cycle. During
the dimming cycle the fire will slowly dim then brighten allowing user to choose
suitable level. Press a second time to stop cycle when the desired brightness level
is obtained. Failure to press dimmer a second time will result in the fire dimming
then brightening repeatedly.
D
Heater Maximum Heat (1500 W) Press this once to switch to high heat. The
indicator light will come on as well as the fan. Press again to turn off. (The fan will
continue to run for a few moments until sensors indicate cool condition)


