5
INSTALLATION
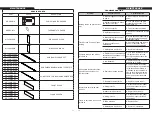
BOX CONTENTS
1 Fire Unit
1 Remote
4 L-Metal Mounting
Brackets
2 Side Glass Pieces
2 Side Covers
1 Front Glass
Clear Acrylic Stones
Canyon Driftwood
Logs
2 Suction Cups
Smoke Acrylic
Crystals
1 Owner's Manual
6
INSTALLATION
INSTALLATION
WARNING: If the information in these
instructions is not followed exactly, a fire
or explosion may result causing property
damage, personal injury or death.
WARNING - RISK OF FIRE!
To prevent a possible fire, do not block air
intake or exhaust in any manner. Do not
use on soft surfaces where openings may
become blocked.
WARNING - RISK OF FIRE!
Do not blow or place insulation against the
firebox.
To reduce the risk of fire do not store or
use gasoline or other flammable vapors in
the vicinity of this or any other heater.
CAUTION: Keep combustible materials,
such as furniture, pillows, bedding,
papers, clothes and curtains at least 3
feet (0.9m) from the front of the heater and
keep them away from the sides and rear.
CAUTION: Wear gloves and safety glasses
for protection during installation and
maintenance.
Installing fireplace
Select a suitable location that is not susceptible
to moisture and is a safe distance from drapes,
furniture and high traffic areas. A qualified
electrician should add a dedicated flexible
15 amp 220-240 volt circuit per local building
codes.
Note: Follow all national and local electrical
codes.
This fireplace has a number of installation options. It can be installed fully recessed, half recessed, wall
mounted with a floating cabinet or with a simple slide-in cabinet. In addition, the fully recessed option can
be installed with all sides showing, 1 side showing, or flush.
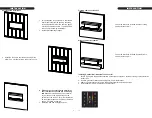
To prepare for installation, connect the hard wire to the terminal block according to the diagram below.
Choose any connector type according to local building code.
To be performed by a qualified electrician
according to local building codes.
L1 - Line 1
N - Neutral
- Ground

