background image

6  


INSTALLATION 

4. Secure fire unit to the finished framed opening with the provided screws. This installation should 
only be made in to wood studs or solid surface and should not use drywall anchors to secure the 
fireplace. Home builder or contractor will provide appropriate anchors for solid surface installation. 
Fireplace will stand proud of the finished wall opening by 2 1/4 inches. This is a semi-permanent 

installation. Remove screws to relocate. 
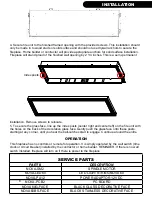
5. To secure the glass face, line up the index posts (center right and center left) on the fire unit with 
the holes on the back of the decorative glass face. Gently push the glass face onto these posts, 
starting at any corner, until you hear the ball-catches start to engage. Continue around the entire 

OPERATION 

This fireplace has no controls or remote for operation. It is simply operated by the wall switch (time 
clock or circuit breaker) installed by the contractor or home builder. REMINDER: If there is no wall 
switch installed, fireplace will turn on if there is power to the fireplace.  

Index posts 

PART#

DESCRIPTION

NOVA-SM2

SPINDLE MOTOR

NOVA-LED60

LED LIGHT STRING NOVA 60

NOVA-PA12

POWER ADAPTOR 12V DC

NOVA-PCB2

PC BOARD

NOVA60G-FACE

BLACK GLASS DECORATIVE FACE

NOVA60BS-FACE

BLACK STAINLESS DECORATIVE FACE

SERVICE PARTS

Summary of Contents for NOVA 60

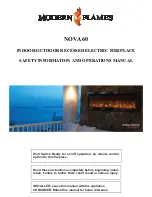
Page 1: ... result in serious injury INSTALLER Leave this manual with the appliance CONSUMER Retain this manual for future reference NOVA 60 INDOOR OUTDOOR RECESSED ELECTRIC FIREPLACE SAFETY INFORMATION AND OPERATIONS MANUAL Wall Switch Ready for on off operation no remote control option for this fireplace ...

Page 2: ...or outlets be required 7 When transporting or storing device keep in a dry place 8 Do not let children play with the appliance Carefully remove unit from box Prior to permanently installing unit test to make sure unit operates properly A qualified electrician should add a flexible 15 amp 120V circuit per local building codes WARNING Do not operate the unit if it is damaged or has malfunctioned If ...

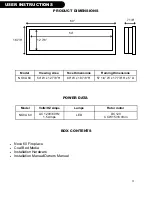
Page 3: ... 57 1 4 W x 17 7 8 H x 5 D USER INSTRUCTIONS PRODUCT DIMENSIONS POWER DATA 60 18 7 8 7 1 8 BOX CONTENTS Nova 60 Fireplace Coal Bed Media Installation Hardware Installation Manual Owners Manual Model Voltz HZ Amps Lamps Rotor motor NOVA 60 AC 120V 60Hz 1 5 Amps LED DC 12V CCW 15 18 r min 54 12 7 8 ...

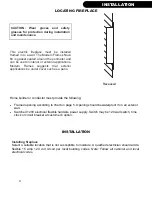
Page 4: ...g fireplace Select a suitable location that is not susceptible to moisture A qualified electrician should add a flexible 15 amp 120 volt circuit per local building codes Note Follow all national and local electrical codes INSTALLATION LOCATING FIREPLACE INSTALLATION Recessed Home builder or contractor must provide the following Framed opening according to chart on page 5 Opening should be waterpro...

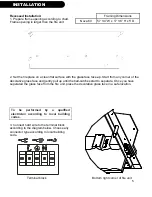
Page 5: ... ball catches start to separate Once you have separated the glass face from the fire unit place the decorative glass face in a safe location 3 Connect hard wire to the terminal block according to the diagram below Choose any connector type according to local building code Framing Dimensions Nova 60 57 1 4 W x 17 1 8 H x 5 D INSTALLATION Terminal block To be performed by a qualified electrician acc...

Page 6: ...he fire unit with the holes on the back of the decorative glass face Gently push the glass face onto these posts starting at any corner until you hear the ball catches start to engage Continue around the entire OPERATION This fireplace has no controls or remote for operation It is simply operated by the wall switch time clock or circuit breaker installed by the contractor or home builder REMINDER ...

Page 7: ...7 MAINTENANCE NOTES ...

Page 8: ...8 2016 www modernflames com Please dispose of properly ...

Reviews: