F
Manual
MODSTER ASW 28 V2
24 www.modster.at
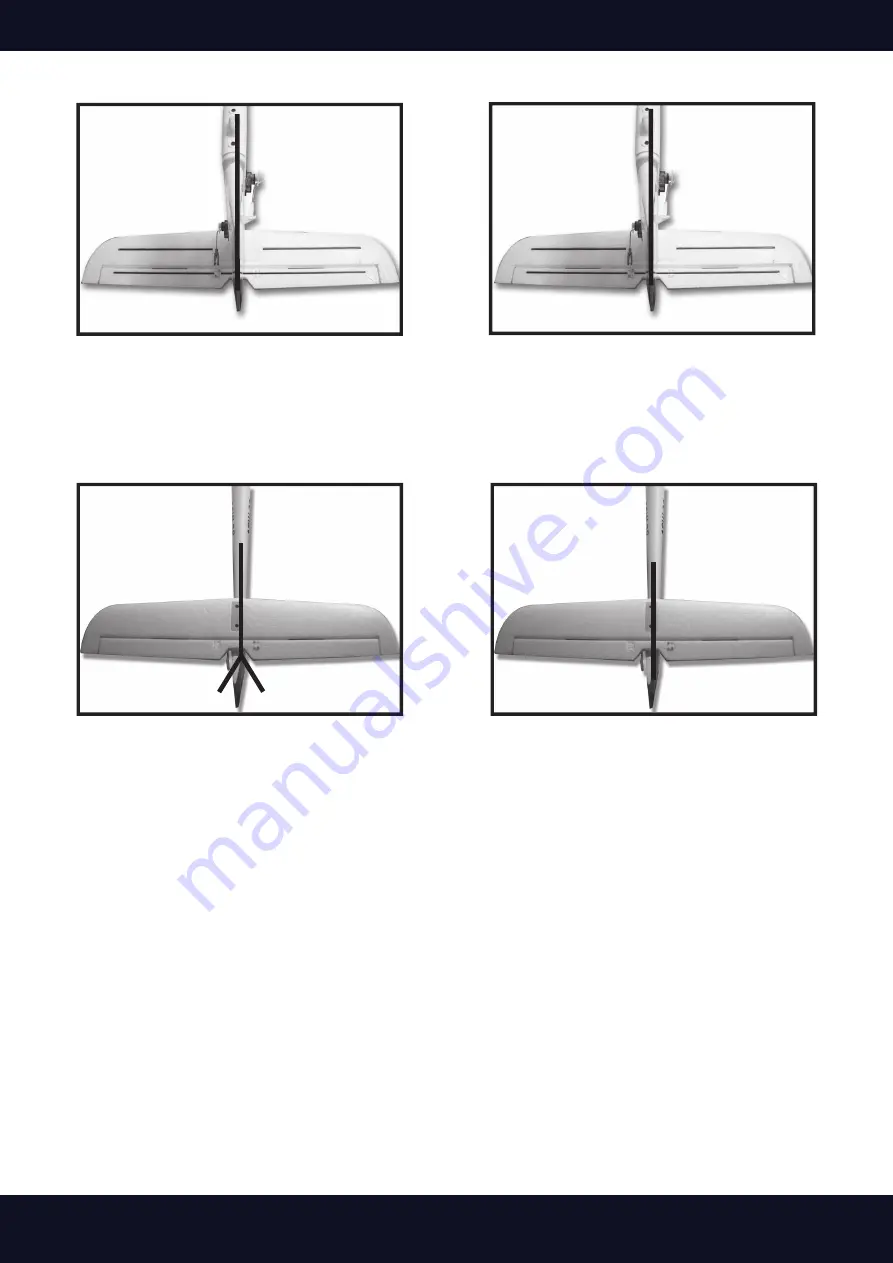
Rudder NOT
properly centered
Rudder properly
centered
After connecting the clevises with the control horns, look at the side link and the rudder directly
from above. The rudder, if properly centered, should be in line with the side link. When the
rudder is angled to the right or left, you can adjust the length or position of the push rod so that
the surface is mechanically centered while the trim lever is centered on the transmitter.
When the rudder is angled to the left, carefully remove the clevis from the locking screw and
turn it clockwise half to a full turn with the screwdriver. Then, push the pin back into the outer-
most hole in the control horn.
If the rudder is angled to the right, carefully remove the clevis from the locking screw and turn
it counterclockwise half a turn to the full with the screwdriver. Then, push the pin back into the
outermost hole in the control horn.
Look at the side guide and the rudder directly from above and proceed with adjusting the
length / position of the push rod / clevises until the rudder is properly centered.
NOTE: You should always turn the clevis until the pin is perpendicular to the locking screw to
ensure that the bolt is not overloaded when it is inserted into the hole and during operation. In
some cases, it may not be possible to accurately center the surface mechanically while the pen
is properly aligned. In these cases, make sure that the pin is correctly aligned and adjust the
position of the trim lever slightly if necessary. In addition, it is likely to be necessary to make
further adjustments to the position of the trim lever during the flight, since most of the surfaces
do not end in exactly the centered position when an aircraft is properly fitted for the actual flight
(although centered is still the best starting point).


