background image


Mod. 60/30 PCG 
Mod. 60/60 PCG 
Mod. 60/60 CFG 
Mod. 60/60 CFGE 

UK – CAT  II

2H3+


GAS HOBS AND COOKERS


Cod. 252.151.11 

¸ 

0051 

Summary of Contents for 60/30 PCG

Page 1: ...Mod 60 30 PCG Mod 60 60 PCG Mod 60 60 CFG Mod 60 60 CFGE UK CAT II2H3 GAS HOBS AND COOKERS Cod 252 151 11 0051...

Page 2: ...nces 7 3 Electrical connection 7 4 Equipotential connection 7 5 Replacement of power cord gas oven 8 Maintenance 8 1 Conversion for use with a different type of gas Top burners 8 1 1 Changing top burn...

Page 3: ...lition of the appliance must be carried out in strict observance of current standards Failure to observe the above could undermine the safety of the appliance 2 COMPLIANCE WITH THE EEC DIRECTIVES 2 1...

Page 4: ...260 0 205 1 167 2 x 0 296 2 x 0 350 0 238 1 566 85 95 80 115 135 109 Air adjustment These burners do not require any air adjustment 4 1 GAS CHARACTERISTICS The data relative to power and consumption...

Page 5: ...h of air for each kW of installed power 6 3 DISCHARGE OF FUMES FOR TYPE A APPLIANCES The appliances must be installed on premises that are suitable for the discharge of the combustion products and mu...

Page 6: ...e adjust its height and stability by turning the levelling feet 7 1 LAWS TECHNICAL REGULATIONS AND GENERAL RULES Comply with the following rules during installation 1 accident prevention standards 2 t...

Page 7: ...ible cable through the grommet and cable relief strain connect the single wires to their corresponding terminals It is indispensable to connect the appliance to a working earth wire For this purpose n...

Page 8: ...with a section of 3x1 mm may be replaced in the following way Open the terminal board see fig below Insert the conductors in the respective terminals N L Fix the cable in the special cable clamp Close...

Page 9: ...nimum flame fig 1 remove the cock knobs 8 with a screwdriver turn the cock 6 adjustment screw 7 until you get the minimum flame required Supply pressure it must be that specified on the appliance s da...

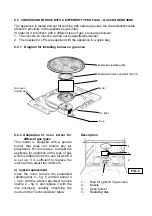
Page 10: ...This model is equipped with a special burner that does not require any air adjustment For this reason to adapt the appliance for operation with a type of gas which is different form the one for which...

Page 11: ...imum once the set temperature is reached Then remove the cock knob and use a screwdriver on screw 1 fig 6 turning it to the right to decrease the flame or to the left to increase it until the desired...

Page 12: ...ven may emit smoke or unpleasant odours This is due to the heating of the thermal insulation and the grease used during manufacturing Therefore heat the oven for approximately 60 minutes During this o...

Page 13: ...whereas the orange one is connected to the thermostat and operates intermittently whenever the thermostat cuts in to keep the temperature constant 9 2 2 SAFETY THERMOSTAT electric oven In order to avo...

Page 14: ...light turn the knob to to turn on simultaneously the light and the grill heating element finally place the knob at to switch on the light the heating element and the rotisserie motor The indicator lig...

Page 15: ...re returning it to its place making sure that no openings are obstructed with impurities It is indispensable for the burner to be installed correctly since improper positioning may cause serious abnor...

Reviews: