background image

Page 5 of 5

STEP 7:

Customer Service 609-256-9000 www.modway.com

Carefully position the assembled table to the desired location.

EEI-3700-NAT  

TABLE

Assembly is complete. Your table is ready to be used now!

Summary of Contents for EEI-3700-NAT

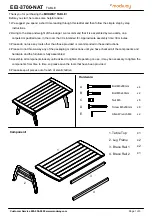
Page 1: ...e any tools other than those provided or recommended in these instructions 4 Please do not throw away any of the packaging or instructions until you have checked all the components and hardware and the furniture is fully assembled 5 Assemble all components loosely until advised to tighten Depending on use it may be necessary to tighten the components from time to time so please save the tools that...

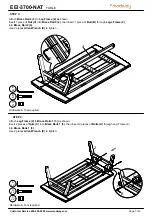
Page 2: ... x1 E E x2 A x2 E x2 C Attach Brace Rails 1 3 to Table Top 1 as shown Then insert 4 pieces of Screws D through Brace Rails 1 3 into Table Top 1 Tighten with Allen Wrench E Attach Leg Frame 2 to Brace Rails 1 3 as shown Insert 2 pieces of Nuts C then insert 2 pieces of Bolts A through Leg Frame 2 into Brace Rails 1 3 Tighten with 2 pieces of Allen Wrench E ...

Page 3: ... shown Insert 1 piece of Nut C into Brace Rail 2 4 then insert 1 piece of Bolt B through Legs Frame 2 into Brace Rail 2 4 Use 2 pieces Allen Wrench E to tighten Attach Leg Frame 2 to Brace Rails 1 3 as shown Insert 2 pieces of Nuts C into Brace Rails 1 3 then insert 2 pieces of Bolts A through Leg Frame 2 into Brace Rails 1 3 Use 2 pieces Allen Wrench E to tighten x2 A x2 E x2 C x1 B x2 E x1 C ...

Page 4: ...ce 609 256 9000 www modway com E C B E Insert 1 piece of Nut C into Brace Rail 2 4 Then insert 1 piece of Bolt B through Leg Frame 2 into Brace Rail 2 4 Use 2 pieces Allen Wrench E to tighten Insert 4 pieces of Screws D through Legs Frame 2 into Table Top 1 Tighten using Allen Wrench E x1 B x2 E x1 C x4 D x1 E ...

Page 5: ...Page 5 of 5 STEP 7 Customer Service 609 256 9000 www modway com Carefully position the assembled table to the desired location EEI 3700 NAT TABLE Assembly is complete Your table is ready to be used now ...

Reviews: