
MOD-5804 QUEEN BED
Customer Service 908-368-1025︱www.modway.com
Page 2 of 5
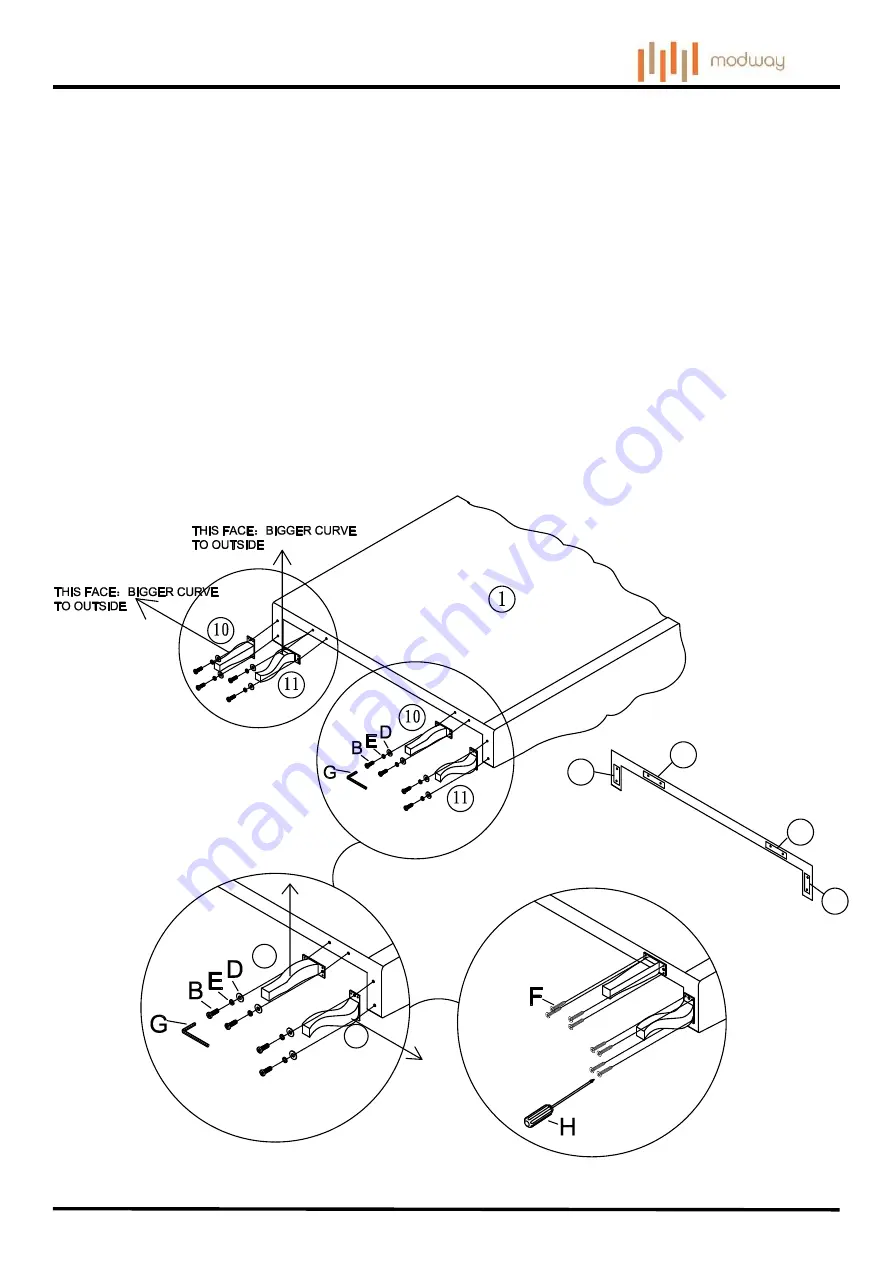
STEP 1:
10
11
HEADBOARD BOTTOM
11
10
10
11
THIS FACE
:
BIGGER CURVE TO OUTSIDE
THIS FACE
:
BIGGER CURVE TO OUTSIDE
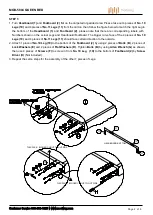
1. Turn
Headboard (1)
and
Footboard (2)
flat on the carpeted or padded area. Please take out 4 pieces of
No. 10
Legs (10)
and 4 pieces of
No.11 Legs (11)
from the carton, then follow the figure below to match the right Leg to
the bottom of the
Headboard (1)
and
Footboard (2)
, please note that there are corresponding labels with
Numbers shown on the actual Legs and Headboard/Footboard. The bigger curve face of the 4 pieces of
No. 10
Legs (10)
and 4 pieces of
No.11 Legs (11)
should face certain direction to the outside.
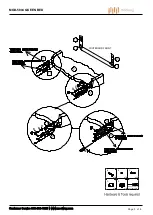
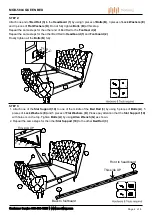
2. Attach 1 piece of
No.10 Leg (10)
to the bottom of the
Footboard (2)
by using 2 pieces of
Bolts (B)
, 2 pieces of
Lock Washers (E)
and 2 pieces of
Flat Washers (D)
. Tighten
Bolts (B)
by using
Allen Wrench (G)
as shown,
then use 4 pieces of
Screws (F)
to screw in from
No. 10 Leg (10)
to the bottom of
Footboard (2)
by
Screw
Driver (H)
(Not included).
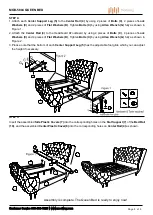
3. Repeat the same steps for the assembly of the other 7 pieces of Legs.


