background image

A

C

B

C

D

10

3

3

J

MOD-6214

Customer Service 609-256-9000 | www.modway.com

05 of 05

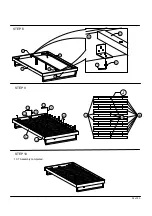
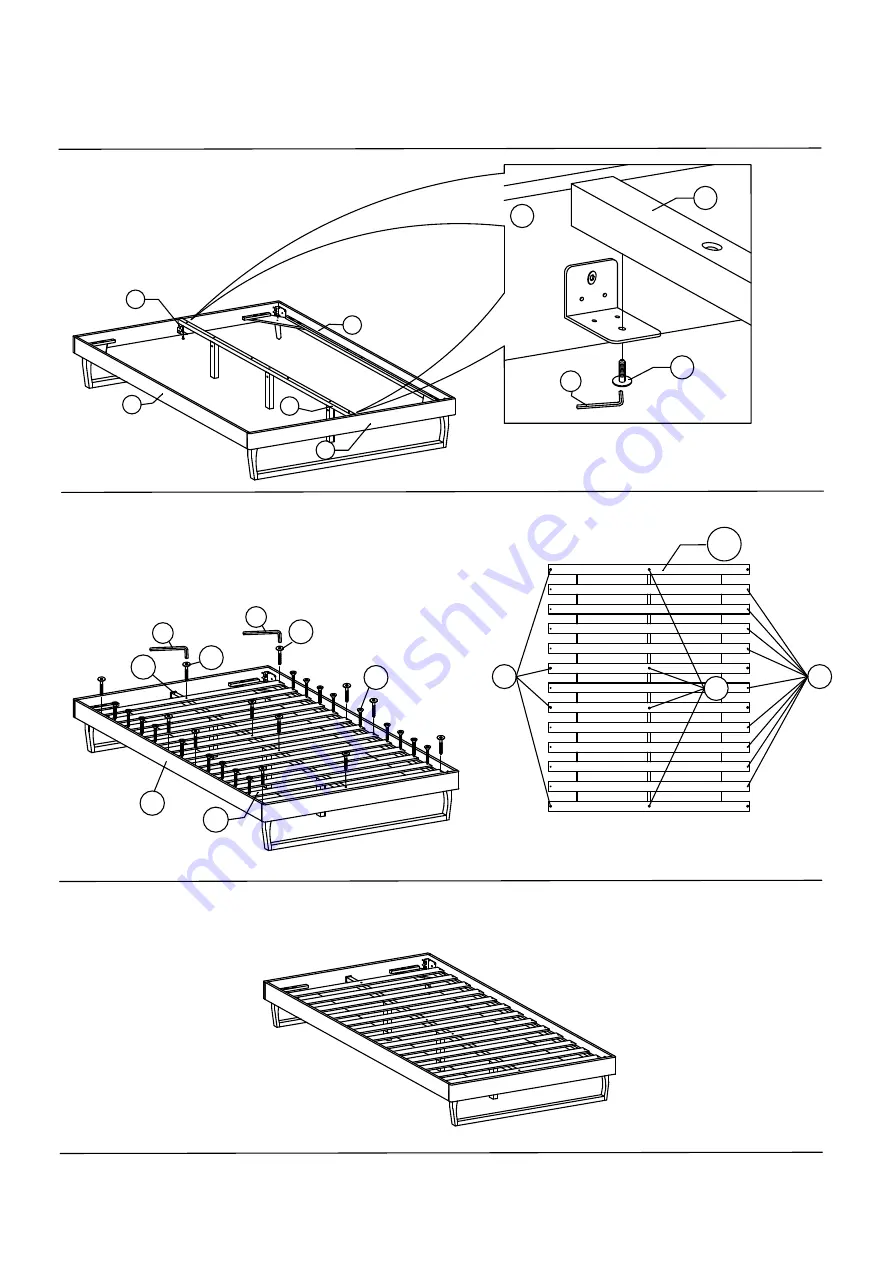
STEP 8

STEP 9

STEP 10

10.1 Assembly completed.

5

D

A

11

11

11

3

10

3

D

C

J

Summary of Contents for MOD-6201

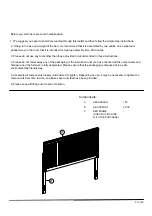
Page 1: ...ot use any tools other than those provided or recommended in these instructions 4 Please do not throw away any of the packaging or the instruction until you have checked all the components and hardwar...

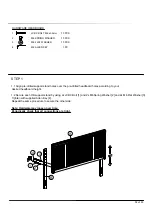
Page 2: ...re drilled support stand holes over the pre drilled headboard holes according to your desired headboard height 1 2 Secure each HB support stand by using 2x JCBC Bolt 1 and 2x M6 Spring Washer 2 and 2x...

Page 3: ...match those of the headboard 2 2 Secure the headboard to the bed frame by using 3x JCBC Bolt 1 and 3x M6 Spring Washer 2 and 3x M6 Flat Washer 3 for the thicker bed frame Tighten with supplied Allen K...

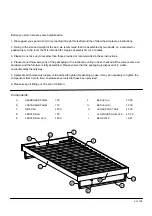
Page 4: ...ctions 4 Please do not throw away any of the packaging or the instruction until you have checked all the components and hardware and the furniture is fully assembled Please ensure that the packaging i...

Page 5: ...3 JCBC BOLT M6 x 40mm 12 PCS 4 JCBC BOLT M6 x 20mm 8 PCS 8 M6 SPRING WASHER 24 PCS 9 M6 FLAT WASHER 24 PCS 10 PH SCREW M4 x 32mm 22 PCS 11 M4 ALLEN KEY 1 PC 5 JCBC BOLT M6 x 15mm 4 PCS 6 JCBB BOLT M8...

Page 6: ...omer Service 609 256 9000 www modway com 03 of 05 STEP 3 Short Tab of L Bracket 13 5 Side Rail Holes A 13 13 5 B 13 5 9 8 4 C A I Side Rail Holes 11 STEP 4 11 Side Rail Holes I G F C C 2 8 9 11 C I ST...

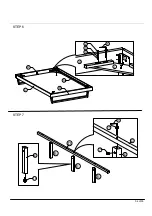
Page 7: ...2 8 9 A C B C I A C MOD 6214 Customer Service 609 256 9000 www modway com 04 of 05 STEP 6 STEP 7 11 E 14 E D 7 1 D E E E 11...

Page 8: ...A C B C D 10 3 3 J MOD 6214 Customer Service 609 256 9000 www modway com 05 of 05 STEP 8 STEP 9 STEP 10 10 1 Assembly completed 5 D A 11 11 11 3 10 3 D C J...

Reviews: