background image

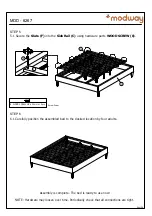
STEP 5

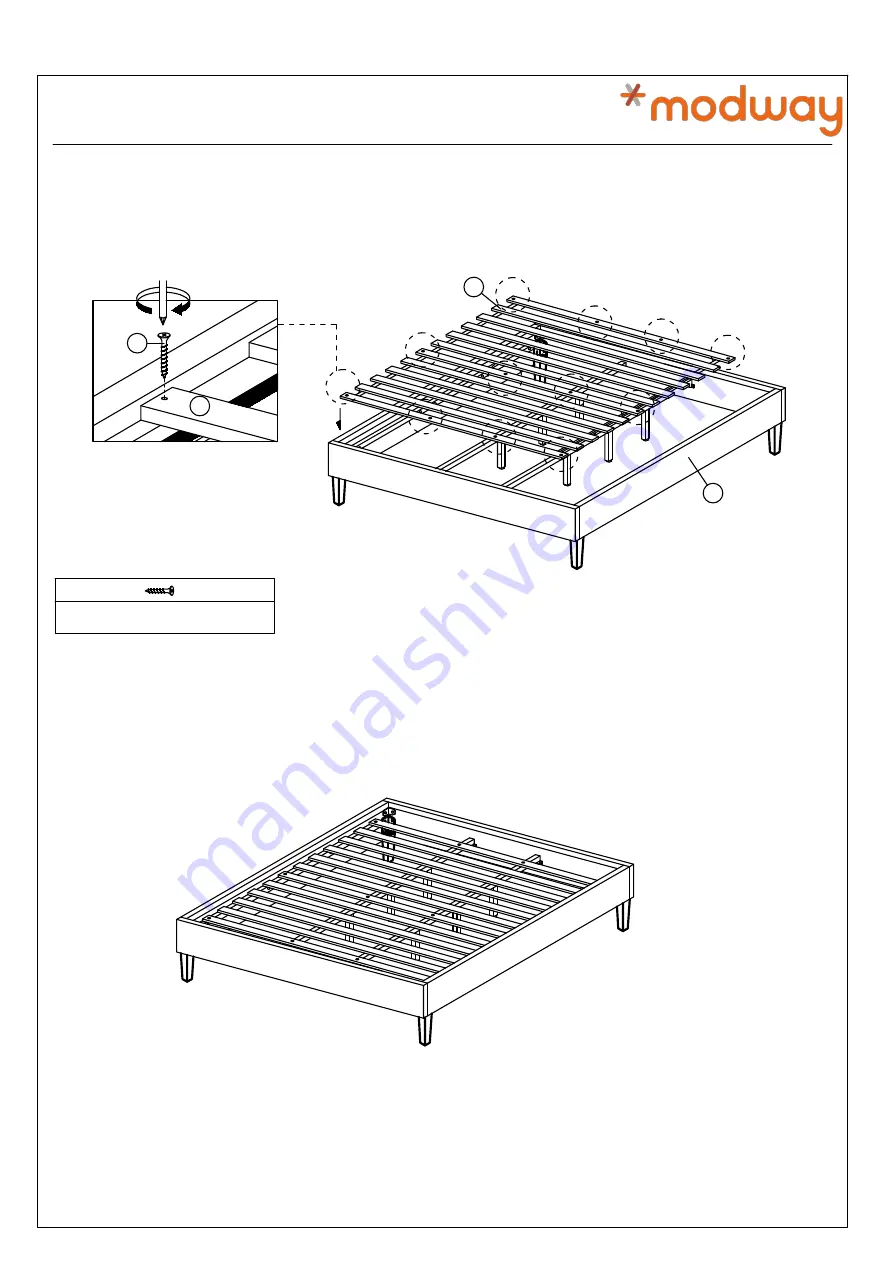
STEP 6

5.1 Secure the Slats (F) into the Side Rail (C) using hardware parts WOOD SCREW (8).

6.1 Carefully position the assembled bed to the desired location by four adults.

Assembly is complete. The bed is ready to use now!

NOTE: Hardware may loosen over time. Periodically check that all connections are tight.

8

F

F

8. 

WOOD SCREW M4 x 32mm x 12pcs

Screw Driver

04 of 04

C

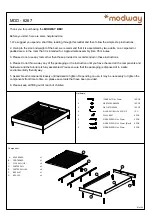
MOD - 6267

Summary of Contents for MOD-6267

Page 1: ...components and hardware and the furniture is fully assembled Please ensure that the packaging is disposed of in a safe environmentally friendly way 5 Assemble all components loosely until advised to tighten Depending on use it may be necessary to tighten the components from time to time so please save tools that have been provided 6 Please keep all fitting out of reach of children Hardware 1 JCBB ...

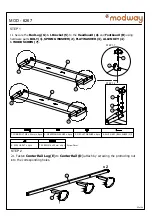
Page 2: ...CREW 7 STEP 2 2 1 Fasten Center Rail Leg E to Center Rail D attach by screwing the protruding nut into the corresponding holes 1 JCBB BOLT M8 x 20mm x 8pcs 2 M8 SPRING WASHER x 8pcs STEP 1 1 STEP 1 2 7 A B 4 1 2 3 3 M8 FLAT WASHER x 8pcs 4 ALLEN KEY BALL SHAPE M5 5 5005 L BRKT x 4pcs G G G G 5 7 SCREW M4 x 20mm x 4pcs D E Screw Driver x2 02 of 04 MOD 6267 ...

Page 3: ... Rail D into the corresponding brackets inside of Headboard A and Footboard B Using hardware parts WOOD SCREW 6 6 WOOD SCREW M4 x 20mm x 4pcs Screw Driver 1 JCBB BOLT M8 x 20mm x 8pcs 2 M8 SPRING WASHER x 8pcs 3 M8 FLAT WASHER x 8pcs 4 ALLEN KEY BALL SHAPE M5 7 SCREW M4 x 20mm x 4pcs Screw Driver 1 2 3 4 7 C C D 6 STEP 3 1 STEP 3 2 STEP 4 1 D 03 of 04 A B A B C C MOD 6267 ...

Page 4: ...EW 8 6 1 Carefully position the assembled bed to the desired location by four adults Assembly is complete The bed is ready to use now NOTE Hardware may loosen over time Periodically check that all connections are tight 8 F F 8 WOOD SCREW M4 x 32mm x 12pcs Screw Driver 04 of 04 C MOD 6267 ...

Reviews: