Customer Service 908-368-1025
︱
www.modwayfurniture.com
Page 3 of 3
MOD-5432
QUEEN BED FRAME
Hx26
Jx13
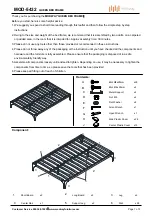
STEP 3:
Hardware & Tool required
1
6
6
2
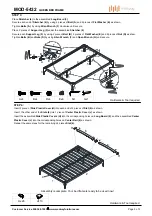
Assembly is complete. Your bed frame is ready to be used now!
1
2
H
H
Insert 2 piece of
Side Plastic Cover (H)
into each end of 2 pieces of
Slat (6)
as shown.
Insert the other end of the
Slats (6)
into 1 piece of
Center Plastic Cover (J)
as shown.
Insert the assembled
Side Plastic Covers (H)
into the corresponding holes on
Long Board (2)
,
and the assembled
Center
Plastic Cover (J)
into the corresponding holes on
Center Rail (4)
as shown.
Repeat the same steps for the remaining 24 pieces
Slat (6)
.
J
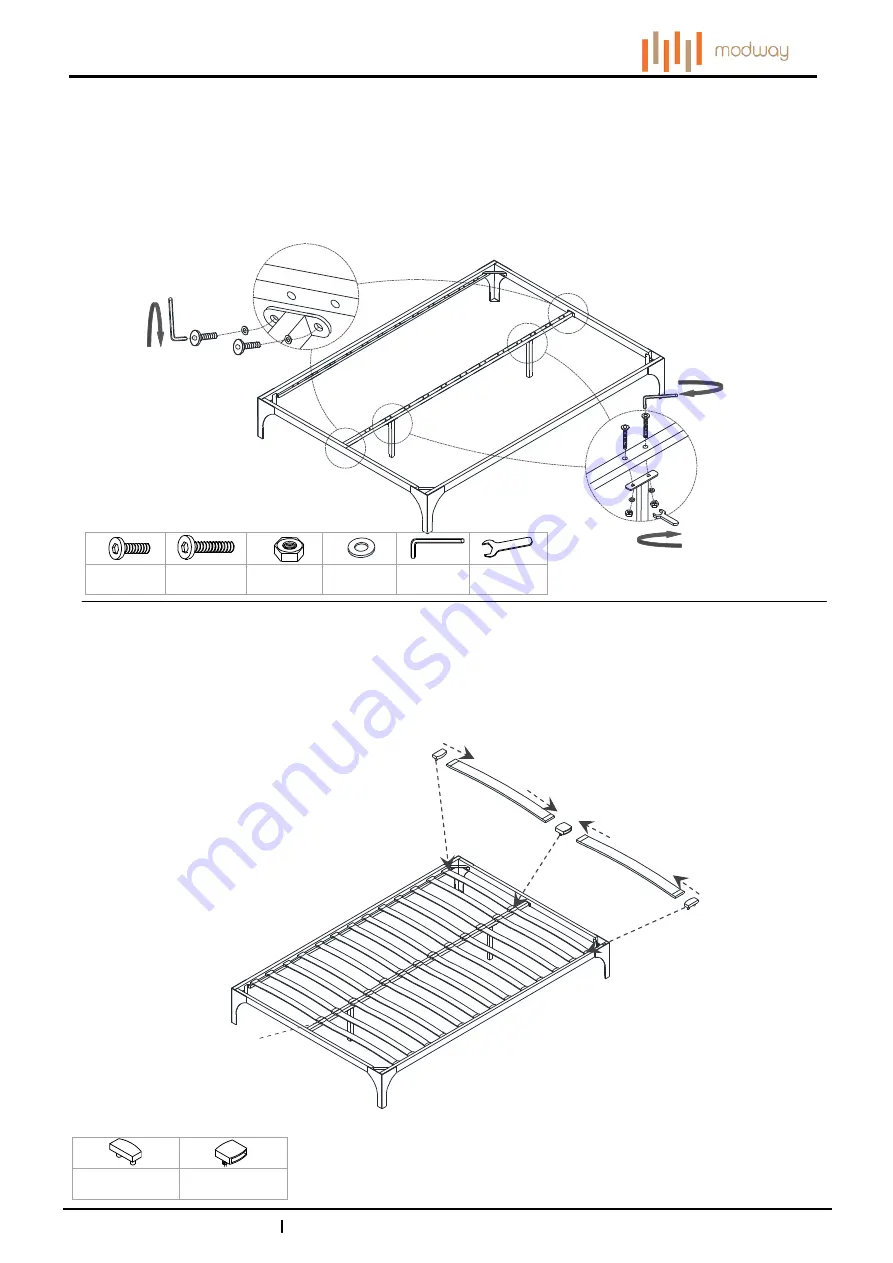
STEP 4:
Ax4
Bx4
Dx4
Ex8
Gx1
Fx1
Hardware & Tool required
Place
Stretcher (4)
to the assembled
Long Board (2)
.
Secure each end of
Stretcher (4)
by using 2 pieces of
Bolt (A
) and 2 pieces of
Flat Washer (E)
as shown.
Tighten
Bolts (A)
by using
Allen Wrench (F
) clockwise until secure.
Place 2 pieces of
Support Leg (5)
under the assembled
Stretcher (4)
.
Secure each
Support Leg (5)
by using 2 piece of
Bolt (B)
, 2 pieces of
Flat Washer (E)
and 2 pieces of
Nut (D)
as show.
Tighten
Bolts (B)
and
Nuts (D)
by using
Allen Wrench (F
) and
Open Wrench (G)
until secure.
4
5
5
1
1
2
2
3
3
3
3
1
4
4
A
E
A
E
F
F
B
B
E
E
G
D
D
4


