5031496 G
211
Chapter 18: Troubleshooting
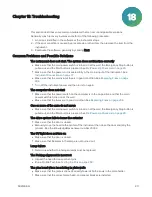
This section describes some common problems that can occur and possible solutions.
Generally, crash recovery involves some form of the following procedure:
1. An error is identified in the software or the instrument stops.
2. If the error condition is caused by a receptacle or other item, then remove the item from the
instrument.
3. Reactivate the software, generally by clicking Next.
Common Problems and Possible Solutions
The instrument does not start. The system does not function correctly
Make sure that the main power switch is turned on at the wall, the Emergency Stop button is
pulled out, and the Start button is pressed. See
Pre-Power-Up Check List on page 25
Make sure that the power cord is seated fully in the mains input of the instrument. See
Instrument Connections on page 17
Make sure that the mains input fuse is in good condition. See
Turn off the instrument power and then turn it on again.
The computer does not start
Make sure that the power switch on the computer is in the on position and that the main
power switch is turned on at the wall.
Make sure that the fuses are in good condition. See
One or more of the axes do not move
Make sure that the main power switch is turned on at the wall, the Emergency Stop button is
pulled out, and the Start button is pressed. See
Pre-Power-Up Check List on page 25
The drive system fails to home the actuator
Make sure that the door is closed.
Manually move the head to the center of the instrument then close the door and retry the
process. See the Knowledge Base answer number
.
The UV light does not turn on
Make sure that the door is closed.
Make sure that filaments in the lamp are not burned out.
Lamp failure
Determine whether the halogen lamps must be replaced.
The Picking alignment is incorrect
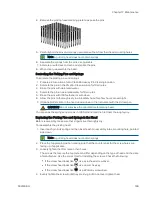
Inspect the head for loose or bent pins.
Run a Pin Fire Test. See
.
The pins bend when inoculating in plate wells
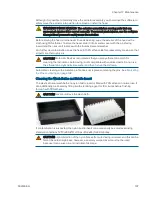
Make sure that the plate is aligned correctly towards both arrows in the plate holder.
Make sure that the correct plate, head, and spacer blocks are installed.
18
Summary of Contents for QPix 420
Page 1: ...5031496 G August 2022 QPix 420 Colony Picking System User Guide...
Page 6: ...QPix 420 Colony Picking System User Guide 6 5031496 G...
Page 20: ...QPix 420 Colony Picking System User Guide 20 5031496 G...
Page 30: ...QPix 420 Colony Picking System User Guide 30 5031496 G...
Page 38: ...QPix 420 Colony Picking System User Guide 38 5031496 G...
Page 62: ...QPix 420 Colony Picking System User Guide 62 5031496 G...
Page 138: ...QPix 420 Colony Picking System User Guide 138 5031496 G...
Page 156: ...QPix 420 Colony Picking System User Guide 156 5031496 G...
Page 186: ...QPix 420 Colony Picking System User Guide 186 5031496 G...
Page 194: ...QPix 420 Colony Picking System User Guide 194 5031496 G...
Page 210: ...QPix 420 Colony Picking System User Guide 210 5031496 G...
Page 214: ...QPix 420 Colony Picking System User Guide 214 5031496 G...
Page 218: ...QPix 420 Colony Picking System User Guide 218 5031496 G...
Page 222: ...QPix 420 Colony Picking System User Guide 222 5031496 G...
Page 224: ...QPix 420 Colony Picking System User Guide 224 5031496 G...

