background image

Hand Crimp Tool For 3.18mm (.125”) Lighting Terminals 

Doc No: ATS-638252600 

Release Date: 03-21-12 

UNCONTROLLED COPY


Page 3 of 7 

Revision: A 

Revision Date: 03-21-12 

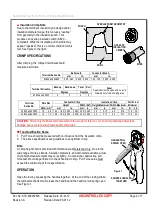
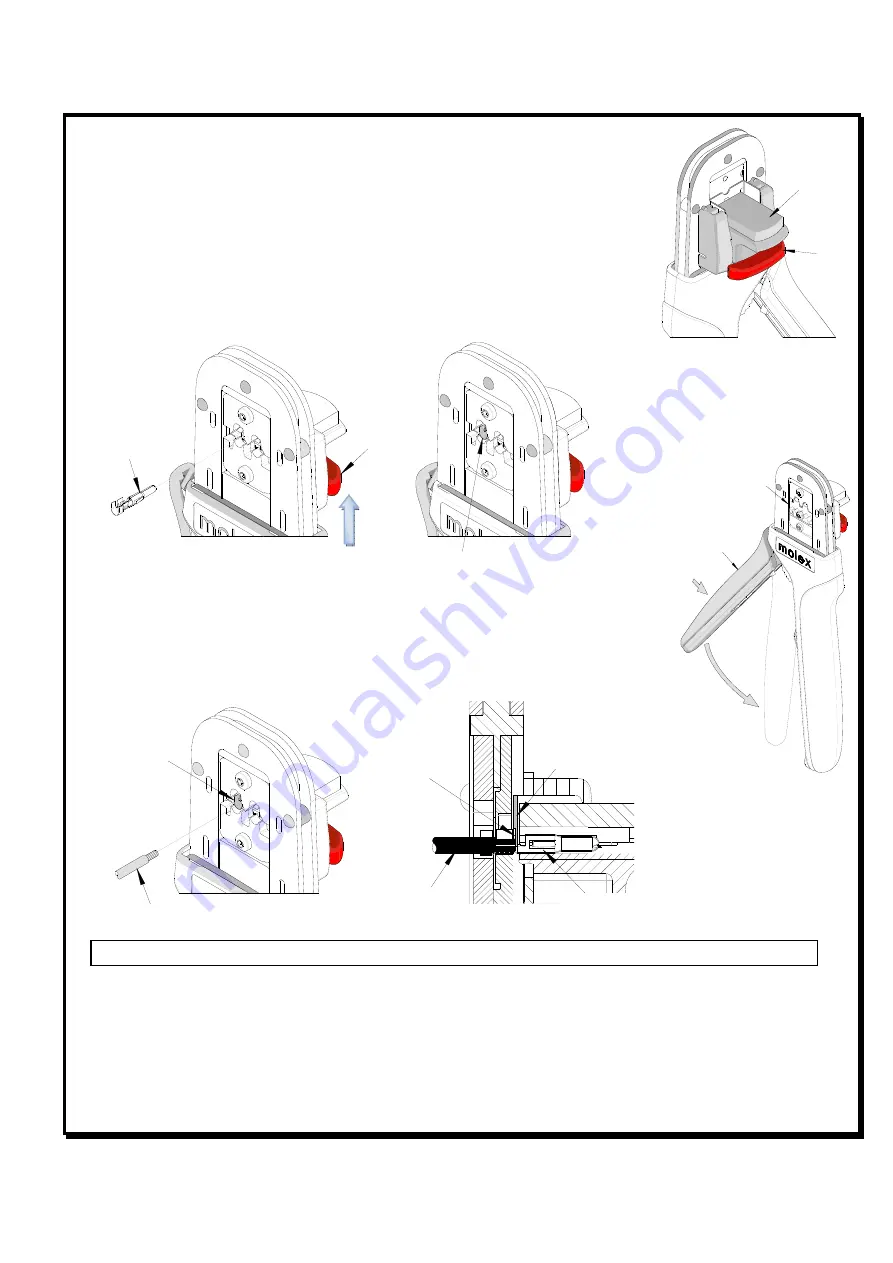
PRE-STRIPPED WIRE 

TERMINAL 

Figure 5 

TERMINAL 

WIRE AGAINST 

THE WIRE 

STOP 

WIRE 

WIRE STOP IS 

PART OF 

THE LOCATOR 


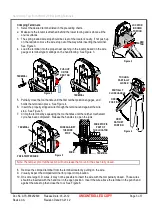
Crimping Terminals


1.


Select the desired terminal listed in the preceding charts. 

2.


Make sure the locator is attached behind the lower tooling and is above all the 
anvils surfaces. 

3.


The spring loaded wire stop should be clear of the locator’s cavity, if not push up 
on the red tab to move the wire stop out of the way while inserting the terminal.  
See Figure 3. 

4.


Load the terminal into the proper nest opening in the locator based on the wire 
gauge or terminal type markings on the hand tooling.  See Figure 3.  


5.


Partially close the tool handle until the first ratchet position engages, and 
holds the terminal in place.  See Figure 4. 

6.


Insert the properly stripped wire through the terminal and against the wire 
stop.  See Figure 5. 

7.


Crimp the terminal by squeezing the tool handles until the ratchet mechanism 
cycle has been completed.  Release the handles to open the jaws. 


Note: The tamper proof ratchet action will not release the tool until it has been fully closed. 

 
8.


Remove the crimped terminal from the terminal locator by pulling on the wire. 

9.


Visually inspect the crimped terminal for proper crimp location. 

10.


On some large O.D. wires, it may not be possible to insert the wire with the tool partially closed.  Those wires 
should be inserted with the hand tool in the open position.  Insert the wire above the terminal in the punch and 
against the wire stop then close the tool.  See Figure 6. 

LOCATOR 

IN DOWN 
POSTION 

RED 
TAB 

Figure 2 

TERMINAL 

Figure 3 

TERMINAL 

PUSH UP 

ON THE 

RED TAB 

PARTIALLY 

CLOSE HANDLE 

TOOLING 

PARTIALLY 

CLOSED 

Figure 4 

FIRST 

RATCHET 
POSITION 

OPEN 

POSITION 

Summary of Contents for 63825-2600

Page 1: ... wire stop holds terminals in the proper crimping position Right or left handed operation IPC WHMA A 620 Class 2 compliant as indicated RoHS compliant however RoHS compliant is not required For 12AWG crimps use hand tool 63825 2700 SCOPE Products 3 18mm 125 Lighting Terminal for 16AWG and 18AWG wires Terminal Series No Terminal Order No Reel Form only Conductor Size Insulation Outside Diameter 1 S...

Page 2: ...WG mm2 mm In mm In mm In mm In N Lb 42824 and 42825 18 0 8 1 52 1 60 0 060 0 063 2 30 0 090 3 9 0 15 4 0 0 16 116 26 42824 and 42825 16 1 3 1 58 1 66 0 062 0 065 2 30 0 090 4 2 0 17 4 2 0 17 178 40 CAUTION Crimp only the Molex terminals listed in the scope for this tool Do not crimp hardened objects as damage can occur to the tool frame and or crimp dies Tool Qualification Notes 1 Pull Force shoul...

Page 3: ... first ratchet position engages and holds the terminal in place See Figure 4 6 Insert the properly stripped wire through the terminal and against the wire stop See Figure 5 7 Crimp the terminal by squeezing the tool handles until the ratchet mechanism cycle has been completed Release the handles to open the jaws Note The tamper proof ratchet action will not release the tool until it has been fully...

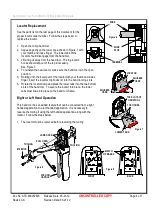
Page 4: ... tool The top locator hooks should slip out of the top slots easily See Figure 7 4 To reinstall the new locator make sure the hand tool is in the open position 5 Holding onto the lower part of the locator with your thumb and index finger insert the locators top hooks 2 into the hand tool top slots 6 Rotate the locator down and press the lower tabs into the two bottom slots of the hand tool To secu...

Page 5: ...ty machine oil Do not oil excessively The tool was engineered for durability but like any other equipment it needs cleaning and lubrication for a maximum service life of trouble free crimping Light oil such as 30 weight automotive oil used at the oil points every 5 000 crimps or 3 months will significantly enhance the tool life 4 Wipe excess oil from hand tool particularly from crimping area Oil t...

Page 6: ...is tool is designed for hand use only Any clamping fixturing or use of handle extensions voids this warranty CAUTION Molex crimp specifications are valid only when used with Molex terminals and tooling CAUTIONS 1 Manually powered hand tools are intended for low volume or field repair This tool is NOT intended for production use Repetitive use of this tool should be avoided 2 Insulated rubber handl...

Page 7: ...OLLED COPY Page 7 of 7 Revision A Revision Date 03 21 12 RATCHET RELEASE LEVER 2 Figure 13 1 3 PARTS LIST Item Number Order Number Description Quantity REF 63825 2600 Hand Crimp Tool Figure 13 1 63825 2675 Locator Assembly 1 2 63810 0104 Spring Return 1 3 63810 0105 Spring Ratchet 1 http www molex com ...

Reviews: