5.6 Manual range selection
The measuring range for a measuring
function is always automatically selected
in the optimum way if “AUTO” is displayed
(functions ~V, V,
Ω
,
, µA, mA, A) and
in case of frequency measurement. If
“AUTO” is displayed, the range selection
can also be made manually, except for
capacitance measurements.
1) To retain a measuring range that has
automatically been selected, press
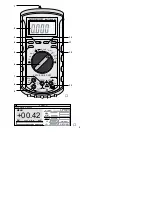
the button “RANGE” (10). The display
“AUTO” is extinguished.
2) With each repeated actuation of the
button “RANGE”, the next-higher
measuring range is selected. Thus,
the resolution of the measured value
is decreased but constant automatic
switching is prevented if the measured
value varies between two ranges. If
the highest possible measuring range
is obtained by further actuation, the
meter switches back to the lowest
measuring range.
3) To activate the automatic range se-
lection, keep the button “RANGE”
pressed for approx. 2 seconds until
“AUTO” is displayed or select another
measuring function via the range
switch (6).
5.7 Relative value measurement
Starting from a certain measured value,
occurring deviations can be displayed.
With the exception of frequency and
pulse duty factor measurements, the
function can be activated in all measur-
ing ranges.
1) Carry out the measurement in the
corresponding measuring range. If
the desired reference value is dis-
played, actuate the button “REL
∆
”
(3). “000” and “
∆
” is displayed.
Note: The function cannot be
switched on if “OL” is displayed.
2) If the measured value changes, the
deviations from the reference value
are now displayed. As the automatic
range selection is deactivated
(“AUTO” is extinguished), “OL” is dis-
played if a range is exceeded.
3) To deactivate the relative value
measurement, actuate the button
“REL
∆
” again and reactivate the
automatic range selection with the
button “RANGE” (10) (keep button
“RANGE” pressed for approx. 2 sec-
onds), if required. When switching to
another measuring function, the rel-
ative value measurement is switched
off as well.
5.8 “Freezing” a measured value
It is possible to “freeze” a measured
value in the display, e. g. to obtain a bet-
ter readability of the value after the ob-
ject to be measured has been separated
from the meter. This function can be
activated in all measuring ranges.
1) For “freezing” the measured value,
shortly press the button “
HOLD”
(11). The symbol
is displayed.
2) Actuate the button “
HOLD” once
again shortly to switch off this func-
tion. The symbol
is extinguished.
3) If another measuring range is select-
ed with the range switch (6), the func-
tion is deactivated as well.
5.9 Activating the display illumina-
tion
To obtain a better readability of the dis-
play in a dark environment, keep the but-
ton “
HOLD” (11) pressed for approx.
2 seconds until the display illumination is
switched on. At the same time, the
“freezing” function for the measured
value is activated. For deactivating,
shortly actuate the button once again.
The display illumination will auto-
matically be extinguished after approx.
30 seconds to save the battery.
H
H
H
H
H
GB
17

