45
English
4) Click the field “Password” highlighted by a blue frame.
A window with a keyboard will appear. Use the keyboard
to enter the password and then click “Unlock”.
5) When a pattern has been defined for unlocking, keep the
left mouse button pressed and draw the pattern.
000000
(000000)
000000
(000000)
admin
admin
Unlock
Device ID
Unlock
Device ID
Draw the unlock pattern first.
Password
Password
Draw the unlock pattern first.
Fig. 7-4
Window with an example of an unlock pattern
Note:
When the recorder is locked and a menu or function is called up,
the window for unlocking the recorder will immediately be shown. Thus,
it is not absolutely necessary to use the “Unlock” option of the start menu
to unlock the recorder.
7.2 User change
When multiple user accounts have been created for the re-
corder, each new user must log in with their password to be
able to operate the recorder with the user rights they have
been assigned:
1) Show the toolbar (Fig. 7-1): Press the right mouse button
or move the mouse pointer to the centre of the lower edge
of the screen.
2) Click the first symbol to the left
HD
SD
i
15/09/2019 14:27:38
to call up the start
3) In the first line, click the current user name (“admin”, for
example): The window “Switch User” will appear:
000000
(000000)
admin
Switch User
Device ID
User
Password
Cancel
Switch User
Show Password
Fig. 7-5
Window to switch the user
4) In the line “User”, click the arrow
∨
. A pop-up menu will
appear; select the user in the pop-up menu.
5) Click the field “Password” highlighted by a blue frame. A
window with a keyboard will appear. Click the keyboard
to enter the password. To delete characters, click
. To
confirm the password entered, click
; the window with
the keyboard will be closed.
6) Finally, click “Switch User”. If the password for the user
selected has not been enabled, it will be possible to click
“Switch User” without having to enter the corresponding
password.
7.3 Live surveillance
When the recorder is switched on, the camera images will be
shown in the live view; the date and the time will always be
inserted at the bottom of the image.
CH1
CH2
CH3
CH4
Camera
No Camera
No Camera
No Camera
09/20/2019 20:36:57
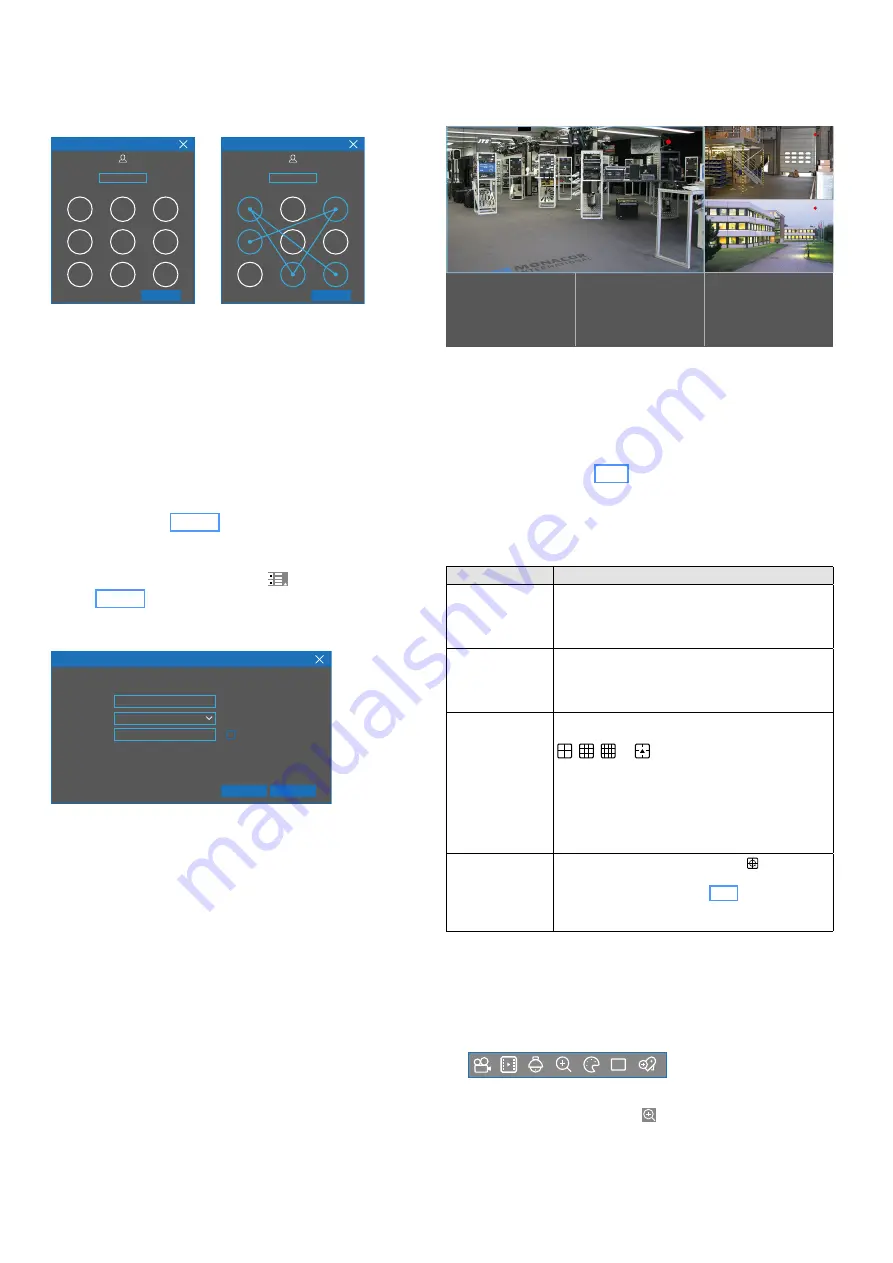
Fig. 7-6
Live surveillance
Depending on the model and the settings, a different number
of fields for the camera images is available
Each camera image is designated by the number of the cam-
era channel (CH..). In addition, a camera name (e. g. “Cam-
era”, “Entrance”, “Checkout Area”) and the date / time can
be shown (see chapter 6.6.2).
It is possible to enlarge individual live images. Changes to
the display of the live images will
not
have any influence on
the current recording (indicated by the symbol
•
in the camera
image). The following options are available:
Display
Action
Individual image
in full-screen
mode
With the left mouse button:
Double-click the image desired.
On the remote control:
Press the corresponding
numeric button(s) 1 … 9, 0.
Return to the
display of all
camera images
With the left mouse button:
Double-click the full-screen display.
On the remote control:
Press the button ALL (repeatedly).
Different numbers
of camera images
With the mouse:
Press the right mouse button to
show the toolbar. Then select the view:
,
,
…
Depending on the recorder model, different sym-
bols are available.
Click the layout symbol repeatedly to switch to
additional camera channels, if required.
On the remote control:
Press the button ALL
(repeatedly).
Sequence of all
full-screen images
Use the mouse
to click the symbol in the tool-
bar. (SEQ Dwell Time = 5 s; to make changes to this
setting, see table in chapter 6.6.1, section “Out-
put Configuration”). To terminate the sequence,
click the image with the right mouse button.
7.3.1 Magnifying an image section
1) Using the left mouse button, click the live image in which
you want to magnify an image section. (In the single-image
mode, simply press the left mouse button.) The quick-se-
lection bar will appear:
HD
Fig. 7-7
Quick-selection bar for each camera image
2) Click the magnifier symbol
HD
. Use the scroll wheel to set
the magnification factor.
3) As a monitoring feature, a thumbnail view of the complete
live image is shown in the lower right of the screen. The
square in the image will show the section magnified; to


