20
EnglishEnglish
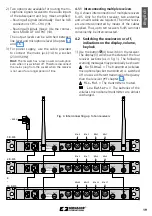
2) The display can show the following informa-
tion:
Indica-
tion
Meaning
left side of the display
Key lock activated
Operating voltage for antenna ampli-
fiers connected is switched on
AT
The output MIXED AF OUTPUT (18)
is set to microphone level
separately for each of the four receiver sections
3
Number of the receiver section (1 – 4)
AT
The signal output CH (19) is set to
microphone level
A
Indication which of the two anten-
nas (A or B) receives the radio signal
of higher strength; when no signal is
received, × will be shown
ID
Identification number for the
REMOSET function
G
Group number (1 … 6)
CH
Channel number (1 … 22)
MHz
Transmission frequency
(506 000 … 542 000 MHz)
Status of the batteries of the trans-
mitter
– when no signal is received or when
the transmitter is muted, the mes-
sage
MUTE
will be shown instead
of the battery symbol
– as long as the battery status has
not been transferred yet, a ques-
tion mark will be shown
The output level adjusted by means of
the buttons
:
Mute
,
-31
…
0
Fig. 5 Display information
3) Use the buttons
(13) to separately adjust
the volume of the four microphone channels
These volumes will also be used when the
signals are routed to the output MIXED AF
OUTPUT (18)
4) The receiver is provided with a key lock to pre-
vent inadvertent switch-off or operation: Keep
the button
(9) pressed for 1 second until
the symbol appears on the left side of the
display To deactivate the key lock, keep the
button pressed for 2 seconds until the symbol
disappears
5) To switch off the receiver, keep the button
pressed for 2 seconds until
Power OFF
is
shown on the display
4.3 Settings via the menu
1) To call up the menu (fig 2, page 17), keep the
button SETUP (6) pressed for 2 seconds until
the menu appears on the display (3)
2) Turn the knob PUSH
/ CONTROL (7) to select
the desired menu item Then press the knob
to call up the menu item
3) Turn the knob to make the setting or, when a
submenu appears, turn the knob to select a
submenu item and press the knob to call it up
4) If multiple setup functions are available for a
menu item (e g group number and channel
number), press the knob to go from one func-
tion to the next one
5) To save a setting, press the button SETUP The
display briefly indicates
Saving
before the
previous menu reappears
To exit a menu item without any changes,
press the button EXIT (8)
6) To exit the menu, press the button EXIT or
select the menu item
7.Exit
and then press
the knob PUSH
/ CONTROL
All setting options via the menu can be found in
the following chapters
4.4 Basic settings and reset
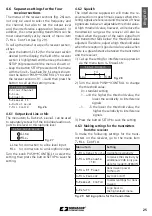
1) If it is difficult to read the display, change
the
contrast and the brightness.
Call up the following menu via
1.System
Options
1.Display Options
:
Screen Options
Contrast:
5
Brightness: 5
Fig. 6
Turn the knob PUSH
/ CONTROL to set the
contrast Press the knob to go to
Bright-
ness
and then set the brightness Press the
button SETUP to save the setting The previous
menu will reappear
To deactivate the menu, press the button
EXIT twice or to change another setting, turn
the knob PUSH
/ CONTROL to select the cor-
responding menu item and press the knob
to call it up


