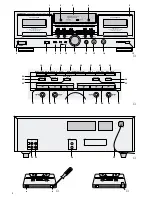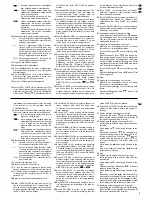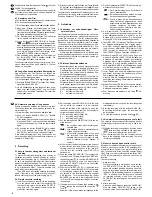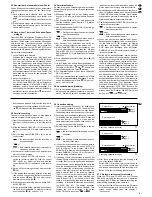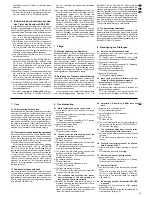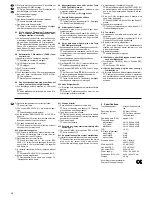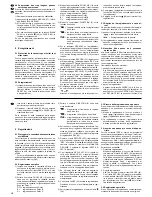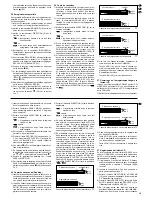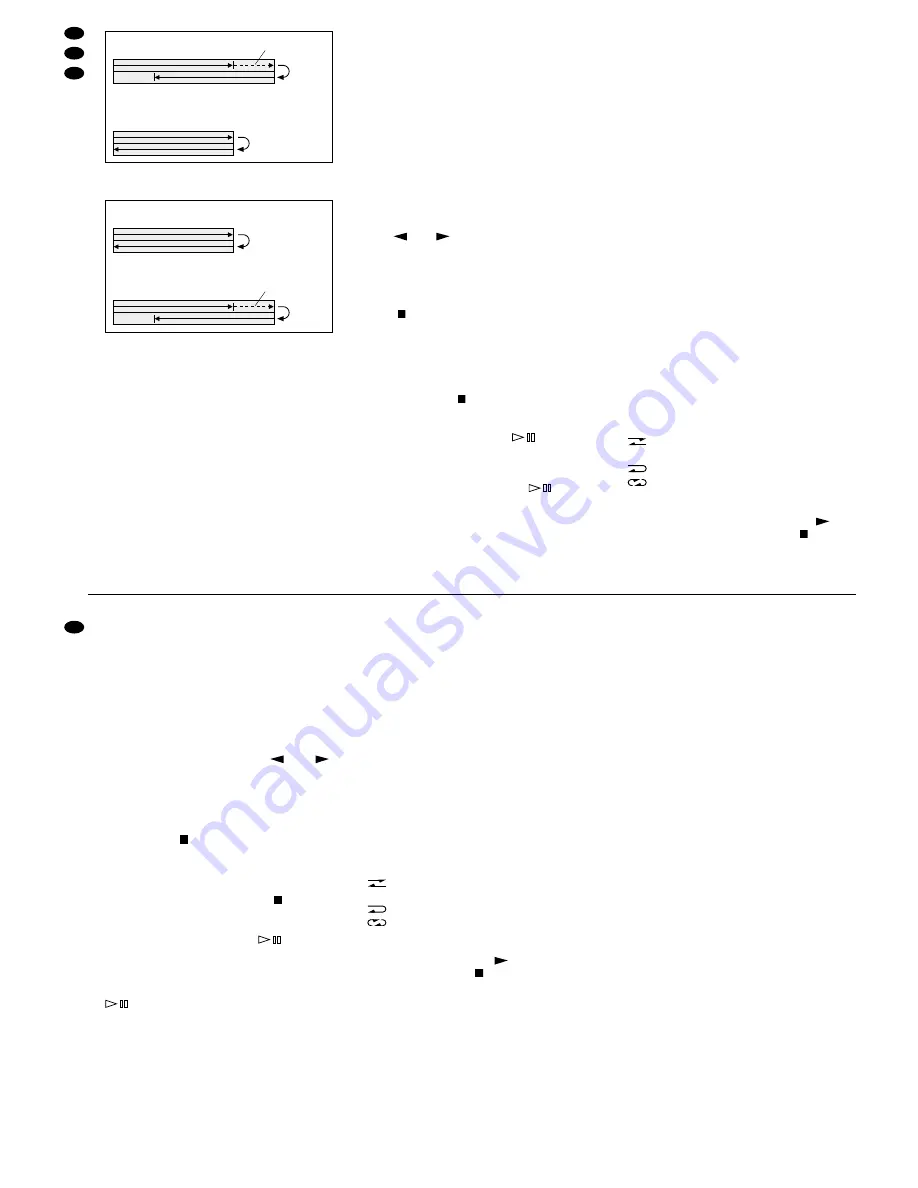
Aufnahmekassette ist kürzer
➅
Aufnahmekassette ist länger
➆
6) Nach diesen Vorbereitungen das Kopieren mit
einer der Tasten DUBBING starten:
Taste NOR (19) für das Kopieren mit normaler
Geschwindigkeit, zu empfehlen bei hochwertigen
Aufnahmen und bei Kassetten mit hohem Aufnah-
mepegel.
Taste HIGH (20) für das Kopieren mit doppelter
Geschwindigkeit.
5.7 CD-Spieler startet Kassettenaufnahme
Beim Betrieb des zum Recorder dazugehörigen
CD-Spielers CD-2000 und des HiFi-Receivers DSR-
2000 kann durch Starten der CD-Wiedergabe gleich-
zeitig die Kassettenaufnahme automatisch mit ge-
startet werden.
1) Der Recorder, der HiFi-Receiver und der CD-
Spieler müssen miteinander durch die beiliegen-
den Steuerkabel verbunden sein (siehe auch Ka-
pitel 3 „Gerät anschließen“).
2) Kassette(n) einlegen. Sind zwei Kassetten einge-
legt, wird immer mit dem Laufwerk 2 zuerst ge-
startet.
3) Die Schalter DIRECTION (9) und DOLBY NR (10)
in die gewünschte Position schieben (siehe Kapi-
tel 5.2 „Einfache Kassettenaufnahme“).
4) Die Taste RECORD (25) drücken, die CD anspie-
len und den Aufnahmepegel mit dem Regler REC
LEVEL (11) einstellen sowie die Balance für die
Aufnahme mit dem Regler BALANCE (12).
5) Ist im Display eine andere Bandlaufrichtung als
gewünscht angezeigt, die Laufrichtung mit der
Taste bzw. ändern.
Achtung: Wird die Taste gedrückt, die mit der an-
gezeigten Laufrichtung übereinstimmt, startet so-
fort die Aufnahme!
6) Den CD-Spieler stoppen.
7) Am Recorder die Aufnahmebereitschaft mit der
Taste
(29) ausschalten und die Taste RE-
CORD (25) erneut drücken. Dieser Bedienschritt
ist besonders wichtig. Wird er nicht durchgeführt,
kann die Aufnahme nicht mit dem CD-Spieler zu-
sammen starten!
Es ist auch darauf zu achten, daß am HiFi-Recei-
ver der CD-Spieler angewählt ist. Wenn nicht, am
Recorder die Taste
(29) drücken, am Receiver
den CD-Spieler anwählen und dann die Taste RE-
CORD (25) betätigen.
8) Am CD-Spieler mit der Taste
oder durch
Eintippen der gewünschten Titelnummer die Wie-
dergabe starten. Gleichzeitig schaltet der Recor-
der auf Aufnahme.
9) Die Aufnahme kann mit der Taste
am CD-
Spieler unterbrochen werden (der Recorder
schaltet nach einigen Sekunden auf Aufnahme-
bereitschaft) und auch wieder fortgeführt werden.
Die Aufnahme wird am Ende der CD automatisch
beendet oder durch Drücken der Taste STOP am
CD-Spieler.
5.8 Automatische CD-Aufnahme auf Kassette
(CARS)
Durch CARS (Computer Aided CD Recording
System = computerunterstütztes CD-Aufnahme-
system) kann eine CD-Aufnahme mit automatischer
Pegeleinstellung auf Kassette erfolgen. Dabei wer-
den alle Titel der CD im Schnellauf angespielt und
der optimale Aufnahmepegel eingestellt. Am Kasset-
tenanfang wird eine 8-Sekunden-Pause eingefügt.
Die CD startet dann erneut von Anfang an, und
gleichzeitig beginnt die Aufnahme - alles automa-
tisch! Diese Funktion ist nur in Verbindung mit dem
zum Recorder dazugehörigen MONACOR CD-Spie-
ler CD-2000 und dem MONACOR HiFi-Receiver
DSR-2000 möglich.
1) Der Recorder, der HiFi-Receiver und der CD-
Spieler müssen miteinander durch die beiliegen-
den Steuerkabel verbunden sein (siehe auch Ka-
pitel 3 „Gerät anschließen“).
2) Mit der Taste EDIT auf der Fernbedienung des
CD-Spielers die Editierfunktion zum Auswählen
von Titeln und der Länge der Aufnahmekassette
aufrufen (siehe Bedienungsanleitung des CD-
Spielers).
3) Kassette mit der leeren Spule nach rechts einle-
gen und eventuell an den Bandanfang zurückspu-
len.
4) Den DOLBY NR (10) in die gewünschte Position
schieben (siehe Kapitel 5.2 „Einfache Kassetten-
aufnahme“).
5) Den Schiebeschalter DIRECTION (9) auf die ge-
wünschte Funktion stellen:
= Der Recorder stoppt nach der Aufnahme
einer Kassettenseite.
oder
= Beide Kassettenseiten werden automa-
tisch nacheinander aufgenommen.
6) Im Display muß die Bandlaufrichtung nach rechts
angezeigt sein. Wenn nicht, die Taste
(31)
drücken und danach sofort die Taste
(29).
7) Die Taste CARS (21) betätigen. Der automatische
Aufnahmevorgang beginnt. Die Pegeleinstellung
Wiedergabe Laufwerk 1
Aufnahme Laufwerk 2
Vorspulen
Seite 1
Seite 2
Seite 1
Seite 2
Stop
Aufnahme Laufwerk 2
Wiedergabe Laufwerk 1
Vorspulen
Seite 1
Seite 2
Seite 1
Seite 2
Stop
2) Insert cassette(s). If two cassettes are inserted,
always at first deck 2 is started.
3) Slide the switch DIRECTION (9) and DOLBY NR
(10) to the desired position (see chapter 5.2 "Sim-
ple cassette recording").
4) Push the button RECORD (25), shortly start to
play the CD, and adjust the recording level with
the control REC LEVEL (11) as well as the balance
for the recording with the control BALANCE (12).
5) If another tape direction than desired is displayed,
change the direction with the button
resp.
.
Attention: If the button is pushed which corre-
sponds to the displayed direction, the recording
starts immediately!
6) Stop the CD player.
7) Switch off the recording stand-by at the recorder
with the button
(29) and push the button RE-
CORD (25) again. This operation step is of spe-
cial importance. If it is not carried out, the record-
ing cannot start together with the CD player!
Also watch that the CD player is selected at the
HiFi receiver. If not, push the button
(29) at the
recorder, select the CD player at the receiver and
then push the button RECORD (25).
8) Start the replay with the button
at the CD
player or by inserting the desired title number. At
the same time the recorder is switched to record-
ing mode.
9) The recording can be interrupted with the button
at the CD player (after some seconds the
recorder is switched to recording stand-by) and
also be continued again. The recording is auto-
matically stopped at the end of the CD or by push-
ing the button STOP at the CD player.
5.8 Automatic CD recording on cassette
(CARS)
By CARS (Computer Aided CD Recording System) a
CD can be recorded with automatic level adjustment
on a cassette. Hereby all titles of the CD are shortly
monitored with advance/reverse run. and the opti-
mum recording level is adjusted. At the cassette be-
ginning a 8-second pause is inserted. The CD starts
again from the beginning, and at the same time the
recording starts - a fully automatic function! This
function is only possible in connection with the
MONACOR CD player CD-2000 and the MONACOR
HiFi receiver DSR-2000 matching the recorder.
1) The recorder, the HiFi receiver, and the CD player
must be connected with the enclosed control ca-
bles (also see chapter 3 "Connection").
2) With the button EDIT on the remote control of the
CD player call up the edit function to select titles
and the length of the recording cassette (see in-
struction manual of the CD player).
3) Insert cassette with the empty bobbin to the right
and rewind back to the tape beginning, if neces-
sary.
4) Slide the DOLBY NR (10) to the desired position
(see chapter 5.2 "Simple cassette recording").
5) Set the sliding switch DIRECTION (9) to the de-
sired function:
= The recorder stops after recording of one
cassette side
or
= Both cassette sides are automatically re-
corded one after the other.
6) The display must show the tape direction to the
right. If not, push the button
(31) and after that
immediately the button
(29).
7) Push the button CARS (21). The automatic
recording starts. Thereby the level adjustment
can take up to 3
1
/
2
minutes according to the CD.
8) After the recording the CD player and the re-
corder are switched to Stop. If it is desired to stop
before, push the button STOP at the CD player.
6
Operation with a Switch Clock or via
the Timer of the Receiver DSR-2000
In connection with a switch clock or with the HiFi re-
ceiver DSR-2000 matching the recorder the replay or
a recording can automatically be started at a time
selected before.
1) Connect the mains plug of the recorder in the
switch clock resp. in the power supply jack at the
rear panel of the receiver DSR-2000.
2) In case of an operation with a switch clock also all
other units (e.g. amplifier, receiver) must get their
power supply via the switch clock. The switch
clock must at first be set to ON for the pre-adjust-
ment of the HiFi system (independent of the ad-
justed switching time).
3) Switch on all necessary units with their power
switches.
4) If at the HiFi system also the MONACOR CD
player CD-2000 is connected, no CD must be in
the CD player. Otherwise with switching on the
timer the replay starts from the CD player resp.
the CD is recorded on the cassette.
5) Insert cassette(s). If two cassettes are inserted, at
first always deck 2 is started. The empty bobbin of
the cassette must be at the right side because it is
always started with direction to the right.
6) Slide the switch DIRECTION (9) and DOLBY NR
(10) to the desired position (see chapter 4.3
"Playing a cassette" resp. 5.2 "Simple cassette
recording").
7) For an automatic replay slide the switch TIMER
(8) in position PLAY. Adjust the desired volume at
the receiver.
8) For an automatic recording adjust the station at
the tuner/receiver from which it is to be recorded.
Push the button RECORD (25) at the recorder.
Adjust with the control REC LEVEL (11) the level
and with the control BALANCE (12) the balance
of the recording. Slide the switch TIMER (8) in po-
sition REC. Then the volume of the amplifier can
be set to minimum.
9) Select the switching time at the receiver DSR-
2000 resp. at the switch clock. Switch off the re-
ceiver resp. set the switch clock to automatic
operation. As soon as the selected time is rea-
ched, the HiFi system is switched on and the re-
play resp. recording is started.
10
GB
D
A
CH


