background image

All operating elements and connections described
can be found on page 2.

1

Operating Elements and Connections

1.1 Monitor (fig. 1 or 2)

IR sensor for the remote control signals

B and - for settings in the OSD menu

Button 

or 

to switch on the monitor or to go to

stand-by mode

Button MENU to activate the menu items of the

OSD menu

Button V1/ V2 to switch between the video sources

Power supply jack to connect the power supply unit

provided or the 12 V electrical system of a vehicle
via the cigarette lighter cable provided

Jack AV IN to connect two video sources via the

distribution cable provided
Note: Connect the camera of a car rear view sys-
tem to the RCA plug “AV2”.

For use in a car rear view system.

Input BACK for connection to the cable of the
reversing light via the single-core cable provided
(to switch to the camera image when putting the car
into reverse).

1.2 Remote control (fig. 3)

Button

: corresponding to item (3) on the monitor

10 Keypad to adjust the image:

buttons

for brightness

buttons COL for colour intensity
buttons

for contrast

Press the corresponding arrow button to increase
(

L

) or decrease (

M

) the value.

11 Button V1\V2: corresponding to item (5) on the

monitor

12 Button P.P to switch among four image presets

13 Button SYS for the mirror image mode:

2

Safety Notes

The units (monitor and plug-in power supply unit) cor-
respond to all relevant directives of the EU and are
therefore marked with

.

Please observe the following items in any case:

G

The units are suitable for indoor use only. Protect
them against dripping water and splash water, high

air humidity and heat (admissible ambient tempera-
ture range 0 – 40 °C).

G

Do not operate the monitor or immediately discon-
nect the power supply unit from the socket 

1. if the units are visibly damaged, 

2. if a defect might have occurred after a unit was

dropped or suffered a similar accident,

3. if malfunctions occur.

In any case the units must be repaired by skilled per-
sonnel.

G

For cleaning only use a dry, soft cloth; never use
water or chemicals.

G

No guarantee claims for the units and no liability for
any resulting personal damage or material damage
will be accepted if the units are used for other pur-
poses than originally intended, if they are not cor-
rectly connected or operated, or if they are not
repaired in an expert way.

3

Applications

This LCD colour monitor with TFT active matrix tech-
nology is suitable for universal applications, e. g. in
video surveillance systems. Due to its mirror image
mode, it is ideally suited for use in car rear view sys-
tems. It features two video inputs and offers a sharp
image of high contrast in the format 16 : 9 or 4 : 3. Set-
tings are made via touch-sensitive buttons on the front
side or via the IR remote control provided. The monitor
is supplied with a support, a plug-in power supply unit
and the connection cables required. 

4

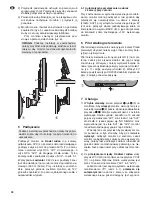
Setting Up / Installation

For setting up the monitor or for wall mounting, use the
support provided (fig. 4), consisting of a base and a
hinged bracket:

1) Release the mounting screw (b) on the bracket so

that it will be possible to slide the small metal plate
(c) into the guide rail (a) on the rear side of the mon-
itor. Slide the metal plate as far as desired into the
guide rail and fasten the mounting screw to clamp
the bracket to the guide rail. 

2) Screw the base to the bracket via its spring-loaded

recessed head screw (d). Fasten the screw in such
a way that a stable connection between the base
and the bracket is ensured.

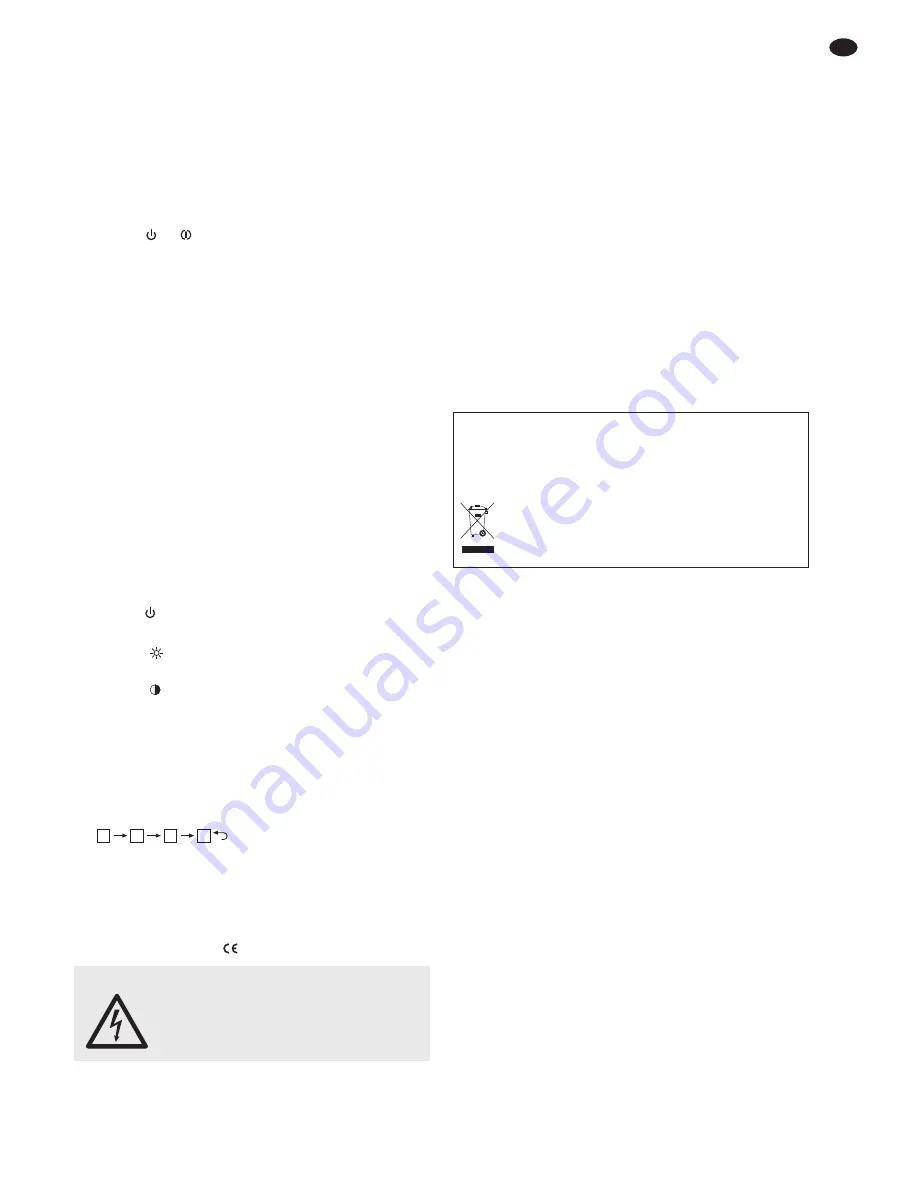
Used batteries of the remote control must not be
placed in the household waste; always take them to
a special waste disposal, e. g. collection container at
your retailer.

If the units are to be put out of operation
definitively, take them to a local recycling
plant for a disposal which will not be harmful
to the environment.

WARNING

The power supply unit uses dangerous
mains voltage. Leave servicing to
skilled personnel only. Inexpert han-
dling or modification of the unit may
result in electric shock.

R

R

R

R

7

GB

Summary of Contents for TVLCD-720COL

Page 1: ...STRUCTION MANUAL MODE D EMPLOI ISTRUZIONI PER L USO MANUAL DE INSTRUCCIONES INSTRUKCJA OBSŁUGI VEILIGHEIDSVOORSCHRIFTEN SIKKERHEDSOPLYSNINGER SÄKERHETSFÖRESKRIFTER TURVALLISUUDESTA TFT LCD FARBMONITOR TFT LCD COLOUR MONITOR TVLCD 920COL Bestellnummer 18 8310 ...

Page 2: ...2 9 6 7 8 1 2 10 11 12 13 6 7 8 1 2 3 4 5 TVLCD 920COL TVLCD 720COL 3 4 5 ...

Page 3: ...glädje med din nya MONACOR produkt Läs igenom säkerhetsföre skrifterna innan enheten tas i bruk för att undvika skador till följd av felaktig hantering Behåll instruktionerna för framtida bruk Säkerhetsföreskrifterna återfinns på sidan 23 Ennen kytkemistä Toivomme Sinulle paljon miellyttäviä hetkiä uuden MONACOR laitteen kanssa Ennen lait teen käyttöä pyydämme Sinua huolellisesti tutus tumaan turv...

Page 4: ...ten vorhan den sind 2 wenn nach einem Sturz oder Ähnlichem der Ver dacht auf einen Defekt besteht 3 wenn Funktionsstörungen auftreten Geben Sie die Geräte in jedem Fall zur Reparatur in eine Fachwerkstatt G Verwenden Sie für die Reinigung nur ein trockenes weiches Tuch niemals Wasser oder Chemikalien G Werden die Geräte zweckentfremdet nicht richtig angeschlossen falsch bedient oder nicht fachge r...

Page 5: ...heinwerfer verbinden 6 Fernbedienung Die Fernbedienung wird mit Batterie geliefert Vor der 1 Inbetriebnahme die Folie am Batteriehalter auf der Rückseite herausziehen Bei Betätigen der Fernbedienung diese immer auf den IR Sensor 1 des Monitors richten Sollte sie nicht mehr funktionieren oder die Reichweite nachlassen muss die Batterie ersetzt werden Die Lasche des Bat teriehalters nach rechts drüc...

Page 6: ...am Monitor drücken Das Bildschirmmenü besteht aus 9 Menüpunkten Mit jedem Drücken auf die Schaltfläche MENU wird der nächste Menüpunkt gewählt Die Einstellungen eines Menüpunkts können mit den Schaltflächen und 2 geändert werden 10 Sekunden nach dem letzten Druck auf eine Schaltfläche blendet sich das Menü aus Reihenfolge der Menüpunkte 1 BRIGHT Helligkeit 2 CONTRAST Kontrast 3 COLOR Farbintensitä...

Page 7: ...occur In any case the units must be repaired by skilled per sonnel G For cleaning only use a dry soft cloth never use water or chemicals G No guarantee claims for the units and no liability for any resulting personal damage or material damage will be accepted if the units are used for other pur poses than originally intended if they are not cor rectly connected or operated or if they are not repai...

Page 8: ...ial operation remove the foil at the battery support on the rear side When using the remote control always direct it towards the IR sensor 1 of the monitor If it fails to function or if its range decreases replace the battery Push the lug of the battery support to the right arrow 1 in fig 7 and remove the support arrow 2 Insert a 3 V button cell of the type CR 2025 with the positive pole upwards i...

Page 9: ...monitor The OSD menu consists of 9 menu items Each time you press the button MENU the next menu item will be selected To change the settings of a menu item press the buttons and 2 The menu will disappear 10 seconds after the last button was pressed Order of menu items 1 BRIGHT 2 CONTRAST 3 COLOR To change the values of the current image set tings use the first three menu items increase the value w...

Page 10: ...nt sur les appareils 2 après une chute ou un cas similaire vous avez un doute sur lʼétat de lʼappareil 3 des dysfonctionnements apparaissent Dans tous les cas les dommages doivent être répa rés par un technicien spécialisé G Pour le nettoyage utilisez seulement un chiffon sec et doux en aucun cas de produits chimiques ou dʼeau G Nous déclinons toute responsabilité en cas de dom mages matériels ou ...

Page 11: ...ommande est livrée avec sa batterie Avant la première utilisation retirez la feuille de protection sur le support de batterie sur la face arrière Lorsque vous utilisez la télécommande dirigez la tou jours vers le capteur infrarouge 1 du moniteur Si elle ne fonctionne plus ou si la portée diminue il faut rem placer la batterie poussez vers la droite la languette première flèche sur le schéma 7 et r...

Page 12: ...sion sur la touche MENU vous sélectionnez le point suivant Vous pouvez modifier les réglages dʼun point du menu avec les touches et 2 Le menu sʼéteint 10 secondes après la dernière pression sur une touche Suite des points du menu 1 BRIGHT luminosité 2 CONTRAST contraste 3 COLOR intensité des couleurs Via les trois premiers points du menu on peut modifier les valeurs du réglage de lʼimage en cours ...

Page 13: ...li apparecchi presentano dei danni visibili 2 dopo una caduta o dopo eventi simili sussiste il sospetto di un difetto 3 gli apparecchi non funzionano correttamente Per la riparazione rivolgersi sempre ad unʼofficina competente G Per la pulizia usare solo un panno morbido asciutto non impiegare in nessun caso prodotti chimici o acqua G Nel caso dʼuso improprio di collegamenti sbagliati dʼimpiego sc...

Page 14: ...arcia 6 Telecomando Il telecomando viene consegnato con la batteria Prima della prima messa in funzione sfilare la pellicola sul porta batterie posto sul retro Azionando il telecomando orientarlo sempre verso il sensore IR 1 del monitor Se non dovesse più funzio nare o se la portata dovesse ridursi occorre sostituire la batteria spingere la linguetta del porta batterie verso destra 1 freccia in fi...

Page 15: ... voci Con ogni pressione del pulsante MENU si sceglie la voce successiva Le imposta zioni di una voce del menù possono essere modifi cate con i pulsanti e 2 10 secondi dopo lʼul tima pressione di un pulsante il menù si spegne Successione delle voci del menù 1 BRIGHT luminosità 2 CONTRAST contrasto 3 COLOR intensità cromatica Con le prime tre voci del menù si possono modi ficare le impostazioni att...

Page 16: ... dañados 2 Alguno de los aparatos ha sufrido daños después de una caída o accidente similar 3 No funciona correctamente Sólo el personal cualificado puede reparar los apa ratos bajo cualquier circunstancia G Utilice sólo un paño suave y seco para la limpieza no utilice nunca ni agua ni productos químicos G No podrá reclamarse garantía o responsabilidad alguna por cualquier daño personal o material...

Page 17: ...o El control remoto se entrega con una batería Antes de la primera utilización extraiga la lámina del soporte de la batería en la parte posterior Cuando utilice el control remoto diríjalo siempre hacia el sensor IR 1 del monitor Si falla al funcionar o dis minuye el rango de funcionamiento cambie la batería Apriete el seguro del soporte de la batería hacia la derecha flecha 1 en la fig 7 y extraig...

Page 18: ...a vez que pulse el botón MENU el siguiente objeto de menú se seleccio nará Para cambiar los ajustes de un objeto de menú pulse los botones y 2 El menú des aparecerá 10 segundos después de haber pulsado el último botón Orden de los objetos del menú 1 BRIGHT brillo 2 CONTRAST contraste 3 COLOR Para cambiar los valores de los ajustes de ima gen actuales utilice los primeros tres objetos del menú Aume...

Page 19: ...zenie urządzenia 2 urządzenie mogło ulec uszkodzeniu na skutek upadku lub podobnego zdarzenia 3 stwierdzono nieprawidłowe działanie Naprawy urządzenia może dokonywać tylko prze szkolony personel G Do czyszczenia używać suchej miękkiej ściereczki nie używać wody ani środków chemicznych G Producent ani dostawca nie ponoszą odpowiedzial ności za wynikłe uszkodzenia sprzętu lub obrażenia użytkownika w...

Page 20: ...a tylnej stronie Pilot należy kierować w stronę czujnika IR 1 na moni torze Jeżeli pilot przestał działać lub jego zasięg znacznie się zmniejszył należy wymienić baterie na nowe przesunąć blokadę pokrywy w prawo strzałka 1 na rys 7 i zdjąć pokrywę strzałka 2 Włożyć 3 V baterię pastylkową typu CR 2025 dodatnim stykiem do góry i założyć ponownie pokrywę 7 Obsługa 1 W trybie stand by świeci przycisk ...

Page 21: ...rane ustawienie wcisnąć przyciski oraz 2 Menu zniknie 10 sekund po ostat nim użyciu przycisku Kolejność poleceń w menu 1 BRIGHT jasność 2 CONTRAST kontrast 3 COLOR intensywność kolorów Do zmiany wartości wybranego ustawienia służą przyciski oraz 4 SIGNAL źródło wideo Wcisnąć lub aby przełączyć się między źródłami wideo AV1 i AV2 5 LANGUAGE język Wcisnąć lub aby przełączyć się na język angielski EN...

Page 22: ...k recyclagebedrijf WAARSCHUWING De netspanning van de netadap ter is levensgevaarlijk Open het apparaat daarom nooit zelf U loopt het risico van een elektri sche schok TFT LCD farvemonitor Læs nedenstående sikkerhedsoplysninger opmærk somt igennem før ibrugtagning af enheden Bortset fra sikkerhedsoplysningerne henvises til den engelske tekst Vigtige sikkerhedsoplysninger Enhederne monitor og strøm...

Page 23: ...trisk chock 23 TFT LCD värimonitori Ole hyvä ja huomioi joka tapauksessa seuraavat tur vallisuuteen liittyvät seikat ennen laitteen käyttöä Lait teen toiminnasta saa lisätietoa tarvittaessa tämän lait teen muunkielisistä käyttöohjeista Turvallisuudesta Nämä laiteet monitori ja virtalähde täyttävät kaikki niihin kohdistuvat EU direktiivit ja niille on myönnetty hyväksyntä Huomioi seuraavat seikat G...

Page 24: ...MONACOR INTERNATIONAL GmbH Co KG Zum Falsch 36 28307 Bremen Germany Copyright by MONACOR INTERNATIONAL All rights reserved A 1161 99 02 05 2011 ...

Reviews: