ASSEMBLY PROCEDURE
NOTE:
Be sure to keep all finished edges and faces
towards the exposed side of the unit. Putting this item
together will be a lot easier if you first lay it on its back.
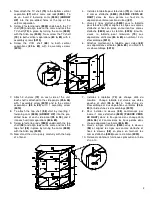
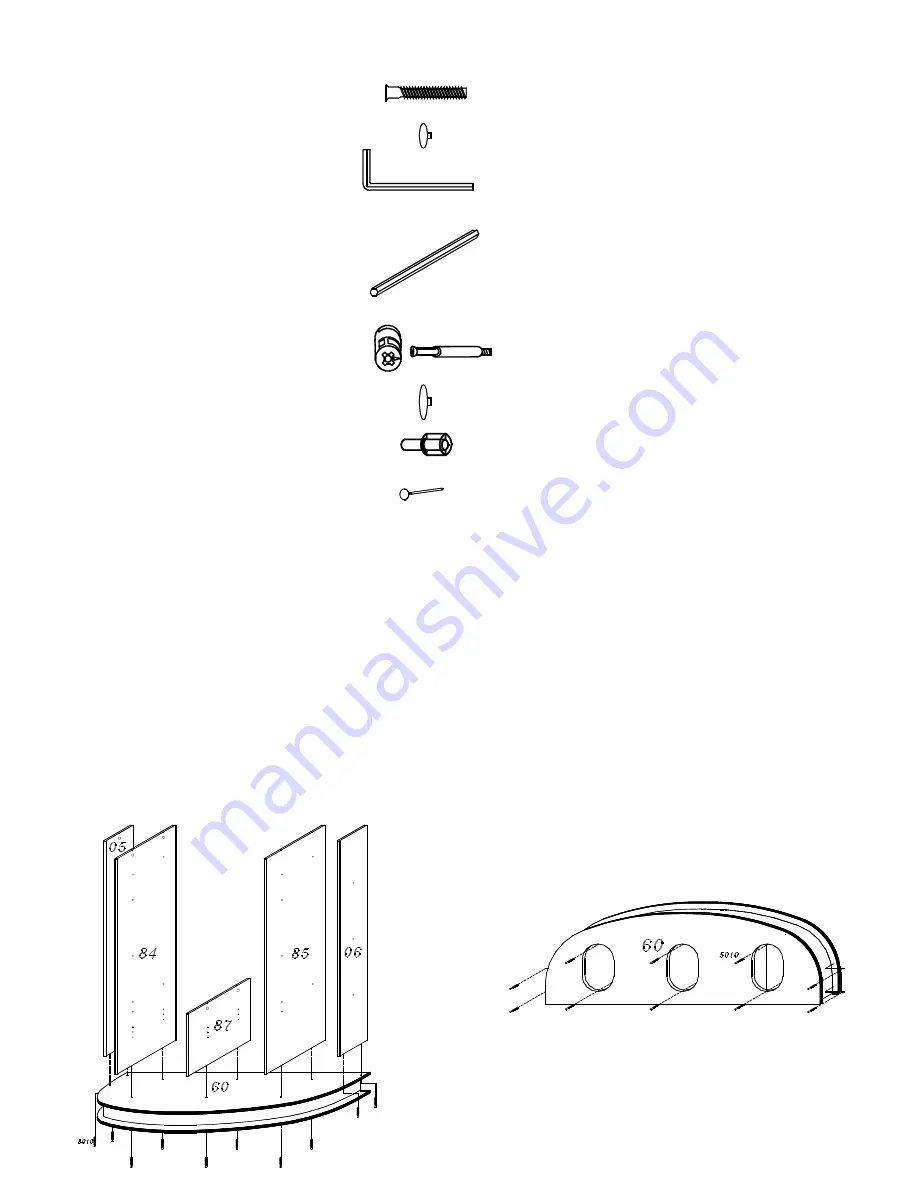
1- Screw both side panels
(05 & 06)
to the pre-
assembled base
(60)
from underneath using 4
assembly screws
(5010)
.
2- Now attach both vertical separations
(84 & 85)
to
the pre-assembled base
(60)
from underneath
using 4 assembly screws
(5010)
.
3- Now screw the bottom vertical separation
(87)
to
the pre-assembled base from underneath using 2
assembly screws
(5010)
.
ASSEMBLAGE
NOTE :
Au cours de l’assemblage, assurez-vous
d’exposer les côtés et les chants finis vers le côté
visible de l’unité. Le montage sera grandement facilité
si vous couchez l’unité sur le dos.
.
1- En passant par dessous, vissez les côtés
(05 &
06)
à la base pré-assemblée
(60)
à l’aide de 4 vis
d’assemblage
(5010)
.
2- Vissez également les séparations verticales
gauche et droite
(84 & 85)
à la base pré-
assemblée
(60)
avec 4 vis d’assemblage
(5010)
.
3- Maintenant, vissez la séparation verticale (section
du bas)
(87)
à la base pré-assemblée avec 2 vis
d’assemblage
(5010)
.
MADE IN CANADA
FABRIQUÉ AU CANADA
2
HARDWARE
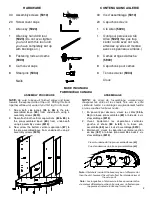
30 Assembly screws
(5010)
20 Screw cover caps
1
Allen key
(5020)
1
Allen key hand drill tool
(5023)
(Do not over-tighten
your unit with this tool until
you have completely set up
with backings on.)
8
Fastening rods and cams
(5900)
8
Cam cover caps
8
Steel pins
(5034)
Nails
CONTENU QUINCAILLERIE
30 Vis d’assemblage
(5010)
20 Capuchons de vis
1
Clé Allen
(5020)
1
Outil pour perceuse à Clé
Allen
(5023)
(Ne pas trop
serrer l’unité avec cet outil,
attendez qu’elle soit montée
avec ses panneaux arrières.)
8
Cames et tiges d’attache
(5900)
8
Capuchons pour cames
8
Tenons d’acier
(5034)
Clous
View of underneath the pre-assembled base
(60)
Vue d’en dessous de la base pré-assemblée
(60)
Note :
Stretchers inside of the base may be of different color
then the unit, however this will not affect the intended view of
the set up unit.
Note :
Les languettes à l’intérieur de la base pourraient être
de couleur différente de votre unité mais ceci n’affectera pas
l’apparence finale de l’unité une fois montée.

