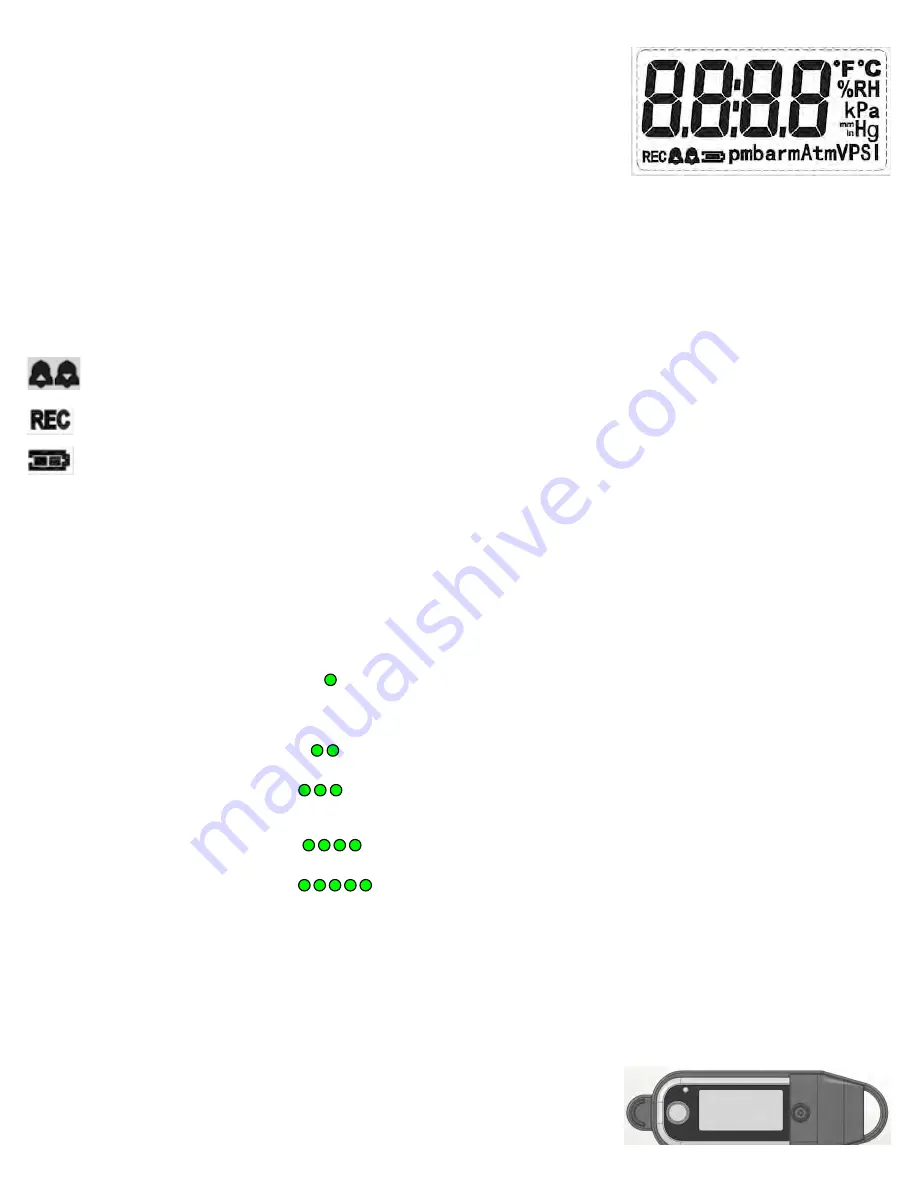
LCD DISPLAY SYMBOLS:
The LCD display shows status and real time information and is user programmable via the Track-It
TM
PC Software. Not all segments are available in all modes. The LCD display is energized when the
push button is pressed and will shut off after a predetermined time as programmed. The following
information may be shown on the display (user programmed) - each button press will show the next
value.
The Barometric Logger has a special relative mode which allows the user to set the local pressure
reading as an offset and effectively “zero” the display. This is especially useful when using the device
as an altimeter. Refer to Push Button below.
Real Time Values
for one or both channels in engineering units relevant to the logger type. Engineering units are PSI, kPA, Bar, mBar, Atm, inHg,
mmHg, Feet, Meters, °C, °F. What is visible is dependent on how it is programmed.
Time and date
in the form of hours and minutes with blinking colon (12 or 24 hour format) such as 12:20 AM followed by the year 2014 then the
month and date 11 23
Amount of memory used
such as 20.05 % m
Icon Indications:
Bell with up arrow (High Alarm) or down arrow (Low Alarm). On steady if any alarms are enabled. Blinks if any high/low alarm occurred
and is current. The unit does not have to be recording for the alarms to be monitored. Alarms can be reset by the user - see below.
REC = On steady if recording is enabled but the unit is not currently recording (Armed but not recording). Blinking if currently recording
data - triggered by any source (timers, alarms, button toggle).
Battery Condition – Shows Full (Solid), Half and Empty. Blinks when battery is too low to operate reliably.
LED:
The LED (Light Emitting Diode) can be programmed to blink when the unit is waiting to record, when the unit is recording (Green blink) or when
there is an Alarm condition (Red blink). The blink period (time between blinks) is user programmable. Note that enabling the LED increases the
drain on the battery. The LED also indicates setup states when using the button.
Push Button:
The button function is programmable using Track-It
TM
PC Software.
Short press (0 - 1 second) will activate the LCD view. Successive short presses will rotate the views as programmed.
Press and hold - (1 - 2 seconds…LED blinks once
) – Releasing the button during this interval (if enabled by program) toggles record mode. If
the unit is currently recording it will stop the recording. If the unit is currently NOT recording it will start recording. Note: Other events may impact
the record mode if they have been set to trigger the recording. This button will not stop any recording started by other triggers. Display will show
rCOn
for
r
e
c
ord
on
or
rOFF
for
r
ecord
OFF
.
Continue to hold button until LED’s second blink
then release button – Releasing the button during this interval (if enabled by program) resets
any alarms (holds/latches, arrow indications) and will stop any alarm triggered recordings currently active. The display will indicate
rSt
for
r
e
S
e
t
.
Continue to hold button until LED’s third blink
then release button – This toggles the logger Relative display mode indicated by
rEL=
for
rEL
ative on. If the Relative mode is active this will revert to the Absolute (normal) mode, indicated by
rELo
for
rEL
ative
o
FF. This mode applies to
pressure/altitude
only.
Continue to hold button until LED’s fourth blink
then release button – This will set the current pressure/altitude value to 0.00 indicated by
Zero
.
Continue to hold button until LED’s fifth blink
then release button – This will shut off the LCD display.
Analog Input:
Most Track-It
TM
Data Loggers have the ability to measure up to 2 channels of analog inputs (4-20mA, 0-5Vdc etc) using external analog modules
that plug onto the USB connector. These are programmed using the Track-It
TM
PC Software. For more information about input connections, refer
to the Track-It Module Connections document available on the website.
NOTE:
Analog recordings are made via the USB connector. If possible (button programmed) STOP RECORDING before plugging the recorder into
the PC so as not to record the USB signals, otherwise use the Track-It
TM
Software “Stop Recording” button under the Device Setup tab as soon
as the device is plugged into the PC.
Protection:
The Data Logger comes with a rubber boot that can be installed to protect the USB connector and
provide some degree of bump and splash protection. The unit should have the boot installed when
traveling. The button can be operated when the boot is in place. The boot cannot be fitted when
analog modules are attached. The unit should not be immersed in liquid.
www.
GlobalTestSupply
.com
Find Quality Products Online at:
sales@GlobalTestSupply.com


