4
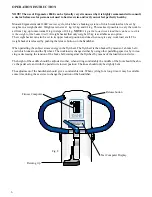
Tip the cycle forward. Assemble the rear
supporting tube with two bolts and two
nuts.
NOTE: Use the accompanying spanner.
See fig 2.
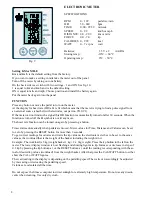
Tip the cycle backwards. Assemble the front
supporting tube with two nuts onto the two
fixed bolts.
NOTE: Use the accompanying spanner.
See fig 3.
Fig. 3
Fig. 2
Serial number
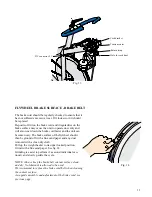
Check that the inclination of the saddle is
comfortable and that the sadle post bracket
is firmly tightened. In order to change the
inclination of the saddle, loosen the saddle
bracket and tighten firmly again.
Adjust to desired height position of saddle/
saddle post by loosening the saddle post
bolt.
NOTE: Tighten firmly. See fig 5.
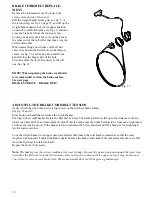
Fig. 4
Sadle bracket
Post bolt
Fig. 5
min. 3”
Before the handlebar stem is assembled be sure
the expanding wedge is loose. Insert the hand-
lebar stem into the frame tube and tighten the
expanding bolt firmly by means of the lever.
NOTE:
The handlebar stem should be in
-
serted into the frame tube at least 3 inches
(about 8 cm).
See fig. 4.
Usually this measure is marked out on the stem.
To change the height of the handlebar, loosen
the expanding bolt about 5 mm. Give the bolt
a light push to release the expanding wedge.
Adjust the handlebar to the desired position and
tighten the expanding bolt again by means of the
lever.
In order to change the inclination of the handle-
bar, loosen the expanding bolt one turn. Adjust
to desired angle of handlebar and tighten the
expanding bolt/lever firmly again.
Put together lead connectors.


