104
AQUILA ALLIANCE
User Manual
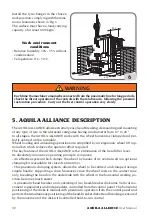
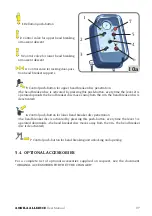
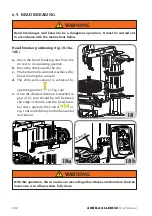
Move the bead-breaker disk at a distance of 2-3 mm from the rim edge.
Do not bring horizontally closer because when the upper arm comes closer so does
the lower arm.
NOTICE
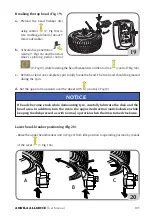
Lower bead breaking (Fig.20)
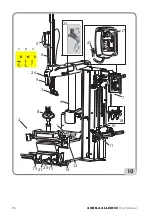
- Preload the bead breaker disc using control
(3, Fig.10a) (a tyre crushing preload of about 5
mm is advisable).
- Activate disc penetration
(control 6 Fig.10a) and then start wheel spinning pedal control
(15 Fig.10), while lowering the bead breaker disc a little at a time
(control 3 Fig.10a).
- Perform at least one complete spin to fully break the bead. The rim bead should be greased
during the spin.
- Set the upper arm downwards below the wheel
with
(control 3 Fig.10).
6.6. DEMOUNTING
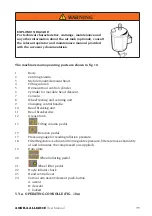
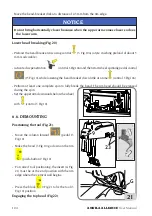
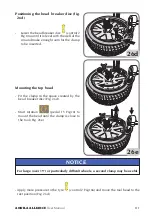
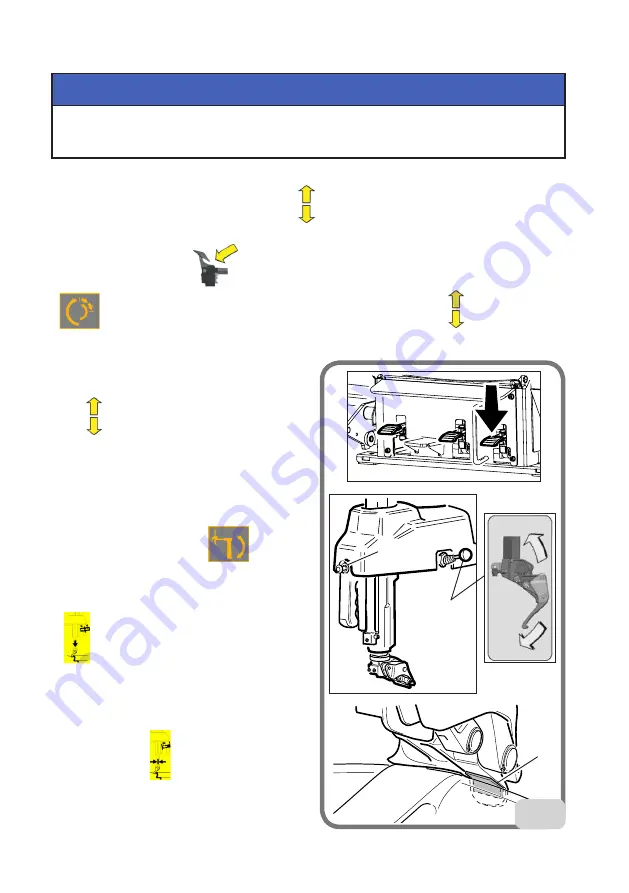
Positioning the tool (Fig.21).
- Move the column forward
(pedal 13
Fig.10)
- Make the head (3 Fig.10) go down on the rim
(push-button 9 Fig.10)
- For correct tool positioning, the insert (G Fig.
21) must be at the end position with the rim
edge where the vertical wall begins.
- Press the block
9 Fig.21 to fix the tool (3
Fig.10) position.
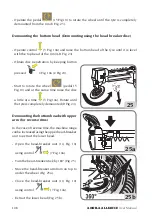
Engaging the top bead (Fig.22)
G
9
23
21
Summary of Contents for Aquila Alliance
Page 61: ...AQUILA ALLIANCE Manuale operatore 61 M9 M2 M15 M4 M10 M13 M14 M7 M11 Accessori a richiesta...
Page 62: ...62 AQUILA ALLIANCE Manuale operatore M13 M14 M11 M7 M2 M9 A...
Page 63: ...AQUILA ALLIANCE Manuale operatore 63 M6 M5 M11 M7 M9 B...
Page 64: ...64 AQUILA ALLIANCE Manuale operatore C M11 M10 M2 M15 M9 D...
Page 65: ...AQUILA ALLIANCE Manuale operatore 65 E...
Page 66: ...66 AQUILA ALLIANCE Manuale operatore F...
Page 69: ...AQUILA ALLIANCE Manuale operatore 69...
Page 70: ...Notes 70...
Page 131: ...AQUILA ALLIANCE User Manual 131 M13 M14 M11 M7 M2 M9 A...
Page 132: ...132 AQUILA ALLIANCE User Manual M6 M5 M11 M7 M9 B...
Page 133: ...AQUILA ALLIANCE User Manual 133 C M11 M10 M2 M15 M9 D...
Page 134: ...134 AQUILA ALLIANCE User Manual E...
Page 135: ...AQUILA ALLIANCE User Manual 135 F...
Page 137: ...Notes 137...
Page 139: ...AQUILA ALLIANCE User Manual 139...
Page 201: ...AQUILA ALLIANCE Manuel d utilisation 201 M13 M14 M11 M7 M2 M9 A...
Page 202: ...202 AQUILA ALLIANCE Manuel d utilisation M6 M5 M11 M7 M9 B...
Page 203: ...AQUILA ALLIANCE Manuel d utilisation 203 C M11 M10 M2 M15 M9 D...
Page 204: ...204 AQUILA ALLIANCE Manuel d utilisation E...
Page 205: ...AQUILA ALLIANCE Manuel d utilisation 205 F...
Page 208: ...208 AQUILA ALLIANCE Manuel d utilisation...
Page 209: ...Notes 209...
Page 270: ...270 AQUILA ALLIANCE Betriebsanleitung M9 M2 M15 M4 M10 M13 M14 M7 M11 Zubeh r auf Anfrage...
Page 271: ...AQUILA ALLIANCE Betriebsanleitung 271 M13 M14 M11 M7 M2 M9 A...
Page 272: ...272 AQUILA ALLIANCE Betriebsanleitung M6 M5 M11 M7 M9 B...
Page 273: ...AQUILA ALLIANCE Betriebsanleitung 273 C M11 M10 M2 M15 M9 D...
Page 274: ...274 AQUILA ALLIANCE Betriebsanleitung E...
Page 275: ...AQUILA ALLIANCE Betriebsanleitung 275 F...
Page 278: ...278 AQUILA ALLIANCE Betriebsanleitung...
Page 279: ...Notes 279...
Page 340: ...340 AQUILA ALLIANCE Manual de uso M9 M2 M15 M4 M10 M13 M14 M7 M11 Accesorios bajo pedido...
Page 341: ...AQUILA ALLIANCE Manual de uso 341 M13 M14 M11 M7 M2 M9 A...
Page 342: ...342 AQUILA ALLIANCE Manual de uso M6 M5 M11 M7 M9 B...
Page 343: ...AQUILA ALLIANCE Manual de uso 343 C M11 M10 M2 M15 M9 D...
Page 344: ...344 AQUILA ALLIANCE Manual de uso E...
Page 345: ...AQUILA ALLIANCE Manual de uso 345 F...
Page 348: ...348 AQUILA ALLIANCE Manual de uso...
Page 349: ...Notes 349...
Page 350: ...350 AQUILA ALLIANCE...
Page 351: ...AQUILA ALLIANCE 351...


