Using PAYD Pro® for Android™ Reference Guide
14
6.
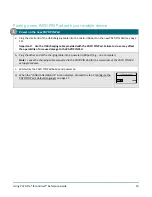
Initialize the PAYD PIN Pad
The PAYD PIN Pad must be successfully initialized from your mobile device before you can use it to perform
PAYD Pro transactions. Follow the steps below to initialize the PAYD PIN Pad.
Note:
If the PAYD PIN Pad is already initialized, go to step 6k of this procedure.
a.
From your mobile device's home screen, tap the
PAYD
icon (
) to launch the PAYD App.
If the "Terms of Use" screen displays, read the terms, and tap
I Agree
.
If at any time the PAYD App requests permission to access data from your mobile device (e.g.,
location, microphone, or contacts data), allow the PAYD App to access the data.
If at any time the "Pinpad has been successfully connected" pop-up displays, tap the
OK
button.
b.
When the sign-in screen displays, sign into the PAYD App (see page 36).
c.
In the PAYD App, start on the "Settings" screen.
Note:
If another screen is displayed, tap the main menu icon (
) to return to the main menu, and
then tap
Settings
.
d.
Tap
Pinpad
.
If the
Connect Pinpad
button displays, tap it.
e.
Tap the
Bluetooth
button if it is not already selected.
f.
Tap the
Initialize Pinpad
button.
Note:
If the
Connect Pinpad
button continues to display even after you have tapped it, see page 75 for
troubleshooting.
g.
When PLEASE WAIT displays on the PAYD PIN Pad, wait while it initializes.
Note:
During this process, the PAYD App displays the "Initializing Pinpad. This
may take a few minutes" screen.
PLEASE WAIT
h.
When the PAYD App displays the "Initialization was successful. Pinpad is ready to use" pop-up, tap the
OK
button.
i.
When the PAYD PIN Pad displays the "WELCOME/BONJOUR" screen, go to the
next step.
Note:
The "BT" icon displays in the upper right corner on the PAYD PIN Pad
screen to indicate that Bluetooth connectivity is established.
BT
WELCOME/BONJOUR
j.
Tap the main menu icon (
) to return to the main menu, and then tap
Signout
.
k.
Proceed to step 7 (Charge the PAYD PIN Pad's battery to full capacity) below.
6


