background image


Using PAYD Pro® for Android™ Reference Guide 

25 

Optional features 

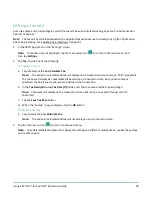
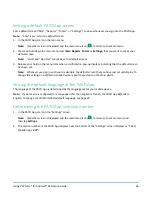
Setting the transaction details level 

Sets the optional transaction details (secondary transaction identifiers, customer ID and order ID) that you can 
enter during a transaction.  

Note:

   Even if optional transaction details are enabled, you may bypass entering data in the 

Customer ID

 and 

Order ID

 fields during a transaction. If you enter data in one or both of these fields during a transaction, you can 

subsequently retrieve the transaction by using one or more of the identifiers as search criteria (e.g., when 
generating a report and/or doing a Refund, Void, or Capture). 

1.


In the PAYD App, start on the "Settings" screen.  

Note:

   If another screen is displayed, tap the main menu icon (

) to return to the main menu, and  

then tap 

Settings

2.


Tap 

Interface

3.


Specify the optional transaction details to include by tapping one of: 


Quick Pay

: Excludes the customer ID and order ID. 


Minimal

: Includes only the customer ID. 


Full

: Includes the customer ID and order ID. 

4.


Tap the main menu icon (

) to return to the main menu. 

Note:  

To change this setting on a different mobile device, repeat these steps on the other device. 


Summary of Contents for PAYD PRO

Page 1: ... 10 2020 Using PAYD Pro for Android Reference Guide ...

Page 2: ...Need help Web moneris com support paydpro Email info getpayd com Toll free 1 855 423 PAYD 7293 Record your Moneris merchant ID here __________________________________________ ...

Page 3: ... payment device 26 Enabling Pre Authorizations 26 Enabling tip prompting 27 Setting a tax rate 28 Location mapping transactions 29 Setting a quick PIN for sign in 30 Pre filling the employee ID store ID at sign in 31 Setting an email address to receive exported reports 32 Auto sending transaction receipts to a set merchant address 33 Setting a default PAYD App screen 34 Setting the default languag...

Page 4: ...PAYD PIN Pad tip prompting enabled 58 Customer prompts in the PAYD App 59 Voiding refunding a transaction 60 Capturing a Pre Authorization 62 Receipts 64 Cardholder verification method CVM statement 64 Card masking 64 Signature capture for receipts 65 Emailing a transaction receipt 66 Sending an SMS text message transaction notification 67 Reporting 68 Transactions report 68 Batch totals report 70...

Page 5: ...eference Guide 3 Setting up for PAYD Pro In this section we go over everything you need to know to activate your PAYD Pro store download the PAYD App and pair the PAYD PIN Pad with an Android mobile device Setting up for PAYD Pro ...

Page 6: ...ris PAYD PAYD PIN Pad with an Android mobile device referred to as mobile device or device download and install the PAYD App to the mobile device initialize the PAYD PIN Pad and use the PAYD App to perform transactions Note For instructions on how to use PAYD Administration to manage your PAYD Pro store and any other registered account users refer to the Using Moneris PAYD Administration guide vis...

Page 7: ...tup steps 2 Ensure that you have the required credentials for your PAYD Pro store If are activating your store ensure that you have your merchant ID and store ID refer to your Useful Information Email for these IDs If your store is already activated ensure that you have your sign in credentials contact your store administrator for these credentials 3 Do one of the following If you have all the req...

Page 8: ...you want to sign into your store Note The password must be from 8 to 16 characters in length and include at least 1 letter 1 number and 1 special character Accents are not supported Password fields are case sensitive You will be prompted to update your password every 90 days your new password must be different than your last 4 passwords 7 In the Security question and Answer fields enter a security...

Page 9: ...e device before you can start to perform PAYD Pro transactions 1 Do one of the following If you need to download install the PAYD App to your mobile device proceed to Downloading and installing the PAYD App from Google Play page 8 If you have already downloaded installed the PAYD App to your mobile device proceed to Setting up the PAYD PIN Pad page 9 ...

Page 10: ...gle Play search for PAYD and then select the PAYD App 3 Download the PAYD App If at any time the PAYD App requests permission to access data from your mobile device e g location microphone or contacts data allow the PAYD App to access the data 4 Once the PAYD App is downloaded and installed on your mobile device do not open launch the PAYD App at this time 5 Return to your mobile device s home scr...

Page 11: ...paired with a PAYD PIN Pad proceed to Pairing a new PAYD PIN Pad with your mobile device page 10 Pairing option 2 If you want to pair a new PAYD PIN Pad that has never been paired and initialized with an Android mobile device that is currently paired with an initialized PAYD PIN Pad proceed to Pairing a replacement PAYD PIN Pad with your mobile device page 18 Pairing option 3 If you want to pair a...

Page 12: ...AYD PIN Pad Failure to do so may affect the operability of or cause damage to the PAYD PIN Pad b Plug the other end of the charging cable into a powered USB port e g on a computer Note Leave the charging cable connected to the PAYD PIN Pad for the remainder of the PAYD PIN Pad setup procedures c Wait while the PAYD PIN Pad beeps and powers on d When the LANGUAGE LANGUE screen displays proceed to s...

Page 13: ...displays proceed to step 3 Ready your mobile device for Bluetooth pairing below BLUETOOTH PAIRING PAIR ADMIN PAIR 3 Ready your mobile device for Bluetooth pairing a Power on the mobile device with which you want to pair the PAYD PIN Pad b Ensure that Bluetooth is turned on the mobile device is discoverable and its Bluetooth settings screen is displayed Note If the mobile device has ever been paire...

Page 14: ...isplay On the PAYD PIN Pad the COMPARE KEY screen with a 6 digit passkey will display g If the passkey code is the same on both the PAYD PIN Pad and the mobile device tap Pair on the mobile device s Bluetooth pairing request h On the PAYD PIN Pad COMPARE KEY screen press F1 YES COMPARE KEY 000000 YES NO YES i When the TERMINAL WILL BE REBOOTED screen displays shown here go to step 4j of this proce...

Page 15: ...that the PAYD PIN Pad s 8 digit terminal ID starts with prefix iCMP as in iCMP I6012345 is shown as Paired on your mobile device s Bluetooth settings screen Note The terminal ID e g I6012345 can also be found on a label affixed to the underside of the PAYD PIN Pad see page 5 b Proceed to step 6 Initialize the PAYD PIN Pad on page 14 5 ...

Page 16: ... Note If another screen is displayed tap the main menu icon to return to the main menu and then tap Settings d Tap Pinpad If the Connect Pinpad button displays tap it e Tap the Bluetooth button if it is not already selected f Tap the Initialize Pinpad button Note If the Connect Pinpad button continues to display even after you have tapped it see page 75 for troubleshooting g When PLEASE WAIT displ...

Page 17: ...he PAYD PIN Pad connect it now Note It may take up to 3 hours to fully charge the battery depending on its current charge status Once the battery is fully charged the icon in the upper right corner of the PAYD PIN Pad s screen displays solid black Important Use the USB charging cable provided to work with the PAYD PIN Pad Failure to do so may affect the operability of or cause damage to the PAYD P...

Page 18: ... is currently paired b On the Bluetooth settings screen locate the initialized PAYD PIN Pad s 8 digit terminal ID displays with prefix iCMP as in iCMP I6012345 Note The terminal ID e g I6012345 can also be found on a label affixed to the underside of the PAYD PIN Pad see page 5 c Unpair the PAYD PIN Pad so that the mobile device forgets the PAYD PIN Pad s terminal ID d Power off the mobile device ...

Page 19: ... scroll to FACTORY DEFAULTS and then press the green key to select it BLUETOOTH PAIRING SECURITY MODE FACTORY DEFAULTS FACTORY DEFAULTS e When the TERMINAL WILL BE REBOOTED screen displays wait while the PAYD PIN Pad reboots TERMINAL WILL BE REBOOTED f When the LANGUAGE LANGUE screen displays press F1 ENGL LANGUAGE LANGUE ENGL FRAN ENGL g When the TERMINAL ID screen displays press the green key to...

Page 20: ...etooth settings screen locate the older initialized PAYD PIN Pad s 8 digit terminal ID displays with prefix iCMP as in iCMP I6012345 Note The terminal ID e g I6012345 can also be found on a label affixed to the underside of the PAYD PIN Pad see page 5 c Unpair the PAYD PIN Pad so that the mobile device forgets the older PAYD PIN Pad s terminal ID d If the PAYD App is open and or you are signed in ...

Page 21: ...TORY DEFAULTS and then press the green key to select it BLUETOOTH PAIRING SECURITY MODE FACTORY DEFAULTS FACTORY DEFAULTS e When the TERMINAL WILL BE REBOOTED screen displays wait while the PAYD PIN Pad reboots TERMINAL WILL BE REBOOTED f When the LANGUAGE LANGUE screen displays go to the next step LANGUAGE LANGUE ENGL FRAN ENGL g Simultaneously press and hold down both the yellow key and the key ...

Page 22: ...d When the LANGUAGE LANGUE screen displays shown here go to step 1e of this procedure If the WELCOME BONJOUR screen displays repeat steps 1a to 1c of this procedure LANGUAGE LANGUE ENGL FRAN ENGL e Proceed to step 2 Select a default display language for the PAYD PIN Pad below 2 Select a default display language for the PAYD PIN Pad a On the LANGUAGE LANGUE screen select a default display language ...

Page 23: ...plays press the green key SECURITY MODE BLUETOOTH PAIRING SECURITY MODE FACTORY DEFAULTS SECURITY MODE d When the SECURITY MODE screen displays press F1 LEGACY SECURITY MODE ENGL SSP LEGACY e When the TERMINAL WILL BE REBOOTED screen displays wait while the PAYD PIN Pad reboots TERMINAL WILL BE REBOOTED f When the LANGUAGE LANGUE screen displays press F1 ENGL LANGUAGE LANGUE ENGL FRAN ENGL g If th...

Page 24: ...en locate the PAYD PIN Pad s terminal ID displays with prefix iCMP as in iCMP I6012345 and tap it f When the mobile device prompts you to enter a PIN code enter a 4 digit number of your choosing e g 1234 g On the PAYD PIN Pad wait for the ENTER PIN CODE _ screen to display and then enter the same 4 digit number that you input on the mobile device and press the green key ENTER PIN CODE _ h When the...

Page 25: ... its features read the sections listed here Configuring optional PAYD App settings see pages 25 to 34 Signing in signing out of the PAYD App see pages 36 to 37 PAYD PIN Pad power management and card entry options see pages 43 to 50 Performing transactions see pages 51 to 62 Generating reports see pages 68 to 70 ...

Page 26: ...or Android Reference Guide 24 Configuring PAYD App s optional features Configuring PAYD App s optional settings In this section we go over everything you need to know to configure the optional settings in the PAYD App ...

Page 27: ...y retrieve the transaction by using one or more of the identifiers as search criteria e g when generating a report and or doing a Refund Void or Capture 1 In the PAYD App start on the Settings screen Note If another screen is displayed tap the main menu icon to return to the main menu and then tap Settings 2 Tap Interface 3 Specify the optional transaction details to include by tapping one of Quic...

Page 28: ...ng on a different mobile device repeat these steps on the other device Enabling Pre Authorizations Enables the option to process Pre Authorizations see Pre Authorization with credit card on page 54 1 In the PAYD App start on the Settings screen Note If another screen is displayed tap the main menu icon to return to the main menu and then tap Settings 2 Tap Interface 3 Tap checkmark or unmark the b...

Page 29: ...d on the Pinpad pop up displays tap the OK button c Go to step 4 To disable tip prompting a Tap unmark the box Tip on Purchase b When the Tip settings have been successfully configured on the Pinpad pop up displays tap the OK button c Go to step 5 4 Configure the three tip percentages To change one or more pre set tip percentages a Enter a tip percentage in one or more Quick Tip fields b Tap Save ...

Page 30: ...calculate add tax will display on all transaction screens except Void By default the tax box will always be checkmarked selected on a transaction screen but you may unmark deselect the box if you do not want to add tax to the transaction b In the Tax Description and Tax Rate fields enter the tax name and the tax percentage Note This name will display on the transaction screen but may be truncated ...

Page 31: ...device s location data The transaction response is APPROVED or DECLINED Note Your mobile device may prompt you to allow the PAYD App to access the device s location data You must grant this access to use the location mapping feature If you want to enable this feature on a different mobile device repeat these steps on the other device Viewing a location map To view the mapped location of a PAYD tra...

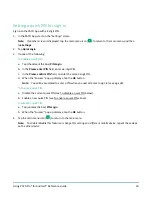
Page 32: ...In the Please confirm PIN field re enter the same 4 digit PIN d When the Success pop up displays tap the OK button Note You will be prompted to enter a PIN when you next attempt to sign in see page 38 To change a quick PIN a Disable the current quick PIN see To disable a quick PIN below b Enable a new quick PIN see To enable a quick PIN above To disable a quick PIN a Tap unmark the box PIN Login b...

Page 33: ...ed tap the main menu icon to return to the main menu and then tap Settings 2 Tap Login Credentials 3 Fill in the field s that you want to have pre filled whenever you launch the PAYD App Note To disable this feature leave the field s blank 4 Tap the Save Login Credentials button 5 When the Success pop up displays tap the OK button 6 Tap the main menu icon to return to the main menu Note To enable ...

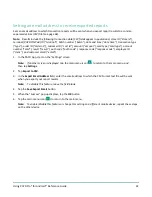
Page 34: ...esult result auth code auth code response code response code employee ID clerk and customer email email 1 In the PAYD App start on the Settings screen Note If another screen is displayed tap the main menu icon to return to the main menu and then tap Settings 2 Tap Export to CSV 3 In the Export Email Address field enter the email address to which the CSV format text file will be sent when you expor...

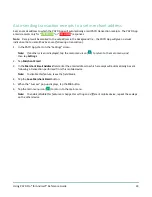
Page 35: ...YD App start on the Settings screen Note If another screen is displayed tap the main menu icon to return to the main menu and then tap Settings 2 Tap Merchant Email 3 In the Merchant Email Address field enter the email address to which a receipt will automatically be sent following a transaction performed from this mobile device Note To disable this feature leave the field blank 4 Tap the Save Mer...

Page 36: ...creen has been set Note Whenever you sign in with your credentials the default screen that you have just set will display To change this setting on a different mobile device repeat these steps on the other device Setting the default language of the PAYD App The language of the PAYD App is determined by the language set for your mobile device Note If your device is configured for a language other t...

Page 37: ...roid Reference Guide 35 PAYD Pro transactions PAYD Pro transactions In this section we go over everything you need to know to use the PAYD PIN Pad and the PAYD App to perform PAYD Pro transactions on an Android mobile device ...

Page 38: ...your mobile device e g location microphone or contacts data allow the PAYD App to access the data If the PAYD App prompts you to change your password enter a new password and tap Save Password Note The password must be from 8 to 16 characters in length and include at least 1 letter 1 number and 1 special character Accents are not supported Password fields are case sensitive You will be prompted to...

Page 39: ... not using it 1 In the PAYD App start on the main menu Note If another screen is displayed tap the main menu icon to return to the main menu 2 Tap Sign Out 3 When the PAYD App sign in screen displays it means you are signed out Note Depending on how you have configured the PAYD App the full sign in screen may display see page 36 or the Enter PIN sign in screen may display see page 38 ...

Page 40: ...From your mobile device s home screen tap the PAYD icon to launch the PAYD App 2 Wait for the Enter PIN sign in screen to display 3 In the Enter PIN field enter your 4 digit quick PIN Note You will automatically be signed in once you enter the last digit otherwise tap Sign In 4 Your default PAYD App screen displays once you are signed in Note To change the default screen see Setting a default PAYD...

Page 41: ...d Reference Guide 39 The PAYD App main menu From the main menu you can access any transaction report or setting in the PAYD App To return to this menu from any other screen simply tap the main menu icon at the top of the screen ...

Page 42: ...and tap the Reset my password link 8 Wait for the New Password page to display on PAYD Administration 9 In the New password and Confirm password fields enter a new password and tap Save Note The password must be from 8 to 16 characters in length and include at least 1 letter 1 number and 1 special character Accents are not supported Password fields are case sensitive You will be prompted to update...

Page 43: ...gn in screen displays tap Forgot PIN 3 When the PAYD full sign in screen displays enter your full sign in credentials see Signing in with full credentials on page 36 Note If you have also forgotten your sign in password see Need to reset your sign in password page 40 4 Once you are signed in you may change or disable your quick PIN see Setting a quick PIN for sign in on page 30 ...

Page 44: ... there is more than one drop down list select the additional questions and then enter answers in the corresponding fields 2 If the Email Address field displays enter your email address Note If you ever need to have your password reset a password reset link will be sent to this address 3 Tap Save Security Question or Save Security Questions 4 When the Sale screen displays do one of the following If...

Page 45: ...YD PIN Pad 6 Chip Reader slot at the bottom of PAYD PIN Pad See page 48 7 Contactless Reader Indicator green flashing light No lights flash PAYD PIN Pad is in Sleep mode see page 46 or off One light flashes Reader is fully powered on Four lights flash Reader capturing card data see page 49 8 Display Screen Contactless Reader WELCOME BONJOUR screen displays when PAYD PIN Pad idle 9 Magnetic Stripe ...

Page 46: ...LCOME BONJOUR screen in the upper right corner of the screen Battery charging Icon Description The battery is charging Charging occurs when the PAYD PIN Pad is connected to an external power source via the USB charging cable and the battery is not already fully charged Battery charge level Icon Description 100 or less 75 or less 50 or less Contactless reader may not read card 25 or less PAYD PIN P...

Page 47: ...he following With the USB charging cable a Plug the small end of the USB charging cable into the micro USB port on the PAYD PIN Pad see page 43 b Plug the other end of the cable into a powered USB port Without the USB charging cable a Press the power button on the PAYD PIN Pad see page 43 Note The battery must be sufficiently charged see page 44 2 Wait while the PAYD PIN Pad beeps and powers on to...

Page 48: ...hile the PAYD PIN Pad is in Sleep mode simply initiate the transaction in the PAYD App enter the required data and tap Process Transaction The PAYD PIN Pad will automatically wake to the WELCOME BONJOUR screen and then display the appropriate card entry prompt if The PAYD PIN Pad is within communication Bluetooth range of the mobile device with which it is paired The screen saver is not active on ...

Page 49: ... Ensure the WELCOME BONJOUR screen is displayed Note If the hardware manufacturer name logo is displayed instead see Exiting Sleep mode above 3 Simultaneously press and hold down both the yellow key and the key until the PAYD PIN Pad starts to power off and then wait while it powers off completely the screen is blank when the PAYD PIN Pad is powered off ...

Page 50: ... the PAYD PIN Pad s contactless reader from inadvertently reading the card data as a contactless transaction Swipe magnetic stripe cards Note If the card has a chip it must be inserted see page 48 1 The PAYD PIN Pad displays SWIPE OR INSERT CARD or SWIPE TAP OR INSERT CARD 2 You or the customer swipes their card on the PAYD PIN Pad s magnetic stripe reader Note If the card is a credit card you sho...

Page 51: ...include Visa Mastercard American Express Discover and Interac or other items such as a key fob mobile tag or mobile device e g a smartphone tablet or smartwatch the cardholder is responsible for any related software on their mobile device including downloading any required apps and loading their card information into their digital wallet Maximum Contactless Dollar Value CDV To determine the maximu...

Page 52: ...try methods fail you may manually enter the card number for credit cards and some chip debit cards 1 In the PAYD App initiate a Sale or Pre Authorization 2 For detailed transaction steps to a Sale see page 52 for a Pre Authorization see page 54 3 On the Sale screen tap checkmark the box Keyed entry on pinpad ...

Page 53: ...be powered on see page 45 It must display WELCOME BONJOUR and BT see page 44 It must be sufficiently charged see page 44 4 If the status of the PAYD PIN Pad s connection with the PAYD App mobile device changes while the PAYD App is open the PAYD App will display a notification If the Pinpad has been successfully connected pop up displays tap the OK button and continue the transaction If the Pinpad...

Page 54: ...ill be generated automatically 4 In the Amount field enter the Sale amount If the tax AA field box displays and is checkmarked the tax that will be added displays in the field while the total transaction amount including the tax displays in the Total field Note If you do not want to add the tax to this transaction tap unmark the tax AA box 5 Use the PAYD PIN Pad to capture the card data If you wan...

Page 55: ...ed the tax that will be added displays in the field while the total transaction amount including the tax displays in the Total field Note If you do not want to add the tax to this transaction tap unmark the tax AA box 4 In the Amount Tendered field enter the amount tendered Note The Change Due field will automatically display the amount owed to the customer 5 Tap the Process Transaction button 6 W...

Page 56: ...d data in one or both fields otherwise leave these fields blank to bypass entering any identifier Note If you enter your own order ID it must be unique If you don t enter your own order ID it will be generated automatically 6 In the Amount field enter the Pre Authorization amount If the tax AA field box displays and is checkmarked the tax that will be added displays in the field while the total tr...

Page 57: ...the card number and press the green key 6 When EXPIRY DATE MMYY displays on the PAYD PIN Pad key in the card expiry date MMYY and press the green key 7 Wait while the transaction is processed If the PAYD App displays the Customer Signature screen capture the customer s signature on your mobile device see Signature capture for receipts on page 65 8 When the PAYD App displays the APPROVED or DECLINE...

Page 58: ...tion presses F1 YES To view the next available application presses F4 NO Application name OK YES NO Presses F1 YES to use the displayed application I PRE AUTHORIZE UP TO 0 00 OK Presses the green key to confirm the displayed Pre Authorization amount TRANSACTION NAME 0 00 OK Presses the green key to confirm the displayed amount SELECT ACCOUNT CHQ SAV For chequing account presses F1 CHQ For savings ...

Page 59: ...se the transaction is complete To email a transaction receipt see Emailing a transaction receipt page 66 Note If you enabled the PAYD App to auto send receipts to a set merchant address the PAYD App automatically emails a receipt to the address the PAYD App will not notify you that the email has been sent To send an SMS text message notification see Sending an SMS text message transaction notifica...

Page 60: ... the green key to confirm the displayed amount ENTER TIP AMOUNT 0 00 To add a tip keys in an amount and presses the green key To bypass adding a tip presses the green key without keying in an amount PURCHASE 0 00 OK Presses the green key to confirm the displayed amount go to step 3 Note If the customer wants to change the tip amount they press the yellow key once and then they rekey the tip amount...

Page 61: ... customer confirms the displayed totals and taps the OK button Note If the customer wants to change the tip amount they tap the Back button and then they re enter the tip when prompted see To add a different tip as an amount or percentage above begin at step b 4 When the Processing Transaction screen displays retrieve your mobile device from the customer If the Customer Signature screen displays c...

Page 62: ...step 4 To narrow the scope of your search a Select one or more of the following criteria Note The original transaction receipt includes the transaction identifiers submitted with the original transaction Date To retrieve transactions processed within a date range other than today Tap the Today drop down list and select a date range from the list otherwise skip this step to retrieve only transactio...

Page 63: ...w prompts on pinpad screen do one of the following Hand the PAYD PIN Pad to the customer see page 56 Manually enter the card data on the PIN Pad yourself continue on page 55 and begin at step 4 8 When the PAYD App displays the APPROVED or DECLINED response the transaction is complete To email a transaction receipt see Emailing a transaction receipt page 66 Note If you enabled the PAYD App to auto ...

Page 64: ...herwise skip this step to retrieve only transactions processed today Order ID Enter the ID in the Order ID field a full or partial ID may be entered Customer ID Enter the ID in the Customer ID field a full or partial ID may be entered Amount Enter the amount in the Amount field b Tap Sort by and select a sort by option amount customer ID date order ID card type or transaction type from the drop do...

Page 65: ...y on your mobile device 10 When the PAYD App displays the APPROVED or DECLINED response the transaction is complete To email a transaction receipt see Emailing a transaction receipt page 66 Note If you enabled the PAYD App to auto send receipts to a set merchant address the PAYD App automatically emails a receipt to the address the PAYD App will not notify you that the email has been sent To send ...

Page 66: ...used during the transaction for which the receipt was generated Note The CVM statement is not included in receipts for cash or swiped contactless debit transactions CVM statement Card type Card entry method NO SIGNATURE TRANSACTION credit tap contactless SIGNATURE credit swipe stripe manual entry VERIFIED BY PIN credit debit insert chip Card masking To reduce the risk of fraudulent card use maskin...

Page 67: ... 62 When the PAYD App displays the Customer Signature screen do the following 1 Retrieve the PAYD PIN Pad if it was used to capture the card data Note The WELCOME BONJOUR screen displays on the PAYD PIN Pad 2 Have the customer write their signature above the Customer Signature line on the screen of your mobile device If the customer wishes to redo their signature they tap Clear and then sign again...

Page 68: ...receipt b Tap the send email icon To select an email address from your mobile device s contacts list Note To use this feature your mobile device s privacy settings must be configured to allow the PAYD App to access your device s contacts data Your mobile device may prompt you you to allow the PAYD App to access the device s contacts data You must grant this access to use this feature a Tap the con...

Page 69: ...MS text message b Tap the send SMS text message icon To select a phone number from your mobile device s contacts list Note To use this feature your mobile device s privacy settings must be configured to allow the PAYD App to access your device s contacts data Your mobile device may prompt you to allow the PAYD App to access the device s contacts data You must grant this access to use this feature ...

Page 70: ... otherwise skip this step to retrieve only transactions processed today Order ID Enter the ID in the Order ID field a full or partial ID may be entered Customer ID Enter the ID in the Customer ID field a full or partial ID may be entered Amount Enter the amount in the Amount field b Tap Sort by and select a sort by option amount customer ID date order ID card type or transaction type from the drop...

Page 71: ... to return to the main menu This table describes the Details screen shown on the right Label Description A Transaction name B Transaction date DD MM YYYY and time hh mm ss C Unique transaction identifier Auto generated if no order ID entered for transaction D Card type or Cash E Card number masked or Cash F Displays if customer ID entered for transaction G Transaction amount excluding tax and tip ...

Page 72: ...card type or Cash a To display this sub report tap the daily summary totals icon Daily Tip Totals For the selected date range displays tip totals grouped by the PAYD employee ID clerk ID under which the tip amounts were accrued a To display this sub report tap the daily tip totals icon Note If No tip totals for today displays it means no tip amounts were accrued for the specified date range Termin...

Page 73: ...ton if it displays 5 Tap the Initialize Pinpad button Note If the Connect Pinpad button continues to display even after you have tapped it see page 75 for troubleshooting 6 When PLEASE WAIT displays on the PAYD PIN Pad wait while it initializes Note During this process the PAYD App displays the Initializing Pinpad This may take a few minutes screen 7 When the PAYD App displays the Initialization w...

Page 74: ...Using PAYD Pro for Android Reference Guide 72 Troubleshooting Troubleshooting In this section we go over everything you need to know to troubleshoot any issues ...

Page 75: ... detect the PAYD PIN Pad with which it is paired 1 See Unable to connect to Pinpad page 74 Please enter a valid cvd value Mandatory CVV is enabled in PAYD Administration 1 Locate the 3 or 4 digit card validation value on the credit card and enter the value in the CVV field before you submit the transaction for processing Sign in failed Please Try Again 1 Try signing in again 2 If the text Quit Dem...

Page 76: ... PIN Pad is powered on see page 45 2 Confirm that the PAYD PIN Pad is in range of your mobile device and operating in a suitable environment see page 80 3 Confirm that the PAYD PIN Pad s 8 digit terminal ID e g I6012345 is shown as paired on your mobile device s Bluetooth settings screen 4 If the error message continues to display simultaneously press and hold down both the yellow key and the key ...

Page 77: ... completely 4 When the PAYD PIN Pad is powered off press its power button see page 43 and then wait while the PAYD PIN Pad powers on to the WELCOME BONJOUR screen 5 In the PAYD App tap the Connect Pinpad button 6 If the issue recurs sign out of the PAYD App 7 Power off your mobile device 8 Simultaneously press and hold down both the yellow key and the key on the PAYD PIN Pad until it starts to pow...

Page 78: ...r mobile device s privacy settings are configured to deny the PAYD App access your device s contacts list or you do not have any contact listings stored on your device 1 Configure your device s privacy settings to allow the PAYD App to access to your device s contacts list and then retry to access your contacts list from the PAYD App A location map does not display on a transaction s Details scree...

Page 79: ...rm a transaction CANNOT SWIPE CHIP CARD 1 Insert the chip card into the PAYD PIN Pad s chip card reader CARD BLOCKED REMOVE CARD The chip card cannot be used 1 Ask for another form of payment CARD NOT SUPPORTED PLEASE RETRY 1 Swipe the card again 2 If this does not work request another form of payment CARD PROBLEM 1 Retry the transaction 2 If the message reappears If card was inserted Swipe the ca...

Page 80: ...OMPLETED The customer took more than 30 seconds to respond to the prompts 1 Retry the transaction PLEASE CHARGE THE TERMINAL The PAYD PIN Pad s battery charge is low 1 Connect the PAYD PIN Pad to an external power source via the USB charging cable 2 When BATTERY CHARGING IN PROGRESS displays see page 77 REFUND LIMIT EXCEEDED The total value of Refunds performed today is greater than your daily Ref...

Page 81: ...e logo instead of WELCOME BONJOUR The PAYD PIN Pad is in Sleep mode 1 To use the PAYD PIN Pad while it is in Sleep mode see page 46 The PAYD PIN Pad powers off The PAYD PIN Pad may have gone into Sleep mode and then shut down to conserve power 1 To power on the PAYD PIN Pad press the PAYD PIN Pad s power button see page 43 2 If this does not work the battery charge may be depleted connect the PAYD...

Page 82: ...ays in the field while the total transaction amount including the tax displays in the Total field Note If you do not want to add the tax to this transaction tap unmark the tax AA box 4 In the Card Number field enter the card number 5 In the Exp MMYY field enter the card expiry date If the CVV field displays enter the 3 or 4 digit card verification value code 6 Tap the Process Transaction button If...

Page 83: ...er screens and televisions Radio transmitters and other wireless devices operating at 2 4GHz e g Wi Fi devices wireless routers cordless phone bases etc at least 2 m 6 5 feet away Microwave ovens at least 3 m 10 feet away Anti theft barriers etc Elevator shafts Cash registers Blenders and food processors Air conditioning units ventilation fans Large metal horizontal or vertical surfaces e g applia...

Page 84: ...Using PAYD Pro for Android Reference Guide 82 Merchant Support Merchant Support At Moneris help is always here for you 24 7 ...

Page 85: ...Download PAYD Pro guides to assist with getting started configuration and usage instructions Visit shop moneris com to purchase point of sale supplies and accessories Visit moneris com insights for business and payment news trends customer success stories and quarterly reports insights Can t find what you are looking for Email info getpayd com or call Moneris Customer Care toll free available 24 7...

Page 86: ...s electronic mechanical including photocopying be reproduced or transmitted without the authorized consent of Moneris Solutions Corporation This document is for informational purposes only Neither Moneris Solutions Corporation nor any of its affiliates shall be liable for any direct indirect incidental consequential or punitive damages arising out of use of any of the information contained in this...

Reviews: