33D4047
27
INSTALLING ROCK WOOL AND CHECKING BURNER FLAME
PLACING ROCK WOOL
DFX24C AND DFX32C MODELS
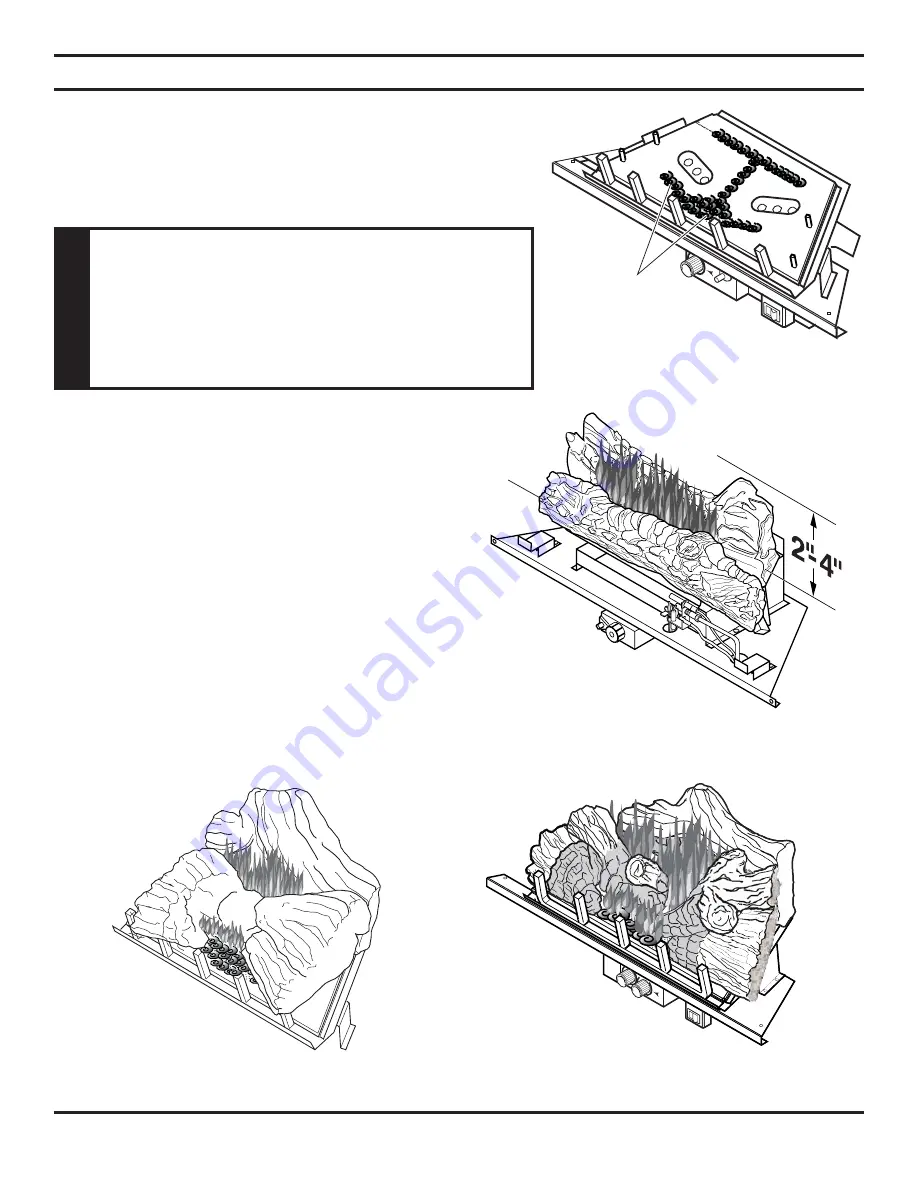
After installing logs, pull apart dime-size pieces of rock wool. Sprinkle
rock wool evenly over burner ports. Wash hands after installing rock wool.
Itching may occur.
W
ARNING
• Use only rock wool provided with log set.
• Do not add additional rock wool.
• Place rock wool on burner ports only.
• Keep air gap between rear log and burner
CLEAN.
Figure 42 - Correct Appearance of Flames
(DFX24C)
Figure 40 - Rockwool Installation
(DFX24C and DFX32C)
One-piece
Log
Figure 41 - Correct Appearance of Flames
(DBX24C)
Dime Size
Rock Wool
CHECKING BURNER FLAME
DBX24C MODEL
In
normal operation at full rate after 15 minutes, the following
flame appearances should be observed:
The flames inside the one-piece log may be yellow. The
flames should extend approximately 2" - 4" above the log.
See Figure 41.
DFX24C AND DFX32C MODELS
In normal operation at full rate after 15 minutes, the following
flame appearances should be observed:
Burner will have a random pattern of yellow flames.
See
Figures 42 and 43.
There should be glowing embers in front
of burner.
NOTE: The front flames and embers will be an
opaque orange color during the burn off time.
Figure 43 - Correct Appearance of Flames
(DFX32C)


