background image

Maintenance

32

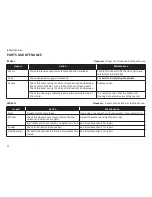
PARTS MAINTENANCE 

Inspect

Action

Maintenance

Rims

Inspect for dirt and grease.

Use a clean rag or wash with soapy water, rinse, and air dry.

Wheels

Check the wheels are securely fastened to the 

scooter and axle nuts are tight.

Adjust if necessary and tighten axle nuts.

Spin wheel and check rotation / alignment is true See bicycle mechanic for repair.

Spokes

Check for broken or loose spokes.

See bicycle mechanic for repair.

Hub Bearings

Lift each wheel and see if there is movement side 

to side.

See bicycle mechanic for repair.

Frequency:

 Inspect and maintain at least each use.

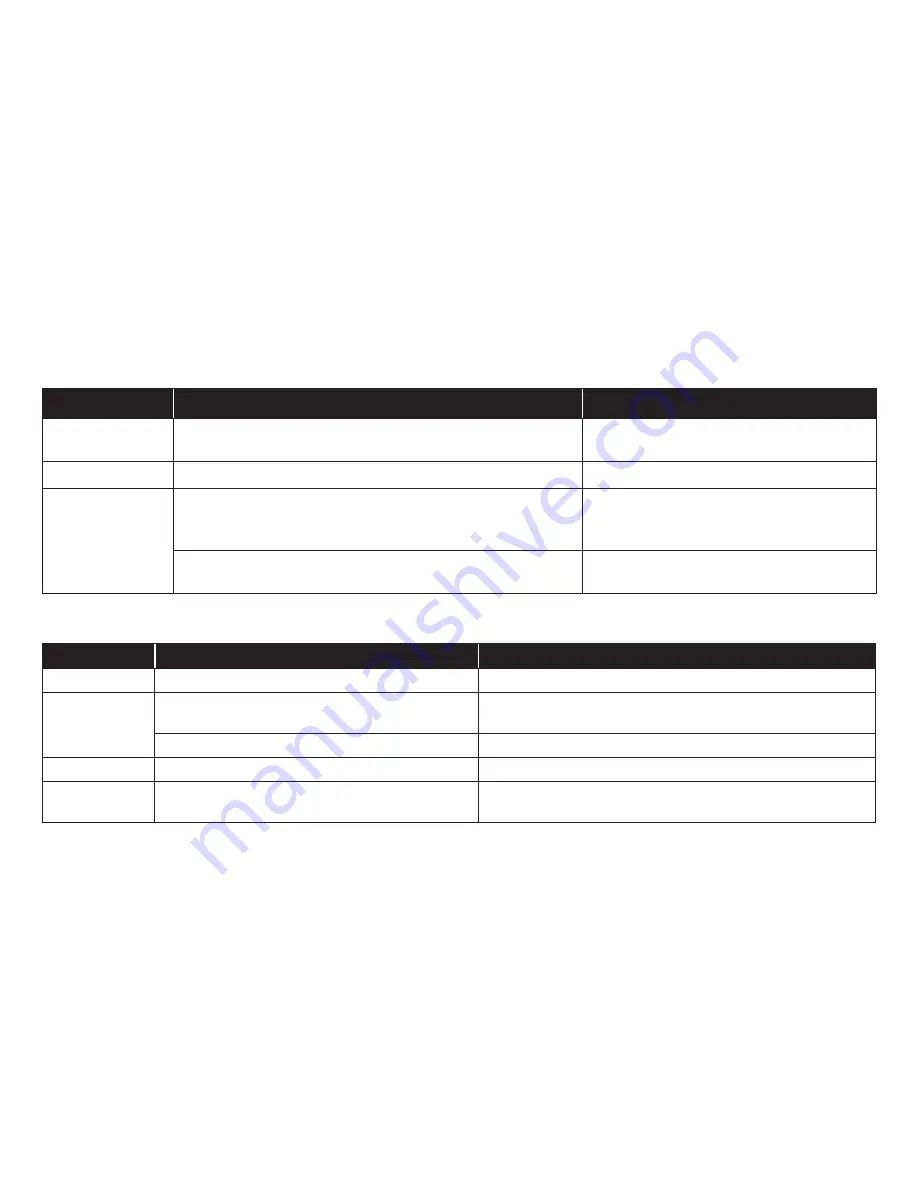
Wheels


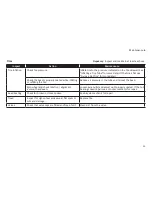
Brakes                         

Inspect

Action

Maintenance

Levers

Check the levers are securely fastened to the handlebar.

Position the levers to fit the rider’s grip and 

screw tight to handlebar.

Pads

Check pad position, gap and pressure.

See

 Section 4: Adjusting the Brakes

Cables

Check the outer casing for kinks, stretched coils and damage. 

Check cables for kinks, rust, broken strands or frayed ends. 

Check the outer casing for kinks, stretched coils and damage.

Replace cable.

Check the housing is seated properly into each cable stop of 

the scooter.

It is recommended that the cables and 

housing be replaced every riding season.

Frequency: Inspect and maintain before each use

Summary of Contents for R6174

Page 1: ...OWNER S MANUAL THIS MANUAL CONTAINS IMPORTANT SAFETY PERFORMANCE AND MAINTENANCE INFORMATION READ THE MANUAL BEFORE TAKING YOUR FIRST RIDE ON YOUR NEW SCOOTER AND KEEP THE MANUAL HANDY FOR FUTURE REF...

Page 2: ...ont Brake Cable 15 Cable Detangler 16 Attach the Front Wheel 18 Attach the Rear Wheel 19 Attach the Pegs 20 4 Adjustments 21 Tools Required 21 Adjusting the Brakes 22 Adjusting the Handlebar 26 5 Use...

Page 3: ...that your first ride on your new scooter is taken in a controlled environment away from cars obstacles and cyclists This manual contains important information regarding safety assembly use and mainte...

Page 4: ...helmet covers your forehead Incorrect Fitting Forehead is exposed and vulnerable to serious injury ALWAYS WEAR A PROPERLY FITTED HELMET WHEN RIDING YOUR SCOOTER DO NOT RIDE AT NIGHT AVOID RIDING IN W...

Page 5: ...n adult to ensure the scooter is properly maintained and in proper operating condition Doing so will reduce the risk of injury Always conduct regular maintenance and inspection of your scooter Complet...

Page 6: ...r the weather conditions Use of protective gear such as pads for the knees and elbows is highly recommended for children A properly fitted ASTM or SNELL approved bicycle helmet shall be worn at all ti...

Page 7: ...Even if your state does not have a children s helmet law it is recommended that everyone wear a helmet It is strongly advised that a properly fitting ASTM or SNELL approved bicycle helmet be worn at a...

Page 8: ...cations to the scooter Wear proper riding attire reflective if possible and avoid open toe shoes Do not use items that may restrict your hearing and vision Do not carry packages or passengers that wil...

Page 9: ...ke slightly before cornering and prepare to lean your body into the corner Decrease your riding speed avoid sudden braking and sharp turns Safe Riding Rules for Children Many states require that child...

Page 10: ...ake shoe pads are not overly worn and are correctly positioned in relation to the rims The brake control cables are lubricated correctly adjusted and display no obvious wear The brake control levers a...

Page 11: ...22 Rear caliper brake assembly 50 70 22A Rear brake pads 22B Rear brake pads hardware 50 60 22C Brake cable pinch bolt 50 70 23 Rear fork 24 Rear fork dropout 25 Pegs 26 Rear tire Part name Torque ft...

Page 12: ...Parts Identification 2 11 3 4 8 7 2 21 10 25 19 12 5 6 9 20 13 11 26 1 18 17 16 15 14 20A 20B 20C 22 22A 22B 22C 23 24...

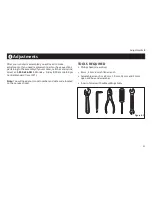
Page 13: ...11 Monday Friday 8 00 am to 5 00 pm Central Standard Time CST TOOLS REQUIRED Phillips head screw driver 4 mm 5 mm and 6 mm Allen wrench Adjustable wrench or a 9 mm 10 mm 14 mm and 15 mm open and box e...

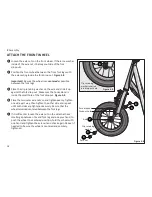
Page 14: ...materials until assembly is complete to ensure that no required parts are accidentally discarded Inspect the scooter and all accessories and parts for possible shortages It is recommended that the thr...

Page 15: ...lebar is clamped in place WARNING Improper attachment of the handlebar may result in damage to the stem post steering tube and result in lose of control serious injury or death Ensure the minimum inse...

Page 16: ...h the slot on the brake lever body Figure 3 4 Press the brake lever towards the grip Bring the brake cable from the stem over the handlebar and Slide the brake cable through the slots and place the ca...

Page 17: ...ow it to return c Check to see if the bearing unit bottoms out on the lower detangler plate If so unscrew the adjust barrel further until the bearing unit sits about 1 mm above the lower plate This is...

Page 18: ...t The gap between the plates and bearing unit should be a minimum 1 mm 1 32 when the brake is engaged or disengaged Lower plate Lower cable Lower cable Locknut Upper cable adjusting barrels Locknut Up...

Page 19: ...the small hole of the fork dropout Figure 3 9 Place the two outer axle nuts on and tighten evenly Tighten one side part way then tighten the other side and repeat until both sides are tightened secure...

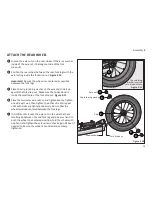
Page 20: ...the small hole of the fork dropout Figure 3 11 Place the two outer axle nuts on and tighten evenly Tighten one side part way then tighten the other side and repeat until both sides are tightened secu...

Page 21: ...pegs To install pegs Do not loosen or remove axle nuts Check to make sure axle nuts are properly tightened before installing pegs Figure 3 12 Thread the pegs on the axle over the axle nut Insert a sc...

Page 22: ...all the service line direct at 1 800 626 2811 Monday Friday 8 00 am to 5 00 pm Central Standard Time CST Note You will need your model number and date code located on the service sticker TOOLS REQUIRE...

Page 23: ...ct the rim Loosen the cable anchor bolt just enough to allow the brake wire to move freely Figure 4 2 While holding the brake closed use your other hand to pull the brake wire tight through the cable...

Page 24: ...correctly If not use a 5 mm allen wench and loosen the bolt enough so you can reposition the pad Position the pad so it is evenly centered on the rim Retighten the bolt after positioning the pad corr...

Page 25: ...er and use your hand to rotate the brake caliper back until both sides of the brake move equally Sometimes it is necessary to over rotate the brake slightly so that as you tighten the locknut the brak...

Page 26: ...e brake lever about 1 3 of the travel before the brake pads contact the rim If the cable has stretched or slipped re adjust the brake cable tension by loosening cable anchor bolt and pulling more cabl...

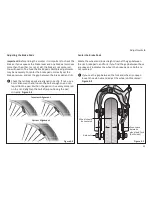
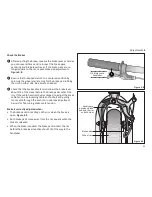
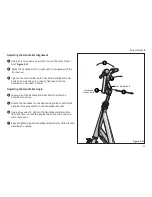
Page 27: ...riding the scooter ADJUSTING THE HANDLEBAR Adjusting the Handlebar Height Turn the front fork to face forward Figure 4 10 Using a 14 mm open end wrench loosen the stem binder bolt Adjust the handlebar...

Page 28: ...and the handlebar is clamped in place Adjusting the Handlebar Angle Loosen all of the handlebar binder bolts to allow the handlebar to move Rotate the handlebar to the desired angle Be sure that the...

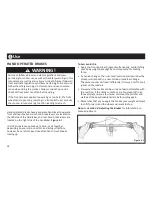
Page 29: ...n the right side of the handlebar Figure 5 1 It is OK to operate one brake at a time or all together depending on your style comfort and riding conditions however be careful to pay close attention to...

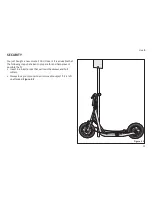
Page 30: ...Don t lose it It is advisable that the following steps be taken to prepare for and help prevent possible theft Invest in a bicycle lock that will resist hacksaws and bolt cutters Always lock your scoo...

Page 31: ...ntain your scooter for years of enjoyable riding For painted frames dust the surface and remove any loose dirt with a dry cloth To clean wipe with a damp cloth soaked in a mild detergent mixture Dry w...

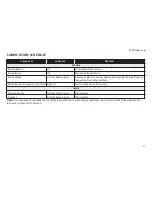
Page 32: ...ricant Method Weekly Brake calipers Oil Three drops from oil can Brake levers Oil Two drops from oil can Brake cables Lithium based grease Remove cable from casing Grease entire length Wipe off excess...

Page 33: ...echanic for repair Frequency Inspect and maintain at least each use Wheels Brakes Inspect Action Maintenance Levers Check the levers are securely fastened to the handlebar Position the levers to fit t...

Page 34: ...r pressure in the tube and re seat the bead Spin wheel and check rotation alignment is smooth and even Loosen axle nut s and adjust until properly seated If the hub bearings need repair see a scooter...

Page 35: ...these steps to inflate a tire Remove the valve cap and add air Be sure the tire is evenly seated on the rim both sides Spin the wheel and check for high and low areas Complete inflation to the recomme...

Page 36: ...lever to pry the tire bead up and out of the rim Repeat around the wheel until one bead is off the rim Remove tube Release second tire bead Remove tire Carefully inspect inside of the rim and tire fo...

Page 37: ...n down Brake pads toe in incorrect Brake pads rim dirty or wet Brake arms loose Replace pads Correct pads toe in Clean pads and rim Tighten mounting bolts Knocking or shuddering when applying brakes B...

Page 38: ...ghten headset Take bike to a bike shop for possible frame realignment Frequent punctures Inner tube old or faulty Tire tread casing worn Tire unsuited to rim Tire not checked after previous puncture T...

Page 39: ...haser subject to the Terms and Conditions of the warranty listed below If failure of any part should occur due to faulty materials or workmanship during the warranty period the part will be replaced A...

Page 40: ...ly and retain as a record of your purchase Please retain your sales receipt for any possible warranty claims Your Name Address City State Date Purchased Place of Purchase Model Brand Information Wheel...

Page 41: ...2013 4902 Hammersley Road Madison WI 53711 Service 1 800 626 2811 www pacific cycle com MongooseManual_Covers_ENG_010213 indd 1 1 2 13 5 21 PM...

Reviews: