background image

5

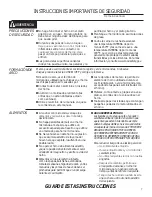
PRECAUCIONES QUE DEBE TENER PARA EVITAR UNAPOSIBLE 

EXPOSICIÓN A UNA EXCESIVA ENERGÍA DEMICROONDA

(a) No trate de operar este horno con la puerta abierta, 

ya que el funcionamiento con la puerta abierta puede 

resultar en una exposición dañina de energía de 

PLFURRQGD(VLPSRUWDQWHTXHQDGLHDOWHUHQLMXHJXH

con los cierres de seguridad.

(b) No coloque 

QLQJ~QREMHWRHQWUHODSDUWHIURQWDOGHO

horno y la puerta, tampoco permita que se acumulen 

en las superficies de sello residuos de sucio o de 

limpiadores.

(c)   No opere el horno si está dañado.  Es particularmente 

importante que la puerta del horno cierre 

adecuadamente y que no exista daño en:
(1) La puerta (doblada)

 %LVDJUDV\DOGDEDVTXHEUDGDVRIORMDV

(3)   Sellos de la puerta y superficies de sello.

(d)   El horno no debe

VHUDMXVWDGRRUHSDUDGRSRUFXDOTXLHU

persona a excepción del personal de servicio calificado.

Horno Advantium

INSTRUCCIONES IMPORTANTES DE SEGURIDAD

PRECAUCIONES DE SEGURIDAD

ADVERTENCIA


Para reducir el riesgo de quemaduras, descargas eléctricas, 

incendio, lesiones a personas o una exposición excesiva a energía de 

microondas: 

„


Lea todas las instrucciones antes de utilizar este 

aparato. 

„


Lea y obedezca las precauciones específicas en la sección 

de PRECAUCIONES PARA EVITAR POSIBLE EXPOSICIÓN A UNA 

ENERGÍA EXCESIVA DE MICROONDAS de arriba.

„

 Asegúrese que su aparato esté debidamente instalado y 

puesto a tierra por un técnico calificado de acuerdo con 

las instrucciones de instalación suministradas.

„

 Instale y coloque este aparato de acuerdo con las 

Instrucciones de Instalación suministradas.

„

 Algunos productos como huevos enteros yrecipientes 

VHOODGRV²SRUHMHPSORERWHVVHOODGRV²SXHGHQH[SORWDU

y no deben calentarse en este horno. Si lo utiliza de esta 

manera puede resultar en una lesión.

„

No monte este aparato arriba del fregadero. 

„

Este horno no está aprobado ni probado parauso marino. 

„

Este horno está aprobado UL para una instalación de 

pared estándar, arriba de 36 pulg.

„

 No usar este electrodoméstico si no funciona 

correctamente o si ha resultado dañado o se ha caído.

„

 Como con cualquier otro aparato, se requiere una cercana 

supervisión cuando seautilizado por niños.

„

 Utilice este aparato sólo para los fines descritos en este 

manual.

„

 No utilice químicos corrosivos o vapores en este aparato.

„

Este horno está específicamente diseñado para calentar, 

deshidratar y cocinar alimentos, no se diseñó para uso en 

laboratorios o para uso industrial.

„

 Este aparato sólo debe ser reparado por personal de 

servicio calificado. Contacte a la empresa de servicio 

DXWRUL]DGDSDUDODUHYLVLyQUHSDUDFLyQRDMXVWHGHHVWH

aparato.

„

 No cubra ni bloquee ninguna abertura delaparato.

„

 No guarde este aparato en el exterior. No loutilice cerca 

GHODJXD²SRUHMHPSORHQXQVyWDQRPRMDGRFHUFDGH

una piscina, cerca de un grifo o en ubicaciones similares.

„

 Vea las instrucciones de limpieza de la superficie de la 

puerta en la sección de Cuidado y Limpieza del Horno, en 

este manual.

„

 Para reducir el riesgo de incendio en la cavidad del horno: 

³ 1RFRFLQHGHPiVORVDOLPHQWRV3UHVWHDWHQFLyQDODSDUDWR

cuando se coloquen papel, plástico u otros materiales 

combustibles dentro del horno durante la cocción. 

³ 4XLWHORVJDQFKLWRVGHDODPEUH\ODVPDQLMDVGHPHWDOGHORV

recipientes de papel o de plástico antes de colocarlos en el 

horno. 

³ 1RXWLOLFHHOKRUQRSDUDDOPDFHQDUHOHPHQWRV1RGHMH

productos de papel, utensilios de cocina o alimentos en el 

horno cuando no lo esté usando. 

³ 1RXWLOLFHODVIXQFLRQHVGHOVHQVRUGRVYHFHVVHJXLGDVHQOD

misma porción de comida.  Si los alimentos no se cocinaron 

después de la primera cuenta regresiva, utilice COOK BY 

TIME (cocinar por tiempo) para obtener tiempo de cocción 

adicional. 

³ 1RXVHHOKRUQRSDUDVHFDUSHULyGLFRV
³ 6LORVPDWHULDOHVXELFDGRVGHQWURGHOKRUQRVHSUHQGHQ

fuego, mantenga cerrada la puerta del horno, apáguelo y 

desconecte el cable eléctrico, o corte la energía desde el panel 

de fusibles o del interruptor de circuitos.  Si se abre la puerta, 

el fuego puede propagarse. 

GUARDE ESTAS INSTRUCCIONES

Al utilizar aparatos eléctricos, se deben seguir precauciones básicas de seguridad, 

incluyendo las siguientes:

Summary of Contents for Advantium ZSC2201

Page 1: ...Owner s Manual Advantium 240V Speedcook Oven For Models ZSC2201 ZSC2202 49 40737 1 04 16 GE monogram com...

Page 2: ...Repeat last 22 Resume feature 22 Speedcook cookware 18 Speedcook safe cookware 8 9 Things that are normal 17 Using the pre set speedcook menu 21 Other Cooking Functions Broiling and toasting 26 Conve...

Page 3: ...eople who serviced your appliance Explain why you are not pleased In most cases this will solve the problem NEXT if you are still not pleased write all the GHWDLOV LQFOXGLQJ RXU SKRQH QXPEHU WR Manage...

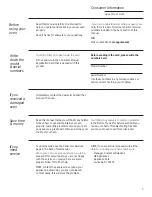
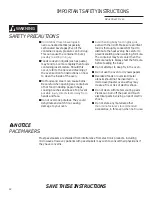
Page 4: ...en cavity R QRW RYHUFRRN IRRG DUHIXOO DWWHQG DSSOLDQFH when paper plastic or other combustible materials are placed inside the oven while cooking 5HPRYH ZLUH WZLVW WLHV DQG PHWDO KDQGOHV IURP SDSHU or...

Page 5: ...este electrodom stico si no funciona correctamente o si ha resultado da ado o se ha ca do Como con cualquier otro aparato se requiere una cercana supervisi n cuando seautilizado por ni os Utilice este...

Page 6: ...NSTRUCTIONS When microwaving place all foods and containers on the clear glass tray Do not pop popcorn in your oven unless in a special microwave popcorn accessory or unless you use popcorn labeled fo...

Page 7: ...onar el horno sin el plato giratorio en su lugar El plato giratorio no debe tener ninguna clase de bloqueo para que pueda girar Durante y despu s del uso no toque o GHMH TXH VX YHVWLPHQWD X RWURV PDWH...

Page 8: ...and door will get very hot when convection baking broiling warming or toasting Cookware will become hot Oven mitts will be needed to handle the cookware Do not cover dishes or use plastic containers p...

Page 9: ...tostar coloquela comida directamenteen la EDQGHMD GH PHWDO El horno y la puerta se calentar n al hornear con convecci n asar calentar otostar Los recipientes se calentar n Necesitar guantes para mani...

Page 10: ...vent plastic wrap so steam can escape Not all plastic wrap is suitable for use in microwave ovens Check the package for proper use Boilable cooking pouches and tightly closed plastic bags should be s...

Page 11: ...para el horno microonda Reviseel empaque para utilizarlo adecuadamente Las bolsas de cocimiento para hervir y las bolsas pl sticas herm ticas deben cortarse pincharse o ventilarse siguiendo las instru...

Page 12: ...all infant food is thoroughly cooked Stir food to distribute the heat evenly Be careful to prevent scalding when warming formula The container may feel cooler than the formula really is Always test t...

Page 13: ...tar comida para beb s en frascos de vidrio incluso sin la tapa Aseg rese de que las comidas para infantes est n totalmente cocinadas Revuelva la comida para distribuir el calor GH IRUPD SDUHMD VHJ UHV...

Page 14: ...tem and ceramic heater assist in the cooking with a microwave boost added in some cooking algorithms Food cooks evenly and fast retaining its natural moisture Getting to know the Advantium 14 The Adva...

Page 15: ...hen convection baking on two levels Clear Glass Tray Place on turntable when using microwave features Place food or microwave safe cookware directly on tray Upper Halogen Lamps Two 1200W halogen lamps...

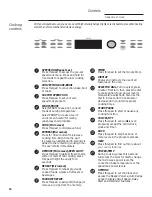
Page 16: ...s pad to light the cavity for 4 seconds REHEAT Microwave Press this pad to reheat previously cooked foods a plate of leftovers or beverages FAVORITE RECIPE Press this pad to add edit change or remove...

Page 17: ...oltage level in your KRPH DQG DGMXVWV WKH FRRNLQJ WLPH XS RU down for proper cooking Cooling Fans The fans will be on during cooking At the end of cooking the fans may continue to run for a short time...

Page 18: ...ok cookware Follow cookware suggestions on the oven display or in the Cookbook or Cooking Guide Cookware will become hot Oven mitts will be needed to handle the cookware Place food directly on the met...

Page 19: ...hen you first plug in the oven or after a power outage 1 Turn the selector dial to set the hour Press the dial to enter 2 Turn the dial to set the minute Press the dial to enter 3 Turn the dial to sel...

Page 20: ...crease or counterclockwise to decrease the upper power level Press the dial to enter 4 Turn the dial to change the lower power level Press the dial to enter 5 Turn the dial to change the microwave pow...

Page 21: ...boxed Texas Toast Breakfast Bagels frozen Belgian Waffles Breakfast Burritos Breakfast Pizza Coffee Cake French Toast Hashbrown Patties Pancakes frozen Rolls refrigerated Sausage Biscuit Sausage Stru...

Page 22: ...l to enter 6 Turn the dial to set the convection power level Press the dial to enter 7 Press the START PAUSE pad or press the selector dial to start cooking For power level and cooking time suggestion...

Page 23: ...ps 5 SELECT COOK TIME appears Turn the dial to select the cooking time Press the dial to enter The display will prompt you to select the power level s 6 Turn the dial clockwise to increase or counterc...

Page 24: ...ings appear 5 Press the dial to edit 6 The display will prompt you to select the power level s and edit the name Turn the dial and press to enter the appropriate settings For power level and cooking t...

Page 25: ...at go directly onto the metal tray do not place the tray into the oven during preheat Place the food directly onto the tray and place the metal tray with food onto the turntable after the oven is fini...

Page 26: ...e Use the metal tray when toasting and the metal tray or metal grill tray when broiling The turntable must always be in place when using the oven Put food directly on the metal tray or the metal grill...

Page 27: ...160 195 F HIGH 195 230 F 4 Turn the dial to select the level of moisture you want See the chart and tips below Press the dial to enter If the oven door is opened during warming PAUSE will appear in t...

Page 28: ...that are normal Interference TV radio interference might be noticed while using the microwave similar to the interference caused by other small appliances It does not indicate a problem with the micr...

Page 29: ...to start cooking You can change the power level before or during a cooking program Here are some examples of uses for various power levels High 10 Fish bacon vegetables boiling liquids Med High 7 Gent...

Page 30: ...or more than one hour after defrosting Room temperature promotes the growth of harmful bacteria For more even defrosting of larger foods such as roasts use DEFROST BY TIME Be sure large meats are comp...

Page 31: ...the Conversion Guide at right For example dial 1 2 for 1 2 pounds 1 pound 3 oz Press the dial to enter 6 Press the dial or START PAUSE pad to start defrosting 7 Turn the food over when the oven signal...

Page 32: ...rowave safe containers and cover them with lids or vented plastic wrap Never use tight sealing plastic FRQWDLQHUV WKH FDQ SUHYHQW VWHDP from escaping and cause food to overcook Be sure the outside of...

Page 33: ...ave been cooking and the oven is hot it may indicate that it is too hot for sensor cooking In that case the oven will automatically change to time cooking and may prompt for weights or amounts of food...

Page 34: ...tart allows you to set the oven to delay cooking up to 24 hours Press the OPTIONS pad turn the dial to select DELAY START and press the dial to enter Follow the display directions to set the Delay Sta...

Page 35: ...oof Features found in the HELP function Other Advantium Features Advantium Oven Use this feature anytime you need a general purpose timer It can even be used while cooking in the oven 1 Press the TIME...

Page 36: ...ssory storage drawer Never use a commercial oven cleaner on any part of your oven or the accessory storage drawer Do not clean the inside of the oven or the accessory storage drawer with metal scourin...

Page 37: ...halogen lamp cover must be kept free of grease and food spatterings in order to operate effectively Clean the lamp glass cover and mica sheet often to avoid excess smoking and decreased cooking power...

Page 38: ...p sponge Dry thoroughly Do not use cleaning sprays large amounts of soap and ZDWHU DEUDVLYHV RU VKDUS REMHFWV RQ WKH SDQHO WKH FDQ GDPDJH LW Door Seal W V LPSRUWDQW WR NHHS WKH DUHD clean where the do...

Page 39: ...rmal These sounds are normal unusual sounds The control is turning while cooking the components on and off Fan noise is normal These sounds are normal Fans are required to keep the oven components and...

Page 40: ...s START PAUSE not pressed after entering cooking selection Another selection already Press CANCEL OFF entered in oven and CANCEL OFF pad not pressed to cancel it Size quantity or cooking Make sure you...

Page 41: ...41 Advantium Oven Notes...

Page 42: ...42 Advantium Oven Notes...

Page 43: ...vice Contracts In the USA 800 626 2224 In Canada 800 561 3344 You can have the secure feeling that GE Appliances Consumer Service will still be there after your ZDUUDQW H SLUHV 3XUFKDVH D SSOLDQFHV FR...

Page 44: ...Servicer is not available you may be responsible for a trip charge or you may be required to bring the product to an Authorized GE Appliances Service Location for service In Alaska the warranty exclu...

Reviews: