background image

AUTO DEFROST

Auto Defrost

With the Auto Defrost feature,

Use the Auto Defrost Guide on the

The oven calculates defrosting

the oven  automatically sets the

next page. Enter the food weight in

time and changes power levels

defrosting times and power

pounds and tenths of a pound (see

during defrosting to give even

levels for you.

Conversion Guide below). Then

defrosting results.

touch START pad.

How to Set Auto Defrost

Before you begin, check the guide located at front
of oven when you open the door. 

It 

shows minimum

and maximum food weights for a variety of foods.
You will need to know your food weight before
setting Auto Defrost.

Step 1: Remove food from package, place in oven on
microwave-safe dish and close door.

Step 2: Touch the AUTO

❑ 

mEmm

Step 

3: 

Enter weight. For

❑ 

m m m m

example, touch number pads 1
and 2 for weight of 1.2 pounds
(1 pound, 3 ounces. See
Conversion Guide below.)

Step 

4: 

Touch START pad.


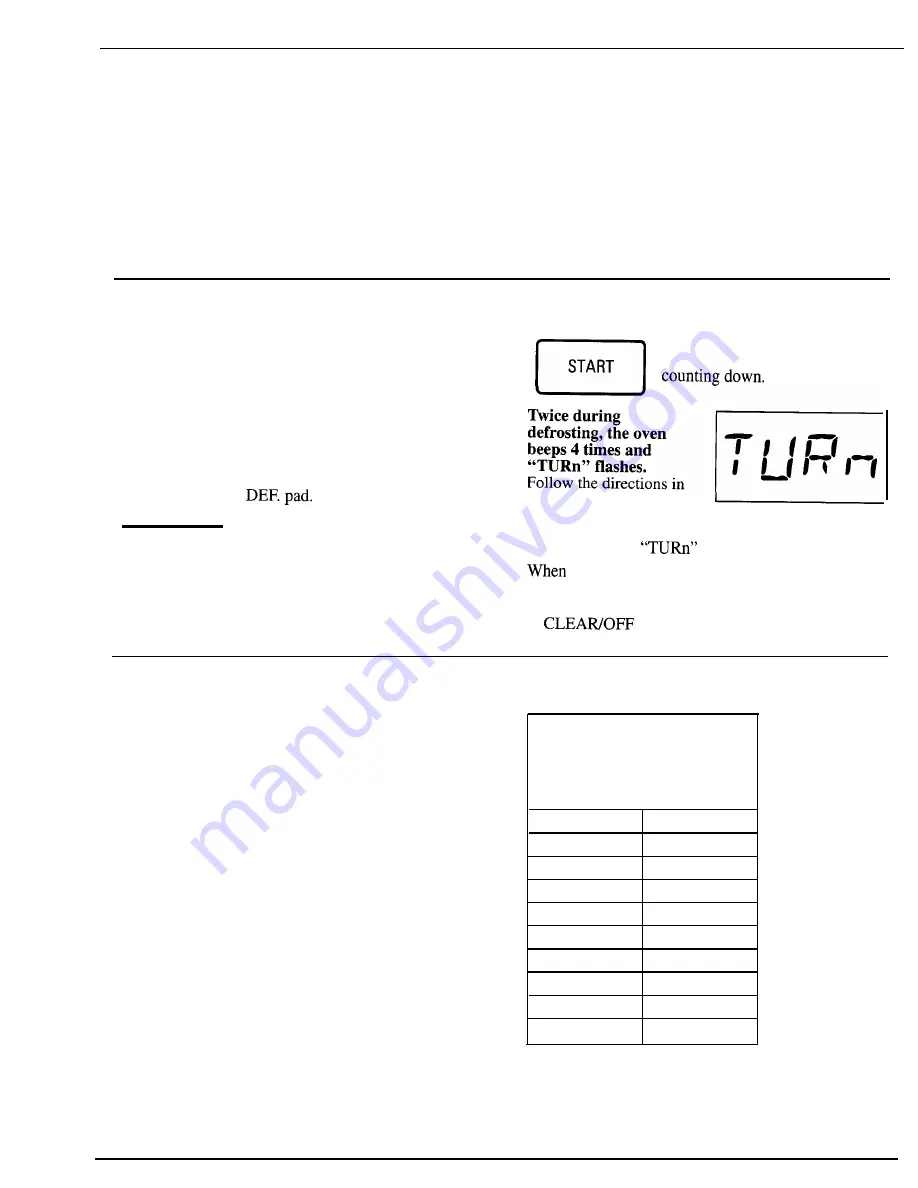
Display shows defrost time

defrosting, the oven
beeps 4 times and

Follow the directions in
the Auto Defrost Guide 
for what to do at the first and second signal. Then
close the door and touch START. (Defrosting

continues during 

 display.)

 defrosting time is completed, “End” flashes

and oven beeps 4 times. “End” remains on display
and oven beeps every minute until door is opened
or 

 pad is touched.

Stand Time

Conversion Guide

After Auto Defrosting, meat needs to stand in order to
let the inside defrost. You may take the food out of the

If the weight of food is stated in

oven if you wish. Stand time recommendations are

pounds and ounces, the ounces

given in the guide on the next page.

must be converted to tenths

(.1) of a pound.

Ounces

Pounds

1-2

.1

3

.2

4-5

.3

6-7

.4

8

.5

9-1o

.6

11

.7

12-13

.8

14-15

.9

16

Summary of Contents for Spacemaker II JEM33M

Page 1: ...Monogam zz Use and Care Guide forJEM33M JEM34M Spacemaker IITM Microwave en Momgam Miuowave m ...

Page 2: ...maintain your microwave oven properly Contents Adapter Plugs 34 Add 30 Seconds 13 Aluminum Foil 5 17 28 Appliance Registration 3 Auto Cook 22_26 Auto Defrost 16 17 Auto Reheat 21 22 26 Auto Roast 18 19 Auto Simmer 19 Auto Start 13 Automatic Cooking Control Guide 24 25 Care and Cleaning 32 33 Clock 8 Consumer Services 38 Containers and Covers 26 Control panel 8 9 Cooking by Time 12 13 Cooking Compl...

Page 3: ...ocation of your This appliance must be re stered Please be certain microwave oven should a need occur for adjustments that it is Your supplier is responsible for registering you as the Write to GE Appliances Range Product Service owner Please check with your supplier to be sure he Appliance Park Louisville KY 40225 has done so also send in your Consumer Product Ownership Registration Card If you m...

Page 4: ...f paper plastic or other combustible of lights blowing of fuse or tripping of circuit materials are placed inside the oven to facilitate breaker cooking Remove wire twist ties from paper or plastic bags before pIacing bags in oven Do not mount this appliance over a sink Install or locate this appliance otiy in accordance with Do not use your microwave oven to dry be provided Inst lation Instructio...

Page 5: ...ions without their lids especially meat and egg as are glass or ceramic materials and may soften mixtures or char if subjected to short periods of overcooking In longer exposures to overcooking o Don t d frost frozen beverages in narrow the food and cookware could ignit For these necked botdes especially carbona od beverages reasons 1 Use microwave safe plastics only and Even if the container is o...

Page 6: ...nder pouches and boxes To prevent A t 1 fifi ihl iniu direct steam away ii n possiblY Du lluL w A sv aShC StOrage containers The shelf artiallY uncovered because they Use the shel 0111 men cooting with containers th plastic wrap rem e covering Be sure that the SIIC1l ID inside the oven to preven Q uct uallI elullY anu Gct stem away f om hands USe o f s h e l f w i t h p ld face popGorn feature Aut...

Page 7: ... the dish is microwave safe Some microwaved foods require stirring rotating or rearranging Steam builds up pressure in foods which are tightly covered by a skin or membrane Pierce potatoes egg yolks and chicken livers to prevent bursting If you use a meat thermometer while cooking make sure it is safe for use in microwave ovens YOU ED SERVICE To obtain service see the Consumer Services page in NEX...

Page 8: ...o be used only with prepackaged microwave popcorn weighing 3 0 to 3 7 ounces EXPRESS COOK Touch the number 1 through 5 pads for 1 to 5 minutes of cooking at power level 10 For example touch 2 then START for 2 minutes at power level 10 9 CLOCK Touch this pad to enter time of day or check time of day while microwaving To set clock first touch CLOCK pad and then enter time of day For example if time ...

Page 9: ...ds using Add 30 Seconds pad to set the clock and to time kitchen tasks with the Minute Second Timer Create your own programs to suit your individual cooking style For example program a hold time between Time Defrost and Time Cook I II set Time Cook I II for a two stage program using different times and power levels or use the Minute Second Timer to delay the start of a cooking function such as Tem...

Page 10: ...Hold or Auto Roast Tem erature Probe Use with Tem Cook Hold and Auto Roast functions only DOUBLE DUTYTM Shelf Lets you microwave several foods at once See Safety Instructions and How to Use the Double DutyTM Shelf Food microwaves best when placed directly on the oven floor Use this shelf only when cooking foods on two levels Touch Control Panel and Display See Your Touch Control Panel section for ...

Page 11: ...n The timer signals when time is up enter number of minutes to delay cooking When delaying Temp Cook Hold or Auto Roast cooking be sure probe is in food Touch START Timer will count down to zero and cooking will begin How to Defrost Hold and Time Cook Let s say you want to defrost a frozen casserole for n Step 4 Set standing or hold time 15 minutes hold for 10 minutes and then Time Cook MI N SEC b...

Page 12: ...imer you must reset the timer to resume cooking How to Change Power Level 1 Press TIME COOK I II 2 Select cooking time 3 Press POWER LEVEL 4 Select power 5 Press START Using the Time Cook II Feature The Time Cook II feature lets you set two time cooking functions within one program This is ideal if you want to change power levels during your cooking operations Here s how to do it Step 1 Place food...

Page 13: ...Seconds feature ADD 30 provides a convenient way to SECONDS extend cooking time by 30 seconds while the oven timer is counting down It will add 30 seconds to the time shown each time the pad is touched How to Use Auto Start The Auto Start feature allows you to program your Step 2 Enter the time you want the oven to start oven to begin cooking at a preset time of day up Be sure your microwave oven ...

Page 14: ...ook Time If your favorite popcorn is not completely popped If your favorite popcorn is overcooked there is there is a simple adjustment you can make another adjustment you can make Touch the POPCORN pad and then touch number pad 9 The word POP will appear on the display with a plus sign beside it The plus sign indicates 20 seconds more cooking time is being provided Touch the POPCORN pad and then ...

Page 15: ...Step 5 Turn the package over close the door and repeat Steps 2 and 3 to set remaining hdf of defrosting time and touch START Step 6 When the oven signals and flashes End open the door remove the package and separate strawberries to finish defrosting Defrosting Tips Foods frozen in paper or plastic can be defrosted in For even defrosting some foods need to be broken the package up or separated part...

Page 16: ...ight For m m m m example touch number pads 1 and 2 for weight of 1 2 pounds 1 pound 3 ounces See Conversion Guide below Step 4 Touch START pad m Countingdown Display shows defrost time m defrosting the oven beeps 4 times and Follow the directions in the Auto Defrost Guide for what to do at the first and second signal Then close the door and touch START Defrosting continues during TURn display men ...

Page 17: ...over and shield 10 minutes run cold water in cavity Turkey Breast 0 1 6 0 lbs breast side up Shield where necessary 20 minutes in refrigerator run cold water in cavity Chicken Pieces 0 1 6 0 lbs Comish Hens whole 0 1 6 0 lbs Turn over Separate and remove defrosted pieces 5 minutes Remove wrapper and turn over 10 minutes run cold water in cavity I Comish Hens split 0 1 6 0 lbs Turn over 5 minutes I...

Page 18: ... and place in microwave safe dish Place meat in oven with probe to the right Insert cable end of probe firmly into receptacle on oven wall How to Auto Roast Beef to Medium Step 1 Touch AUTO ROAST pad Touch number pad 1 Touch n AUTO ROAST START See the Auto Roast Guide for complete list of P recommended codes NOTE By touching heAuToRoAsT m pad during cooking the meat s internal FOOO TEMP temperatur...

Page 19: ...switches to Hold at 180 F and continues E _ l I f q holding at 180 F until 1 you remove food and touch CLEAWOFF COOE pad If stirring is recommended you can restart oven by touching the START pad again Touch CLEAWOFF pad to turn off oven Automatic Simmer Guide Auto Roast Code 4 Food Beef Pot Roast Chili Chicken Stewing BroilerEmer Haflork Roast soup StocWegetable Split Pea 180 F 180 F 180 F 180 F 1...

Page 20: ...ttach probe securely in oven wall Close the door Step 2 Touch TEMP COOK m HOLDpad Step 3 Touch 1 6 and O for 160 F n Step 4 Touch POWER LEVEL POWER pad Touch 5 for medium power LEVEL o Step 5 Touch the START pad If START internal temperature of the roast is less than 90 F display will show COOL if temperature is 90 F or above display shows temperature counting up Step 6 When 160 F is reached the o...

Page 21: ...lates of leftover Foods Not Recommended Bread products foods that must be reheated uncovered foods that require constant attention and foods calling for a dry look or crisp surface after reheating should not be Auto Reheated It is best to use Time Cook I II Easy to Use Keep Door Closed Simply touch AUTO REHEAT and START Do not open the oven door while the word RHEAT is displayed steam escaping fro...

Page 22: ...ng for a dry look or crisp surface after cooking should not be Auto Cooked It is best to Time Cook them Foods that microwave best using the temperature probe should be Temp Cooked or Auto Roasted Easy to Use Keep Door Closed Simply touch three control pads AUTO COOK Do not open the oven door while the word AUTO desired code and START The word AUTO is displayed steam escaping from the oven can appe...

Page 23: ...to Adjust Auto Cook Codes to Suit Your Taste By simply adding a 1 after any Auto Cook code If you want a longer cooking time than a code number you can set the oven to cook for 2070 provides add a 9 after the code less time than the code would regularly provide For the chicken in the example at left code 49 would For example if code 4 cooks your chicken more done provide 20 longer cooking time tha...

Page 24: ... Microwave safe container matched to size of food Microwave safe container matched to size of food Microwave safe container matched to amount of food Plate or microwave safe container matched to amount of food Package tray or plate Pouch Tray Tray Package wrap or tray Package Be sure outside of container and inside of oven are dry After completion of Auto Cook cycle if food needs additional cookin...

Page 25: ...dish 2 qt oblong glass baking dish 2 qt oblong glass baking dish 2 qt oblong glass baking dish l qt casserole with lid Pouch on microwave safe plate 8 inch square dish 2 qt casserole with lid 1X to 2 qt casserole with lid 2 qt casserole with lid 4pprox Time 20 to 30 min 40 to 55 min 8 to 24 min 30 to 40 min 7 to 10 min 24 to 28 min 7 to 9 min 7 to 9 min 30 to 35 min 4 to 7 min 7 to 10 min 8 to 10 ...

Page 26: ...ailable use plastic wrap or wax paper Plastic wrap should be vented over food to allow for escaping steam Seal by pressing plastic wrap firmly around edges For frozen entrees in paperboard trays remove tray from box but do not remove film over tray Thick entrees may take longer to cook see the Automatic Cooking Control Guide For frozen foods in metal trays remove foil covering and baked goods rein...

Page 27: ... are not using it How to Reheat Several Different pes of Foods Together When heating several different types of food together foods which should be served hot must be placed on the shelf while foods which need only to be warmed should be placed on the oven floor This is because microwave energy enters the oven from the top only Also it is important to remember that foods absorb microwave energy at...

Page 28: ...g you use small strips of foil to shield thin parts such as the tips of wings and legs on poultry which would cook before larger parts Arcing Sparks caused by too much metal in the microwave oven or metal touching the side of the oven or foil that is not molded to food Prick Foods to Release Pressure Steam builds up pressure in foods that are tightly covered by a skin or membrane Prick foods such ...

Page 29: ...2 pieces 1 X to 3 min Hamburgers or meatloaf 4 oz per serving 1 to 2 servings 1 X to 3 min Hot dogs and sausages 1 to 2 1 2 to 1 min Nce and pasta 2 3 3 4 cup per serving 1 to 2 servings 1 2 to 3 min Saucy main dishes chop suey spaghetti creamed chicken 1 to 2 servings 2X to 5 min chili stew macaroni and cheese etc 3 4 1 cup per serving Steaks chops ribs meat pieces 1 to 2 servings 1X to 4 min Thi...

Page 30: ...ckage in oven Microwave just until franks can be separated Let stand 5 minutes if necess to complete defrosting Ground meat 1 lb 5 to 8 min Turn meat over after first half of time Roast beef lamb veal pork 10 to 16 min per lb Use Power Level Warm 1 Steaks chops and cutlets 5 to 10 min per lb Place unwrapped meat in cooking dish Turn over after first half of time and shield warm areas with foil Aft...

Page 31: ...king dish Cover with vented plastic wrap Rearrange after half of time In l qt casserole place 3 tablespoons water In l qt casserole place 1 4 cup water In I qt casserole place 2 tablespoons water Peel and cut into 1 inch cubes Place in 2 qt casserole with 1 2 cup water Stir after half of time Pierce with cooking fork Place on paper towel on glass cooking tray 1 inch apart in circular arrangement L...

Page 32: ...r dish may cause the grease to burn onto the oven tray This may be removed with a cleanser such as Bon Ami brand cleanser After using Bon Ami brand cleanser rinse and dry thoroughly following instructions on can Do not use Bon Ami brand cleanser on the painted surfaces such as the walls It may scratch the paint Automatic Temperature Probe Probe is sturdy but care should be taken in handling Do not...

Page 33: ... current This appliance is equipped with a wall receptacle power cord having a grounding wire with a grounding is encountered plug The plug must be plugged into an outlet that is it is your properly installed and grounded Fig 1 personal WARNING Improper use of the grounding responsibility and obligation plug can result in a risk of electric shock to have it Consult a qualified electrician or servi...

Page 34: ...apter ground terminal is very likely to break with repeated use Should this happen DO NOT USE the appliance until a proper ground has again been established Usage situations where appliance s power cord will be disconnected frequently Do not use an adapter plug in these situations because frequent disconnection of the power cord places undue strain on the adapter and leads to eventual failure of t...

Page 35: ...ROAST or AUTO COOK pad PRObE APPEARS Prabe has been forgotten or not seated properly in oven wdl when using Temp ON DISPLAY Cook Hold or Auto Roast functions Error APPEARS During Auto Cook Auto Reheat or Popcorn program lh door was opened before ON DISPLAY steam could be detected or steam was not detected in rnaimum time No steam was detected by sensor within foul minutes and 10 seconds after star...

Page 36: ...NOTES 36 ...

Page 37: ...NOTES 37 ...

Page 38: ... or speech who have Braille controls for a variety of access to a TDD or a conventional teletypewriter may Monogram appliances and a call 800 TDD GEAC 800 833 4322 to request brochure to assist in planning a information or service barrier free kitchen for persons with limited mobility To obtain these items free of charge call 800 626 2000 Service Contracts 80 626 2224 You can have the secure feeli...

Page 39: ...ring warranty period or beyond call 800 GE CARES 800 432 2737 WHAT IS NOT COVERED Service trips to your home to teach Replacement of house fuses or you how to use the product resetting of circuit breakers Read your Use and Care material If you then have any questions about operating the product please contact your dealer or our Consumer Affairs office at the address below or call toll free GE Answ...

Page 40: ...Pub N 494346 Part N 164 D258HP145 12 92 CG Genera E ectr c Company Lou sv l e KY40225 ...

Reviews: