


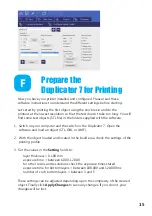


6. Place the vat on top of the LCD screen and tighten the retaining Z brackets down
to secure it
in place
. If you tighten it too much
,
the LCD screen will go white at
the edges.
The tray should not be able to be lifted up.
7. Slide the platform onto the platform arm and firmly tighten the central knob. Loosen
the 4 screws at the sides
,
so there is free movement of the platform up and
down
.
IMPORTANT
!
I
f these knobs are not completely loose
,
you could crush the
bottom screen when lowering it with the home function).
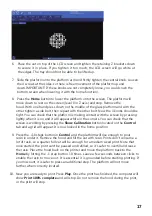
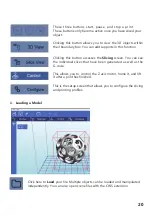
8. Press the
Home
button to lower the platform onto the screen. The platform will
move down to rest
on the screen (level 0 in Z axis.) and stop. Remove the
hood.
With one hand press down on the middle of the glass platform and with the
other tighten a side bolt, then repeat with the other bolt. Now the 3 knobs should be
tight. You can check that the platform is making contact with the screen by pressing
lightly when it is on and it will appear white in the corners. You can check
that
the
screen
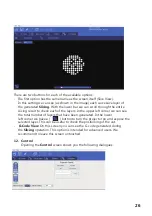
is working by pressing the
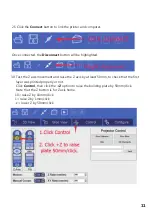
Show Calibration
button located
o
n the
Control
tab and
a grid will appear. It is now locked in the home position.
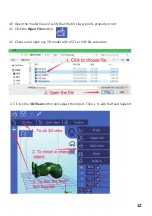
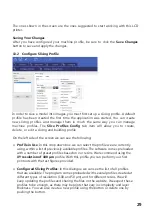
9. Press the +10 steps button in
Control
and the platform will rise enough
to pour
resin in under it. Remove the hood and fill the vat with resin. Prints don’t
consume a
lot of resin,
so
a quarter full vat will be enough for a medium sized print.
Note
that
once started, the print can’t be paused and refilled
,
so it’s safer to overfill and
reuse
the resin. Place the hood back on the printer and move the platform back to
the
Home
by hitting the -1 step button 10 times
. L
eave a few seconds between click
s
to
enable the resin to move out. It is essential it is grounded before starting printing
. I
f
you miscount
,
it is safer to press an additional step
. T
he platform will not move
further when correctly located.
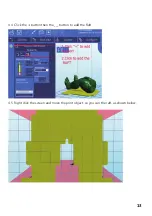
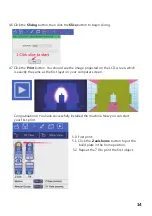
10. Now you are ready to print
. P
ress
Play
. Once the print has finished, the
c
omputer
will
show
Print 100% complete
and will stop. Do
n
o
t remove the hood during the
,
or the print will stop.
17
Summary of Contents for 21824
Page 1: ...MONOPRICE MP Cadet LCD Resin Printer P N 21824 User s Manual ...
Page 32: ......
Page 34: ......


