11
AUTO LEVELING
If the gap between the nozzle and the build platform is not correct, use the Auto Level
function to adjust the gap. You will want to perform Auto Leveling after you unbox the
printer or move it.
1.
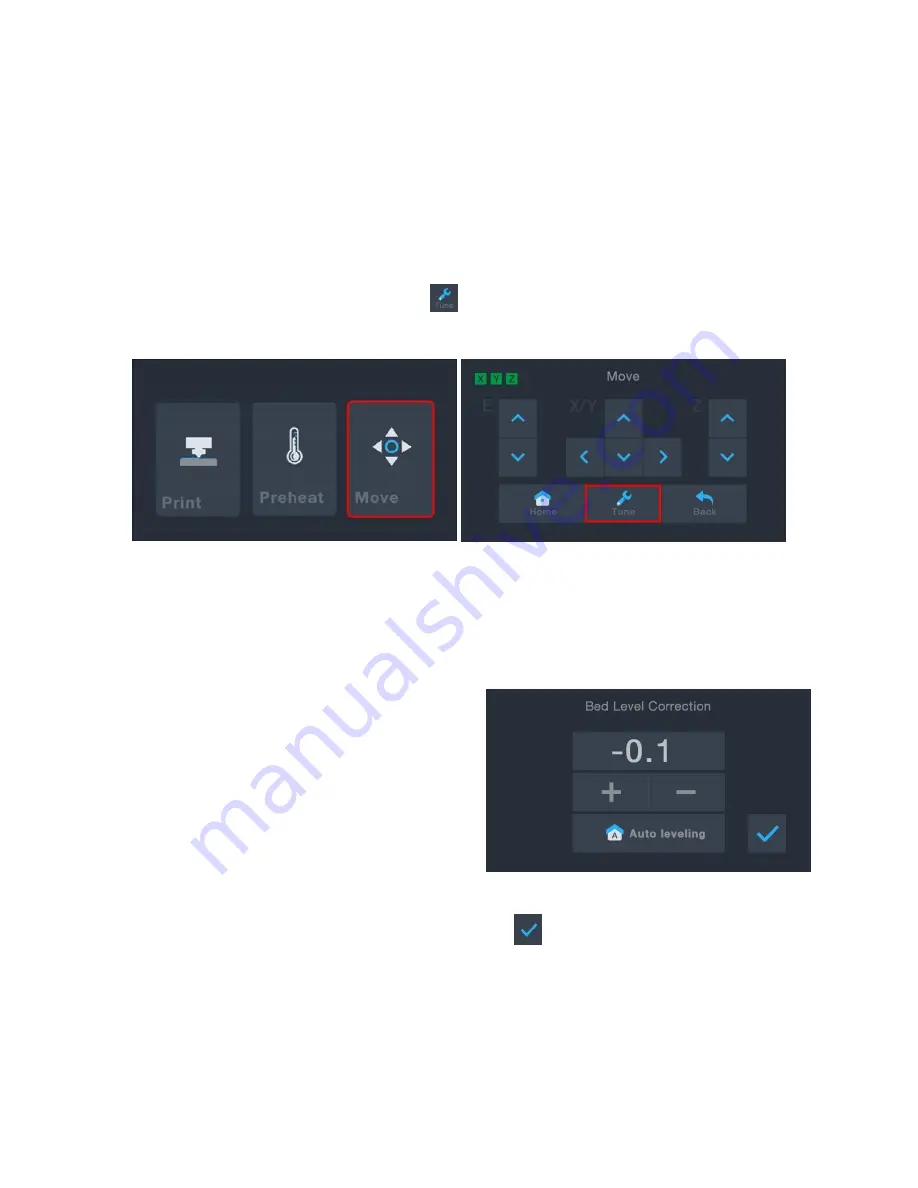
With the printer powered on and the Main Menu displayed, touch the Move button
on the Main Menu, then touch the
button to enter the Bed Level Correction
Menu.
2.
Touch the Auto leveling button. The printer will measure the distance between the
build platform and the nozzle and will automatically set the gap to the proper value.
3.
If you have added something to the build surface (e.g., glass sheet, steel sheet, etc.),
you will need to account for the thickness of the surface to prevent the extruder
from driving into it. With the ability to
adjust the offset locally in the menu
system, swapping surfaces is much
easier than managing the process
through software and sliced with the
model. If you wish to adjust the gap,
touch the + or - buttons.
Note that the
offset must be less than zero.
4.
Once the gap is where you want it, touch the
button to save the data and exit
the menu.


