background image

8

9

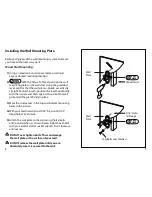
Installing the Wall Mounting Plate

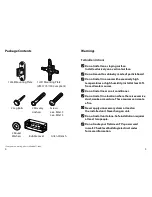
Remove all pieces of the wall mounting system to ensure 
you have all the necessary parts.

Wood Stud Mounting:

Using an electronic stud sensor, locate a wall stud  
at your desired mounting location.

�����

�����

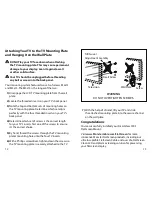
With the help of a friend, position the wall 

mounting plate on the wall stud. Using the provided 
level, confirm that the wall plate is plumb or vertically 
straight. For best results, position the level horizontally 
with the narrow end flush against the side of the wall 
plate. Hold the plate firmly in place.

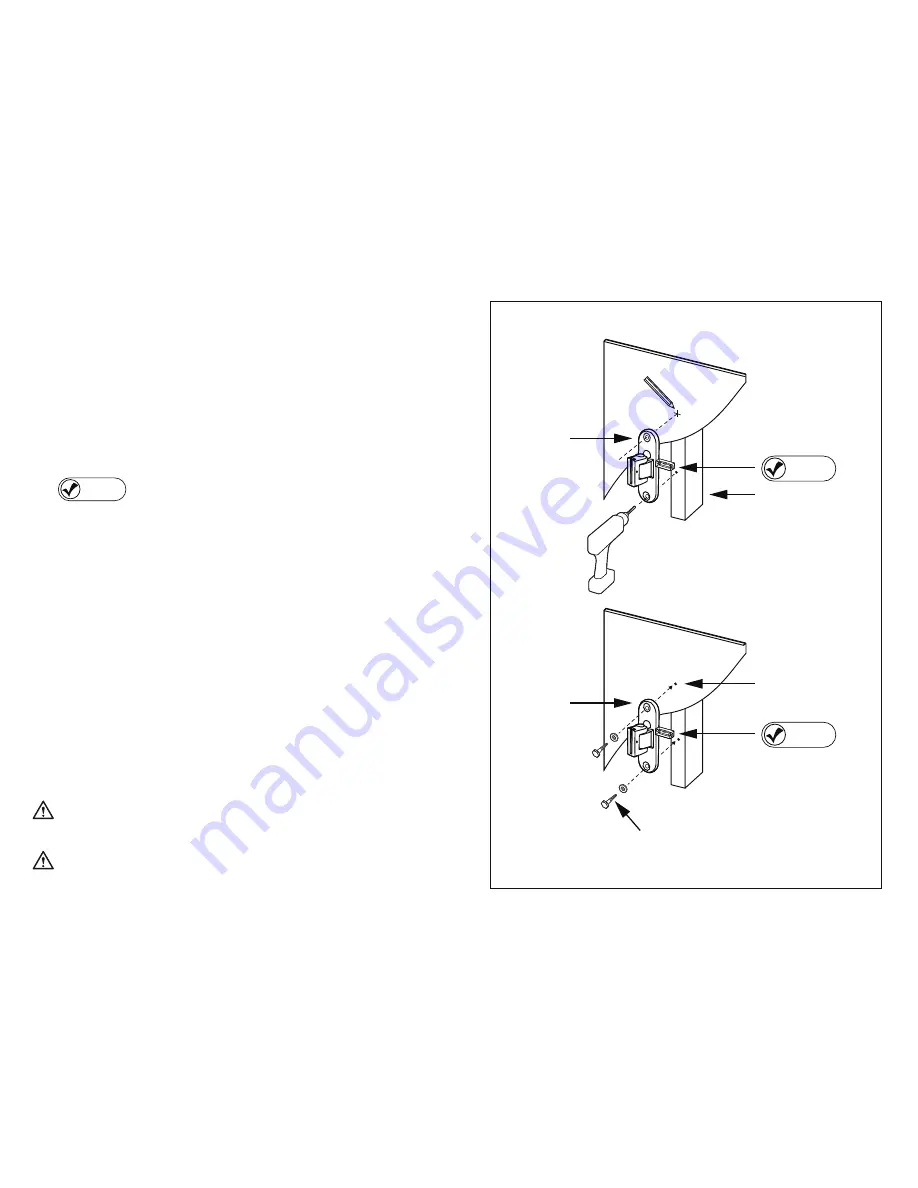
Mark the stud center in the top and bottom mounting 
holes with a pencil.

With your electrical drill and 3/16" bit, pre-drill a 3" 
deep hole at each mark.

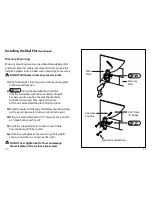
Attach the wall plate to the wall using the lag bolts  
and round washers as shown below. Tighten each bolt 
with your electric drill or socket wrench. Turn clockwise 
until secure.

 DO NOT over tighten bolts. This can damage  

the wall plate or the surface of your wall.

 DO NOT release the wall plate until you are 

absolutely sure it is secured to the wall.

1)

2)

3)

4)

5)

���������

�����
�����

�����
�����

���������������������

����������
���������

�����

�����

�����

�����

Summary of Contents for SmartView 300S

Page 1: ...USER GUIDE WARRANTY SmartView 300S FlatScreen Mount...

Page 2: ...practical AV solutions on the market so enthusiasts like yourself always experience the absolute best from their high performance AV components Monster FlatScreen Mounts deliver the clean sophisticate...

Page 3: ...rick solid concrete and concrete block Note The supplied hardware is not for steel stud walls If you are uncertain about the nature of your wall construction consult an installation contractor More Gr...

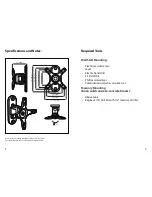
Page 4: ...subject to change without notice RequiredTools Wall Stud Mounting Electronic stud sensor Level Electric hand drill 3 16 drill bit Phillips screwdriver Combination wrenches or socket set Masonry Mounti...

Page 5: ...ion where there is excessive dust smoke or moisture These sources can create a re Never apply unnecessary stress or load on the installed unit Never hang on unit Do not install unit alone Safe install...

Page 6: ...ation have at least one wall stud Is your view of the mounting location free of glare or other obstructions Is the location of your wall stud or masonry surface suitable for repositioning your display...

Page 7: ...the level horizontally with the narrow end ush against the side of the wall plate Hold the plate rmly in place Mark the stud center in the top and bottom mounting holes with a pencil With your electr...

Page 8: ...ically straight For best results position the level horizontally with the narrow end ush against the side of the wall plate Hold the plate rmly in place Mark the centers of the top and bottom mounting...

Page 9: ...emove the black plastic cap in the center of the mounting plate revealing the OmniBall tension nut 13mm With a socket wrench 13mm or 1 2 turn the tension nut clockwise to limit pivot and rotation Turn...

Page 10: ...ed inserts on your TV s back panel Determine which set of screws is the correct length for your TV s inserts Test one of the screws to ensure it s the correct choice By hand thread the screws through...

Page 11: ...duct Defect or should have discovered it if such Product Defect was obvious then Monster will replace the Product with the same or a comparable product This Limited Warranty is valid during the lifeti...

Page 12: ...Notes Notes...

Page 13: ...0 8989 Monster Monster FlatScreen Mounts SmartView the Monster logo PowerProtect Clean Power SurgeGuard Monster FlatScreen Cables Monster Power Monster FlatScreen Clean Monster FlatScreen PowerCenter...

Reviews: