background image

4

© 2017 Monte Carlo Fan Company

10/2017

7

8

9

10

11

12

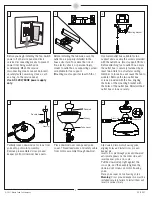
Install ball end of downrod into mounting 

bracket opening. Align (engage) slot on 

ball with tab on mounting bracket.

Warning:

 Failure to align slot on ball with 

tab may result in serious injury.

Important

: If using the angle mount, 

make sure open end of mounting bracket 

is installed facing the higher point of the 

ceiling and make sure the ceiling angle is 

not steeper than 30º. 

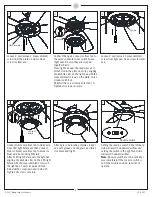
For Canadian installation and for USA fan 

and light kit combinations over 35 lbs, in 

both flush and downrod modes the safety 

cable must be installed into the house 

structure beams using 3” lag screws, 

washers and lock washers provided. 

Make sure that when the safety cable is 

fully extended the lead wires are longer 

than the cable and no stress is placed on 

the lead wires.

Note

: If Installing The Secondary Support 

Safety Cable in the U.S., Do Not Remove 
Knockouts In The Outlet Box.


Make wiring connections using wire 

connectors provided as indicated above.  

White from fan to White (Neutral) from 

house. Black and Blue from fan to Black 

(Live) from house. Connect all green 

grounded wires to Grounded wire from 

House. Make sure that no filaments are 

outside of the wire connectors.

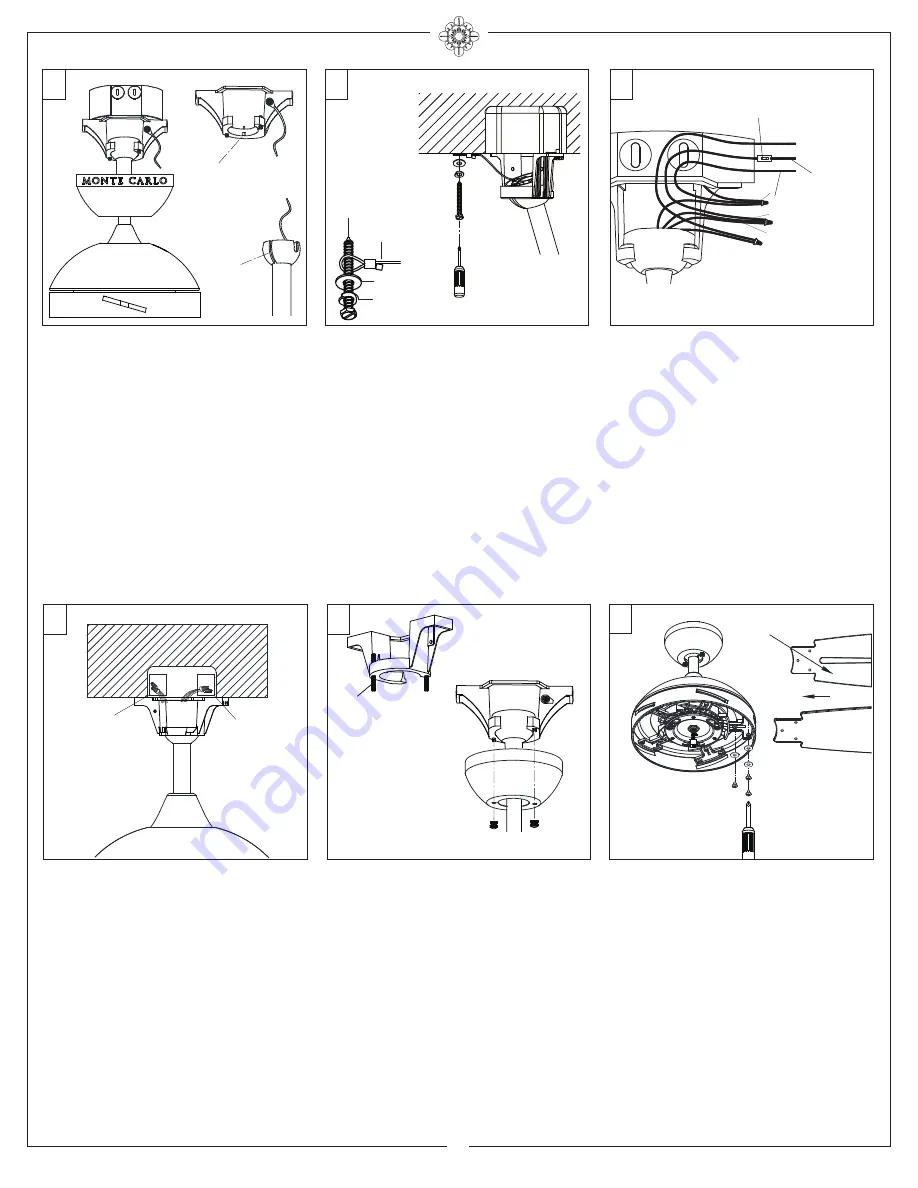
After making the wire connections, the wires 

should be spread apart with the grounded 

conductor and the equipment-grounding 

conductor on one side of the outlet box and 

ungrounded conductor on the other side of 

the outlet box. The splices after being made 

should be turned upward and pushed carefully 

up into the outlet box.              

Lift Canopy allowing the 2 studs to protrude 

through the canopy.

Install knurled nuts as shown. Tighten the 

knurled nuts securely. The canopy should 

adjust for any irregularity in the ceiling or 

Outlet box.

Make sure the studs protruding from the 

bottom of the Mounting bracket are installed 

with threads all the way through the bracket.    

Insert blade into the slot on flywheel.

Install blade with screws and washers 

provided, aligning each of the holes as 

shown and tighten all screws securely. 

Repeat this process for remaining blades.

Note

: Make sure the side with a label 

“This side up” is installed upward.

Tab

Slot

Stud

SAFETY CABLE INSTALLATION

Lag screw

Safety cable

Washer

Lock washer

Grounded

wires

Ungrounded

wires

Blade

Wall 

switch

Power

source

White

(Neutral)

Black

(Live)

Ground/Green

Black

Blue

White

This side up

Este lado hacia arriba

Haut

This side up

Este lado hacia arriba Haut

Summary of Contents for 5DIW52 Series

Page 1: ... DATE OF PURCHASE MODEL NUMBER RETAILER NAME RETAILER ADDRESS Attach sales receipt to this card and retain as your proof of purchase To register your fixture please visit our website www montecarlofans com 5DIW52XXXD Series Fan UL Model NO 5DIW52XXXD 9 3 kgs 20 5 lbs ...

Page 2: ... Of Fire Electric Shock or Personal Injury Mount To Outlet Box Marked Acceptable for Fan Support of 15 9 kg 35 lbs or less And Use Mounting Screws Provided With The Outlet Box CAUTION For Compliance with Local Codes and Regulations If Installing The Secondary Support Safety Cable in the U S Do Not Remove Knockouts In The Outlet Box Mount the secondary support safety cable through the reserved nail...

Page 3: ...s to a structural ceiling member a loose box will cause the fan to wobble Remove the two outlet box screws provided with the box aligning the holes of the mounting bracket with the holes of the outlet box Reinstall the 2 outlet box screws securely Partially loosen downrod set screws from yoke at top of motor assembly Remove preassembled cross pin and keeper pin from downrod Save parts Place downro...

Page 4: ...wires to Grounded wire from House Make sure that no filaments are outside of the wire connectors After making the wire connections the wires should be spread apart with the grounded conductor and the equipment grounding conductor on one side of the outlet box and ungrounded conductor on the other side of the outlet box The splices after being made should be turned upward and pushed carefully up in...

Page 5: ... by locating dimples in light pan with grooves on the glass and twist clockwise until tight Setting the reverse switch in the left hand side will result in downward airflow and setting the switch in the right hand side will result in upward airflow Note Reverse switch must be set either way completely If the reverse switch is set in the middle position fan will not operate Connect the quick connec...

Page 6: ...19 6 2017 Monte Carlo Fan Company 10 2017 Install fan and light kit pull chains to preassembled pull chains on fan Pull chains provided ...

Page 7: ... If this is a downrod mount fan make sure the ridge on mounting bracket engages the notch in the downrod ball 2 Make sure that canopy mounting bracket or mounting plate are tightened securely to 4 Check that all blade holders are tightened securely to motor 5 Most fan wobble problems are caused when blade levels are unequal Check this level by selecting a point on the ceiling above the tip of one ...

Page 8: ...Oct 2017 ...

Reviews: