background image

39

Installation

XG0228 - 021419

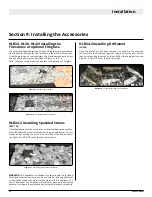
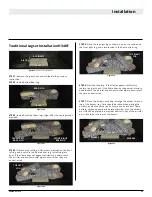
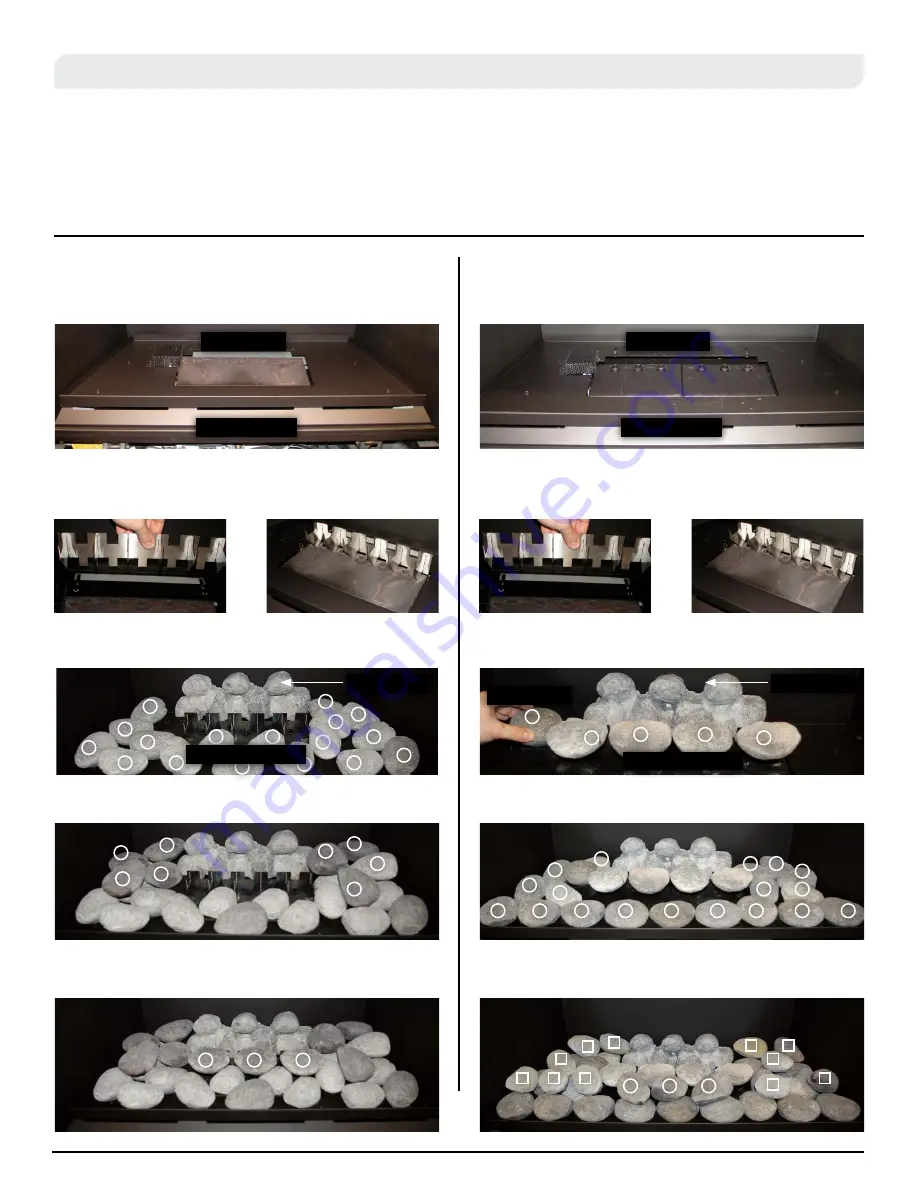
H38 Designer River Rocks Installation

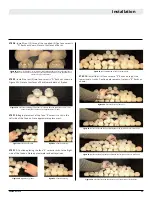
H42 Designer River Rocks Installation

STEP 2:

  Slide the rock guard locator tabs behind the Burner. The 

rocks on the Rock Guard should line up between the air 

inlets of the burner.

STEP 2:

  Slide the rock guard locator tabs behind the Burner. The 

rocks on the Rock Guard should line up between the air 

inlets of the burner.

STEP 3:

 Install Rear faux "A" ceramic 3 in1 Rock. Install Lower (17) 

seventeen Faux Rock "B"

STEP 3:

 Install Rear faux "A" ceramic 3 in1 Rock. Place the (4) four 

centre faux rocks "B" on the riser spikes. faux rock C on Pilot cover.

STEP 4:

 Install the Upper (8) eight Faux Rock "C" Note: place cut 

surfaces of Rocks face down on lower Rocks.

STEP 4:

 Place (18) eighteen faux rocks "D" as shown below.

STEP 5:

 Next step, install the Front (3) three Center Front Faux 

Rocks "D"

STEP 5:

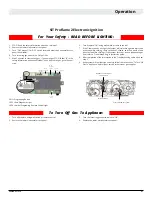
 Place three faux rocks "E" (shown circled). Place eleven 

faux rocks "F" (shown as squares)

STEP 1:

 Install the new Rock Tray and front cover. Make sure the 

tray is not sitting on top of the pilot.

STEP 1:

 Install the new Rock Tray and front cover. Make sure the 

tray is not sitting on top of the pilot.

FRONT COVER

FRONT COVER

ROCK TRAY

ROCK TRAY

FAUX ROCK A

FAUX ROCK A

FAUX ROCK C

Figure 26. 

 H38DF*'s  Fireplace Base.

Figure 27. 

 H42DF*'s  Fireplace Base.

Figure 26.b

Figure 27.b

Figure 26.c

Figure 27.c

Figure 26.d

Figure 27.d

FAUX ROCKS B

FAUX ROCKS B

Summary of Contents for H38

Page 1: ...ane Traditional H38DFNI NG Traditional H38DFLI Propane Traditional HL38DFN NG Linear Read and understand this manual Improper installation adjustment alteration service or maintenance can cause serious injury property damage or even death For assistance or additional information consult a qualified installer service agency or the gas supplier A barrier designed to reduce the risk of burns from the...

Page 2: ...ng Direct Vent assembly or glass doors Use of any component part not manufactured or approved by Montigo in combination with this Montigo fireplace system Installation other than as instructed in this manual Consult your local Gas Inspection Branch on installation requirements for factory built gas fireplaces Installation repairs should be done by a qualified contractor Introduction Safety Alert K...

Page 3: ...as line access 27 Section 6 Finishing 28 Mantels Surrounds 28 Fireplace Facing 28 H34 28 H38 28 Flush Finishing the Fireplace 28 H42 28 Finishing around the fireplace 29 Section 7 Screen Installation and Removal 30 Removing the Screen 30 To Install Screens 30 Replacement Screens 30 Section 8 Installing Removing the Door 31 Removing the door 31 Reinstalling the door 31 Section 9 Installing the Acce...

Page 4: ...lations mustconformtothelocalcodesor intheabsenceoflocalcodes to the current version of Canadian Electrical Code CSA C22 1 1 Installations in the USA must conform to the local codes or in the absence of local codes to the current version of National Fuel Gas Code ANSI Z223 1 NFPA 54 Electrical installations must conform to the local codes or in the absence of local codes to the current version of ...

Page 5: ...g installed fastened and secured in place maintaining proper clearance Firestops installed Exteriorwall roofflashinginstalledandsealedincompliancewithlocalbuildingcode Terminations installed and sealed in compliance with local building code Direct vent termination is highest point in vent assembly Wiring Electrical Section 4 Unswitched power provided to the appliance PPO box Low voltage wire conne...

Page 6: ...ectronic ignition Figure 1 1 Rating Plate for H34 IPI electronic ignition Figure 1 2 Rating Plate for H42 IPI electronic ignition LBA120x Distinction Series no CSA 27 02 2017 LBA120x Distinction Series no CSA 27 02 2017 LB1223 V5 2 SIT IPI with screen AUG 17 2015 ...

Page 7: ...EPRODUCTION IN PART OR AS A WHOLE WITHOUT THE WRITTEN PERMISSION OF CANADIAN HEATING PRODUCTS IS PROHIBITED PROPRIETARY AND CONFIDENTIAL November 24 2017 DATE H34 Dimentions Section 1 Product Dimensions Please review the Installation Checklist for general information on preparing for a successful installation of your fireplace Thefireplacemaybeinstalledinanylocationthatmaintains properclearancesto...

Page 8: ...N PERMISSION OF CANADIAN HEATING PRODUCTS IS PROHIBITED PROPRIETARY AND CONFIDENTIAL November 24 2017 DATE 671 26 7 16 894 35 3 16 959 37 3 4 134 5 1 4 928 36 1 2 123 4 13 16 947 37 5 16 725 28 1 2 911 35 7 8 464 18 1 4 273 10 3 4 86 3 3 8 POWER SUPPLY 974 38 5 16 51 2 513 20 3 16 479 18 7 8 288 11 5 16 GAS SUPPLY 998 39 5 16 176 6 15 16 203 8 127 5 288 11 3 8 H38DF HL38DF HW38DF DIMENSIONS TOLERA...

Page 9: ...valent wood or metal panel This material must extend the full width and depth of the appliance WARNING In Wall and Corner Dimensions 17 21 C L 7 4 Top View 5 5 22 Opening 1 33 4 7 26 17 Side View P N Q N M O 0 clearance to corners only DFN H34DFNE H34DFNI H34DFL H34DFLE DFLI HC34DFN HC34DFNE HC34DFNI 4DFL HC34DFLE HC34DFLI HL34DFLI DFNI HL34DFLI HR34DFN HR34DFNI 17 21 C L 7 4 Top View 5 5 22 Openi...

Page 10: ...f fireplace to a ceiling within the fireplace enclosure Note For mantel clearance please refer to Section 6 Finishing To avoid elevated mantel temperatures all H Series gas fireplaces are required to have the supplied standoffs installed The fireplace is supplied with two standoffs Bend and install these standoffs on top of the fireplace ensuring that the height of the standoff maintains a 8 clear...

Page 11: ...ensure that the termination is the highest point or to meet the venting guidelines laid out below please contact your Montigo dealer to discuss power venting options Notes For Planning Venting Ventingcanoriginatefromtheunitthroughthetoporthroughtherear Venting can terminate through the roof or through an exterior wall Refer to Appendix A Termination Locations to ensure the planned termination loca...

Page 12: ... two offsets each offset is made up of 2 90 bends may be made for vertical vent runs Firestops must be installed as required by National local codes Ensure all horizontal runs are supported with a minimum of 3 supports per 10 of venting Install all roof flashing and storm collars as shown Figure 6 Top vent roof mounted termi nation with no offset in vent run Figure 6 b Top vent Roof mounted with 1...

Page 13: ...lace hearth to the centre of the termination and the horizontal run from the fireplace flue collar to the wall flange of the termination Plot on the Venting Graph with an X If the X falls on or above the top boundary of the shaded area the installation is acceptable Wall mounted Terminations ThefollowingdetailsaresomepossibleconfigurationsforWallmounted terminations See below H34DFN VENT RUN Figur...

Page 14: ...zontal run from the fireplace flue collar to the wall flange of the termination Plot on the Venting Graph with an X If the X falls on or above the top boundary of the shaded area the installation is acceptable VENT RUN Figure 9 H 34DF Rear Vent Venting Graph for wall mounted terminations Figure 9 b Straight run Rear Vented wall mounted termination Figure 9 c Rear Vented wall mounted Multi elbow te...

Page 15: ...e flue collar to the wall flange of the termination Plot on the Venting Graph with an X If the X falls on or above the top boundary of the shaded area the installation is acceptable H38 TOP VENT RUN Example A Acceptable Installation If the vertical dimension from the hearth is 114 and the horizontal run to the wall flange of the vent termination is 168 this would be an acceptable installation Exam...

Page 16: ...rom the fireplace flue collar to the wall flange of the termination Plot on the Venting Graph with an X If the X falls on or above the top boundary of the shaded area the installation is acceptable H 42DF TOP VENT RUN Example A Acceptable Installation If the vertical dimension from the hearth is 84 and the horizontal run to the wall flange of the vent termination is 36 this would be an acceptable ...

Page 17: ...on from the hearth is 48 and the horizontal run to the wall flange of the vent termination is 96 this would not be an acceptable installation Example C Unacceptable Installation If the vertical dimension from the floor of the fireplace is 72 and the horizontal run to the wall flange of the vent termination is 120 this would not be an acceptable installation H38 Rear Venting Graph Measure the verti...

Page 18: ...rom the hearth is 48 and the horizontal run to the wall flange of the vent termination is 96 this would not be an acceptable installation Example C Unacceptable Installation If the vertical dimension from the floor of the fireplace is 72 and the horizontal run to the wall flange of the vent termination is 120 this would not be an acceptable installation H42 Rear Venting Graph Measure the vertical ...

Page 19: ...of angle required but must not exceed 45 45 or less Corner Installation 5 8 Use an PTO 4 termination and an PFL 1 or PFL 2 PFL 2 12 or 24 compressed length and a frame if appropriate Flex may be turned to obtain desired degree of angle required but must not exceed 45 NOTE The PFVK01 PFVK01F kit is available for top vent corner FLEX application NGonly TheKitincludesaheatshield aPFL 18 f f flexible ...

Page 20: ...erior side of the studs concrete or finished wall construction using a minimum of 4 screws 3 Insert the termination into the MOSR frame as shown here from the inside and attach to the MOSR by installing a min quantity of 4 bolts into the threaded nuts on the MOSR Frame Installation of termination frame at time of framing in masonry Terminations with a BSR frame allow the installation of the frame ...

Page 21: ...f m Section MEXT 3 36 f m Section MEXT 4 48 f m Section MEXT 6 72 f m Section 46DVA 06 6 Section 46DVA 09 9 Section 46DVA 12 12 Section 46DVA 18 18 Section 46DVA 24 24 Section 46DVA 36 36 Section 46DVA 48 48 Section 46DVA 60 60 Section E Rigid Pipe Extension EXT18 18 f f Section 46DVA 08A 8 Length 46DVA 16A 16 Length F Elbows MEL 90MM m m 90º Elbow MEL 90FF f f 90º Elbow MEL 90FM f m 90º Elbow MEL...

Page 22: ...DVA 08A 12 58DVA 16A 20 5DLT 12 5DLS1 12 5DLT2 20 5DSL2 20 5DAL 3 to 10 Rigid Telescopic Pipe 58DVA 17TA 58DVA 24TA 5DLA30 Elbows 5 8 Vent PEL 90MM m m 90º PEL 90FF f f 90º PEL 90FM f m 90º PEL 45FM f m 45º 58DVA E30 30 58DVA E45 45 58DVA E60 60 58DVA E90 90 5DE45 45 5DE90 90 5D45L 45 5D90L 90 Support Ring Plate PSPXT 8 58DVA DC 5CS Firestop FS 8 58DVA WFS 58DVA FS 5CS 5DFS Roof Flashing PRF 7 1 1...

Page 23: ...all sheetrock RHS10 Heat Shield inner Section RHS10 Heat Shield inner Section Vent pipe from fireplace Vent pipe from fireplace Combustible framing Combustible framing Combustible framing RHS10 Heat Shield Outer Section RHS10 Heat Shield Outer Section Termination Termination 3 8 min Inner shield Outer shield A A B Installing the included heat shield The included Heat shield CANNOT be used WITHIN 3...

Page 24: ...34DFNI HLB34DFLI 2 HW38DF I 2 HW42DFNI 2 1 5V AA type 1 5V AA type 1 5V AA type 1 5V AA type BLACK WHITE WHITE BLACK BLACK WHITE GREEN VARIABLE SPEED COMFORT FANS Lights ON OFF CONTROL MAIN Power 120VAC 60 Hz 6 Amps SPARK SENSOR RED BLACK BATTERY PACK MAIN ON OFF SWITCH YELLOW GREEN 5 PROFLAME PILOT B RNER ORANGE GREEN BLACK BROWN YELLOW ORANGE 6 10 6 B B Wht Wht OPTIONAL CPI IPI SWITCH BL E WHITE...

Page 25: ... 4 6 3 4 OPTIONAL CPI IPI SWITCH BLUE WHITE X1 X5 X4 X3 X2 LED Lights LED1 Red LED LED2 Amber LED 3 15A FUSE SW1 BLUE RED OPTIONAL X10 X11 X12 X13 MODELS H38DF I H42DF I HL38DF I HL42DF I BLACK LED LIGHTS LED1 RED LED LED2 AMBER LED MAIN Power 120vac 60 hz 6 amps 3 15A FUSE WHITE GREEN SPARK SENSOR BLUE BLUE OPTIONAL CPI IPI SWITCH WHITE RED MAIN ON OFF SWITCH BLACK RED 1 5V AA TYPE 1 5V AA TYPE 1...

Page 26: ...ially recovered as heat into the building so it does not use as much energy as running a pilot in the off season A connector is supplied with this unit that can be plugged into the wire harness connected to the controller This jumper cable gives the Remote Control the ability to operate the CPI IPI switch and set the unittooperateineithercondition CPImeans ContinuousPilotIgnition or Standing Pilot...

Page 27: ...en any areas where bubbling appears or a leak is detected until bubbling stops completely or leak is no longer detected DO NOT use a flame of any kind to test for leaks A fire or explosion will occur causing serious injury property damage or death DANGER When pressure testing the fireplace gas line and input system follow the appropriate local codes for your area DO NOT connect the fireplace to pr...

Page 28: ... of concrete board or tile installed directly on the face Please refer to the flush face finishing guide for more detailed instructions STANDARD FINISHING FLUSH FACE FINISHING PREFERRED STYLE 1 2 3 4 5 6 7 8 9 10 11 12 1 5 11 15 2 6 12 16 3 9 7 13 17 18 19 20 4 10 8 14 Vertical Height In Horizontal Run In Combustible header Non combustible facing Non combustible facing Top of frame Combustible fac...

Page 29: ... facing materials Finishing around the fireplace NOTE National Canadian Gas Association mantel test requirements are for fire hazard prevention to combustible materials Please be aware temperatures over the mantel will rise above normal room temperature and walls above fireplace may be hot to touch Side wall clearances are 3 Combustible surrounds may be installed with 3 clearance to the side of th...

Page 30: ...rned off Safety screens are mandatory and can reduce the risks of severe burns Please keep children away from the fireplace at all times CAUTION NOTICE Screen Bottom Tabs Screen Tab Receptacles Upper Screen Studs Upper Screen Stud Catch Left Side Detail Left Side Detail Removin The Safe To Remove t Simply gra outer corn with your finger and you Once Screen Stu an angle l from the lo which the Tabs...

Page 31: ...he remaining latches STEP 7 Grasp the door on either side usually midway and lift upward lift the door carefully up and away from the front of the fireplace Place the door aside in a safe place while maintenance and or cleaning is being performed Removing the door The doors are removed in a few simple steps Follow these below to remove the horizontal access panel unlatch the door buckles and remov...

Page 32: ...go burners and accessories Never install or add any additional or alternative media rock wool or other material in this appliance The use of additional or alternative materials may pose potential safety hazards damage to the appliance and void manufacturer s warranty HLB34 HL38 HL42 Installing the Firestones or optional Fireglass Theunitissuppliedwithfirestones Optionalfireglassmaybepurchased from...

Page 33: ... satisfactory replace the glass door If the flame does not appear satisfactory double check the air inlet and exhaust outlet pipe to ensure that they are unobstructed STEP 7 Place the Embers as shown Arrange the ember chips on top of the burner tray Care should be taken when placing the embers as blocked burner ports may cause an incorrect flame pattern carbon deposits and delayed ignition Also th...

Page 34: ...EP 3 Slide the rock guard locator tabs behind the Burner The rocks on the Rock Guard should line up between the air inlets of the burner STEP 4 Slide the rock guard locator tabs behind the Burner The rocks on the Rock Guard should line up between the air inlets of the burner Figure 23 H34DF s Fireplace Base Figure 23 e H34DF s Fireplace Base Figure 23 f Placement of faux ceramic rock B C Note decr...

Page 35: ...three faux D ceramic Rocks between burner and front of firebox frame flat surfaces of rock against the front of door opening and bottom pan of the fireplace Note similar size of rock diameters Figure 23 m Completed lower layer of ceramic Rock Figure 23 h Place the remaining 2 two faux D ceramic Rocks on top of faux the A 3 in 1 ceramic rock flat surfaces of rock against back of firebox Figure 23 n...

Page 36: ...aux Rock on top behind the pilot burner faux Rocks Figure 23 t Place the seventh Top faux Rock in the front Figure 23 u Place the eight Top faux Rock in the front to the Right of the last Rock Figure 23 v Completed faux Rock installation Note You may have to move or rotate the Top faux rocks to assure the best possible flame pat tern and effect ...

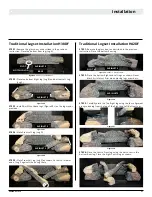
Page 37: ... the four alignment pins protruding from the top of the Right and Left Bottom Logs STEP 4 Place Front Left log Log D STEP 5 Place Front Left log Log F as shown Set notch in lower end of Log F against stile on Log Grate STEP 4 Place the Centre Front log using the notch cast in the Bottom Rear log Place the Right Centre log as shown STEP 1 Remove the glass door as described in the previous instructi...

Page 38: ...g E angle log with knot pointing outward toward front of Fireplace STEP 4 Rest the top log in the provided notch on top of the Top right log STEP 4 Place the Remaining two Front logs Log F Log G Space Logs evenly with log feature direction as shown STEP 5 Ember placement fill voids between front logs and along the front of the grate pan STEP 1 Remove the glass door as described in the previous ins...

Page 39: ...k C on Pilot cover STEP 4 Install the Upper 8 eight Faux Rock C Note place cut surfaces of Rocks face down on lower Rocks STEP 4 Place 18 eighteen faux rocks D as shown below STEP 5 Next step install the Front 3 three Center Front Faux Rocks D STEP 5 Place three faux rocks E shown circled Place eleven faux rocks F shown as squares STEP 1 Install the new Rock Tray and front cover Make sure the tray...

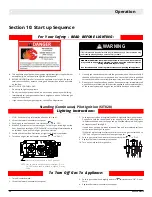
Page 40: ...OFF unless knob is pushed in slightly Do not force Standing Continuous Pilot Ignition SIT 820 with American Flame Electronic Ignition For Your Safety READ BEFORE LIGHTING C Use only your hand to push in or turn the gas control knob Never use tools If the knob will not push in or turn by hand don t try to repair it call a qualified service technician Force or attempt to repair may result in a fire ...

Page 41: ...truction guide 8 After completion of the information in the Troubleshooting section Repeat step 5 9 If the system will not function correctly follow the instructions To Turn Off Gas To Appliance and call your service technician or gas supplier 1 STOP Read the safety information above on this label 2 Remove the lower Horizontal access panel 3 Turn ON manual ON OFF switch located below the horizonta...

Page 42: ...oflame 2 Control Module 4 Wiring Harness 5 Variable Speed fans If applicable 7 Proflame 2 remote control 8 Battery Pack 9 Manual override switch NOTE Can not be used with home automation systems SW1 Programing Button LED1 Red Diagnostic Light LED2 Amber Programing Remote Control Light Blue back lit LCD display On Off key Thermostat key Up Down arrow key Mode key Not Used Not Used CPI mode optional...

Page 43: ... On the Fireplace With the system Off turn the master override switch to on and press the On Off Key on the Remote Control The Remote Control display will show some other active Icons on the screen At the same time the Control Module will activate the fireplace A single beep from the Control Module will confirm reception of the command Turn Off the Fireplace With the system On press the On Off Key...

Page 44: ...set point the Smart Function will modulate the flame down To activate the function press the Thermostat Key see Figure 27 j until the word SMART appears to the right of the temperature bulb graphic see Figure 27j NOTE When smart Thermostat is activated manual flame height adjustment is disabled Figure 27 i Setting Room Thermostat Figure 27 j Smart flame function Room Temperature Set Temperature Di...

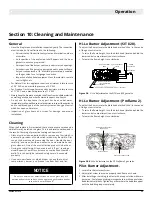
Page 45: ...is Kel Kem During the initial firing Silicone seals will off gas leaving a visual deposit of a white substance on combustion chamber walls This can easily be removed using normal household products Use a vacuum cleaner or whisk broom to keep the control compartment burner and firebox free from dust and lint Figure 28 Hi Lo Adjustment on the SIT Nova 820 gas valve Figure 28 b Hi Lo Adjustment on th...

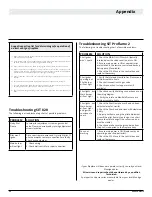
Page 46: ...le limits Pilot lights but Main burner will not Light and igniter continues to spark 1 Check the Pilot Flame Sensor Rod and clean with steel wool or similar 2 Check the Pilot hood and clean with steel wool if dirty 3 Adjust pilot flame using the pilot adjustment screw if the pilot flame is too long or too short Flame should fully engulf the sensor rod and must be stable 4 Check and make sure the g...

Page 47: ...ng RPTA03 Door RDTH34 RDTH38 RDTH42 Replacement Screen RSCH34 RSCH38 RSCH42 Replacement Parts List SIT IPI Proflame 2 Part H34DF HP38DF H38DF HL38DF HW38DF HP42DF H42DF HL42DF HW42DF Log Set RLGSH34 RLGSH38E RLGS47 N A RLGSHW38 RLGSH42E RLGSH42 N A RLGSHW42 NG Gas Valve with stepper motor RGC3033 Propane Gas Valve with stepper motor RGC3034 NG Pilot Assembly RPA035 Propane Pilot Assembly RPA036 Ig...

Page 48: ...mbustion air inlet to other appliance for appliance 100 000 BTU H 30 KW 12 inches 12 inches M clearance to forced air supply inlet 6 feet 3 feet above air inlet N clearance above paved sidewalk or paved driveway located on public property 7 feet 7 feet P clearance under veranda porch deck or balcony 22 inches to combustibles 16 inches to non combustibles 22 inches to combustibles 16 inches to non ...

Page 49: ... gas NG or liquefied petroleum LP only Burning conventional fireplace fuels such as wood coal or any other solid fuel will cause damage to the appliance produce excessive temperatures will result in a fire hazard and void all warranties This warranty is transferable The appliance must remain in its original place of installation to be valid If the components of the appliance covered by this warran...

Page 50: ...ritten consent of The Companies The Companies shall in no event be responsible for any warranty work done without first obtaining the Companies written consent The Companies employees and dealers have no authority to make any warranties to neither alter this warranty nor authorize any remedies in addition to or inconsistent with those stated within this warranty IF WARRANTY SERVICE IS NEEDED To ma...

Page 51: ...The sign shall read in print size no less than one half 1 2 inch in size GAS VENT DIRECTLY BELOW KEEP CLEAR OF ALL OBSTRUCTIONS Appendix C Amendment Gas Fireplace Equipment sold in the State of Massachusetts 5 08 Modifications to NFPA 54 Chapter 10 4 INSPECTION The state or local gas inspector of the side wall horizontally vented gas fueled equipment shall not approve the installation unless upon ...

Page 52: ...Installation Maintenance Manual XG0228 021419 H34 HLB34 HLB34 2 H38 HL38 HW38 H42 HL42 HW42 Indoor Direct Vent Gas Fireplace ...

Reviews: