Page 1
Part No. XG0105B
ME34-DV-2 Homefire
Installation
Removing and Installing
the Insert
You may
remove the insert
to protect it from theft and damage dur-
ing construction.
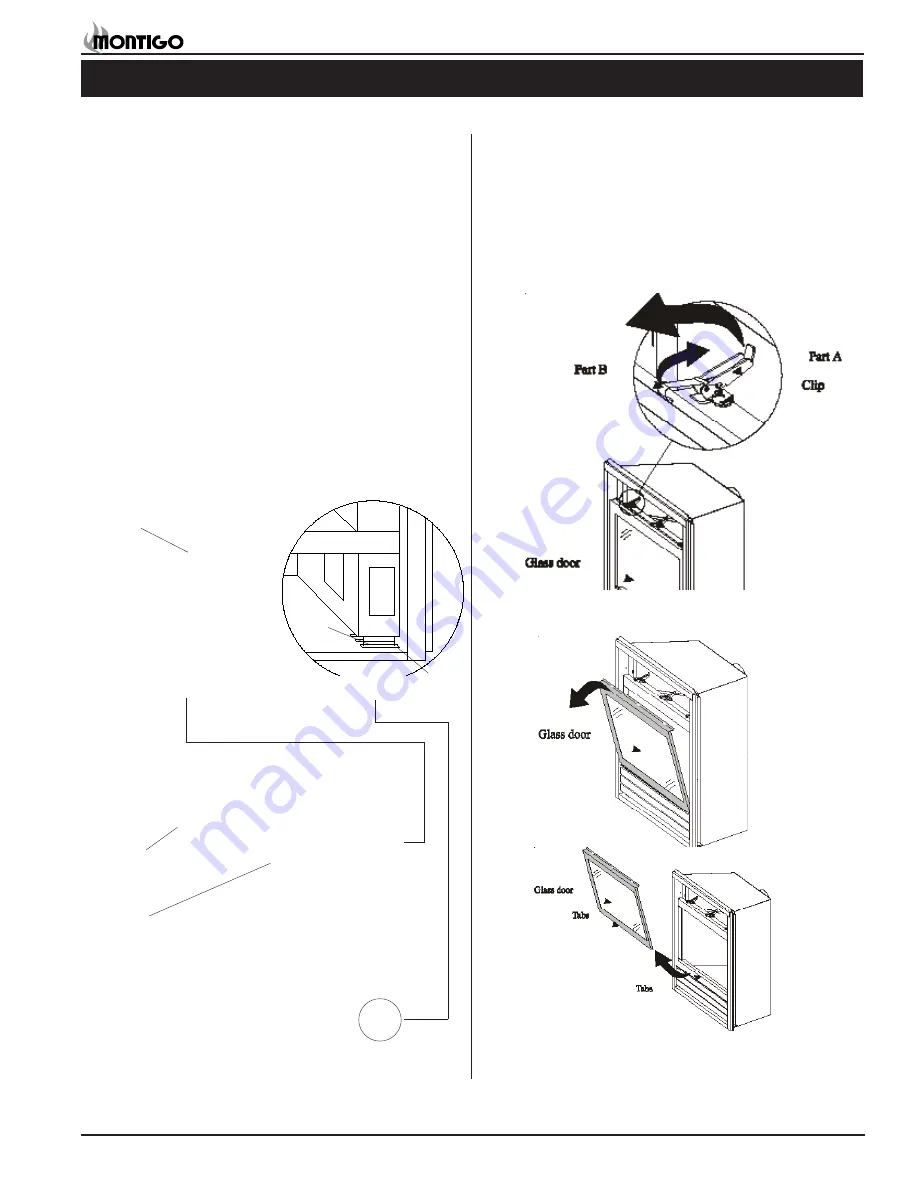
1.
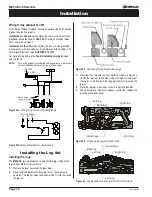
Remove the two machine screws (1 left & 1 right) at the top of the
insert that attach the insert to the shell.
See Inset 1.
2.
Remove the fresh air flex from the collars on the shell.
See Figure
25.
Important: Be careful not to damage the fresh air flex dur-
ing removal or storage.
3.
Remove the 4 machine screws that hold the venting plate to the
insert.
4
. Remove the insert by tipping the top of the insert outward and lift-
ing the tabs past the slots in the bottom of the shell.
See Inset 2.
Store the screws and clamps in a safe place to ensure that they are
not lost.
To
re-install the insert
simply reverse the steps above.
Figure 25.
ME34-DV-2 insert.
INSET 1
Tab
INSET 2
Mounting
Bracket
Fresh Air
Flex (4" dia.)
High temp.
silicone seal
Venting Plate
Front
Slot
Removing and Installing
the Door
Removing the Door:
Remove the trim (as described on the next page) to access the door
latches. Open the latches by pulling Part A upwards and towards
you to disengage Part B from the door. Lift Part B clear of the door.
Repeat for all three latches. Be sure to hold the door carefully so it
does not fall.
(See figure 26a.)
Once the three latches are unhinged, tilt the top of the door forward
and lift it out of the slots.
See figure 26b.
Figure 26a.
Operating the door latches.
Figure 26b.
Removing the door.


