background image

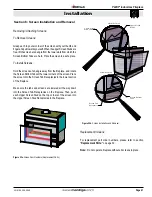
Section 6: Screen Installation and Removal

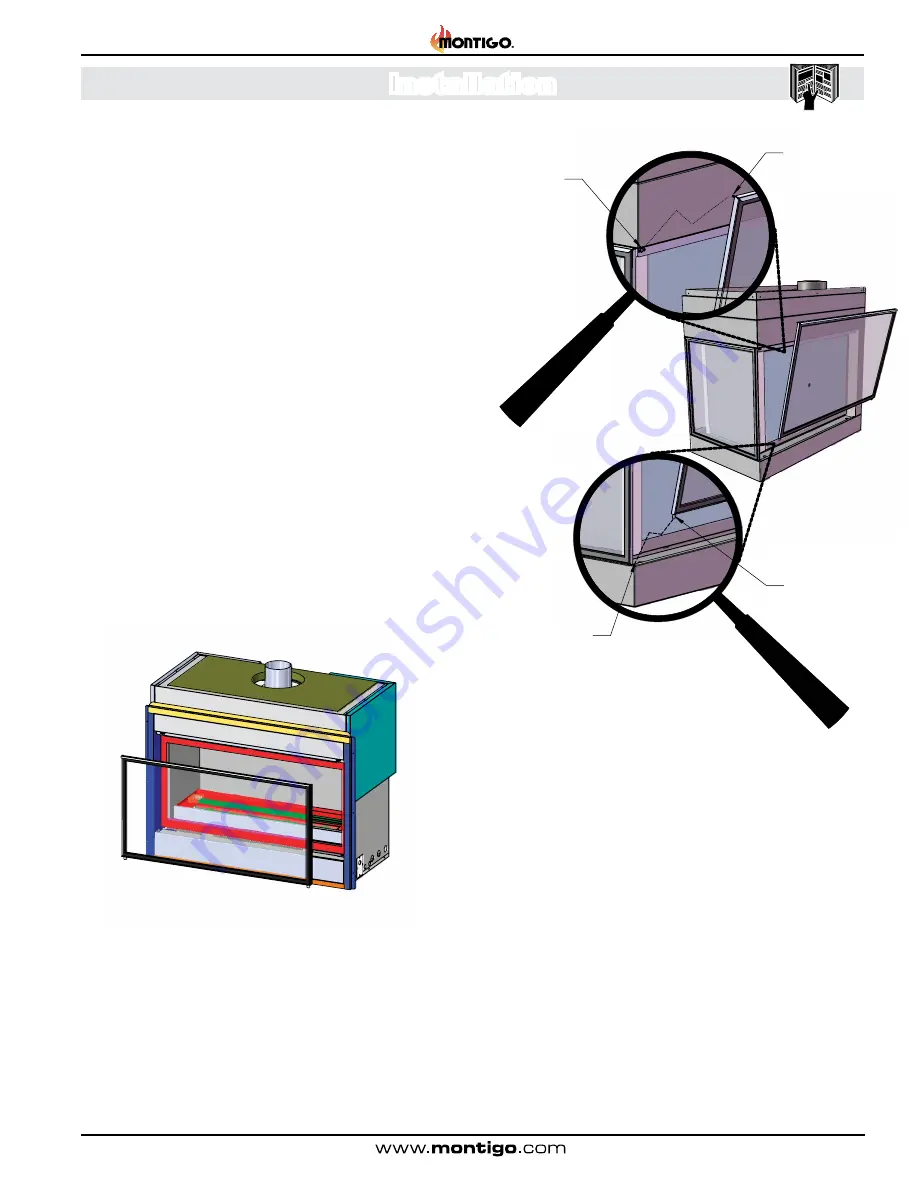
Screen Bottom

Tabs

Screen Tab

Receptacles

Upper Screen

Studs

Upper Screen

Stud Catch

Left Side Detail 

Left Side Detail 

Removing / Attaching

The Safety Screens

To Remove the screen(s)


Simply grasp each top 

outer corner of the screen 

with your thumb and 

finger and pull towards 

you. Once the upper 

Screen Studs are free, at 

an angle, lift the screen 

from the lower slots in 

which the Screen Bottom 

Tabs are held. Place the 

screen in a safe place.

To Install the Screen(s).

Holding the screens at an 

angle away from the  

fireplace, locate the 

Screen Bottom Tabs at the 

lower corners of the 

screen into the Screen 

Tab Recepticles in the 

lower section of the 

fireplace. Make sure the 

tabs and screens are 

lowered all the way down 

into the Screen Tab 

Recepticles on the 

fireplace. Then push each 

Upper Screen Stud at the 

top corners of the screen 

into the Upper Screen 

Stud Catchs in the 

fireplace.

Removing / Attaching Screens:

To Remove Screens:

Grasp each top outer corner of the screen with your thumb and 

finger and pull towards yourself. When the upper Screen Studs are 

free, lift the screen at an angle from the lower slots from which the 

Screen Bottom Tabs are held. Place the screen in a safe place.

To Install Screens:

Hold the screens at an angle away from the fireplace, and locate 

the Screen Bottom Tabs at the lower corners of the screen. Place 

the screen into the Screen Tab Receptacles in the lower section 

of the fireplace.

Make sure the tabs and screens are lowered all the way down 

into the Screen Tab Receptacles on the fireplace. Then, push 

each Upper Screen Stud on the top corners of the screen into 

the Upper Screen Stud Receptacles in the fireplace.

Figure 22b.

 Screen Installation and Removal

Figure 22a.

 Screen Door Numbers (Replacement Parts)

Replacement Screens:

For replacement part order numbers, please refer to section 

"

Replacement Parts:

" on page 30.

Note:

  Do not operate fireplace without all screens in place.

Page 21

P42DF* Indoor Gas Fireplace

XG0195 -150204.2

Installation

Summary of Contents for P42DF Prestige Series

Page 1: ...ld Optical radiation Non ionizing radiation Radiation Hazardous to the Environment Danger of harming your hands Irritant Cutting Watch your step Slippery floor High temperatures Glass hazard Danger of suffocation High voltage Toxic Flammable materials Corrosive Fork lift trucks Danger overhead crane Explosion risk Oxidising Danger of death Biohazard Laser Radiation Danger of entrapment Hot surface...

Page 2: ... 5 1 FUEL CONVERSION 19 Section 5 2 GAS PRESSURE 19 Section 5 3 GAS CONNECTION 19 Finishing Around the Fireplace 20 Section 6 Screen Installation and Removal 21 Section 7 Installing Removing the Door 22 Section 8 Installing the Accessories 23 Installing the Firestones 23 Installing Optional Speckled Stones 24 Installing Optional Speckled Stones 25 Operation 27 SIT Proflame 2 Electronic Ignition 27...

Page 3: ...onandmaintenance Lighting operation and care of this fireplace can be easily performed by the homeowner All installation and service work should be performed by a qualified or licensed installer plumber or gas fitter as certified by the state province region or governing body where the fireplace is being installed This installation operation and maintenance manual is applicable to the models descr...

Page 4: ...flex and or rigid pipe Layout Electrical Requirements Refer to Section 4 Wiring for Details Refer to Section 5 Installing the Gas Line for details on the gas connection and access Refertolocalcodesandguidelinesforinstallationrequirements Installation and repairs should be done by a qualified contractor and must conform to Installations in Canada must conform to the local codes or in the absenceofl...

Page 5: ...Rating Plate Sample Figure A Rating Plate for IPI eletronic ignition LB1223 V5 1 SIT IPI with screen DEC06 2014 Teklynx LabelView Demo Page 5 P42DF Indoor Gas Fireplace XG0195 150204 2 Installation ...
Page 6: ...g Safety as well as efficiency of operation should be considered when selecting the fireplace location Select a location that does not interfere withroomtraffic hasadequateventilationandoffersanaccessiblepath for Direct Vent installation The fireplace dimensions are shown below 4 3 4 121 5 1 2 140 42 1068 30 1 2 776 39 1 2 1004 20 1 4 515 20 5 8 525 12 5 8 320 5 127 8 203 34 5 8 880 27 3 8 696 Pag...

Page 7: ...ombustible Stud 1 2 Above Top RHS101 Non Combustible Materials Only MIN 96 12 door opening 3 Rear Vent Ceiling Floor Alcove area over Fireplac e Top Vent N G L P 12 max Non combustible header Min 1 21 7 8 42 42 Noncombustible Stud 35 8 4 1 2 0 clearance to corners 4 2 59 3 4 40 1 2 MEL Short 90 elbow 50 1 2 17 1 2 Combustible Header Combustible Shelf RHS101 Non Combustible Stud 1 2 above top Note ...

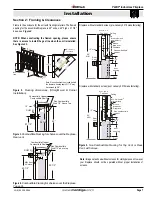
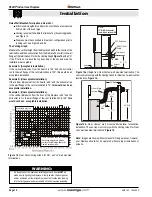
Page 8: ...offs installed The fireplace is supplied with two standoffs Bend and install these standoffs on top of the fireplace ensuring that the height of the standoff maintains a 7 1 2 clearance 7 Figure 6 Installing standoffs NOTE Clearancefromtopoffireplacetoaceilingwithinthefireplaceenclosure Figure 7c Securing the Nailing Flange Extension The supplied nailing extension must be placed along the top edge...

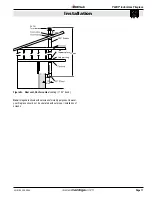
Page 9: ...ation location MUST be selected such that it is the highest point in the venting assembly It should also be selected such that it provides the shortest vent run possible Should it be impossible to ensure that the termination is the highest point or to meet the venting guidelines laid out below please contact your Montigo dealer to discuss power venting options NOTES FOR PLANNING VENTING Venting ca...

Page 10: ...um termination height is used the flame pattern may be affected TheVerticalterminationmustbeaminimum2 higherthanwhere the termination exits the roofing materials asphalt shingles cedar shakes etc This distance should be measured from the high side of the roof slope where the flue flashing intersects the roofing materials see Figures 9 to 9c Termination location must be a minimum 6 from a mechanica...

Page 11: ...ng Support plate 32 max Termination 12 Max PVTK1 PEXT Sections Note Imagesareshownwithoutscreensforclaritypurposes However your fireplace should not be operated without proper installation of screens Page 11 P42DF Indoor Gas Fireplace XG0195 150204 2 Installation ...

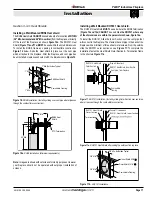
Page 12: ...exterior sheathing of the structure 3 Fasten the termination to the BSR Frame using a minimum of 4 screws 1 Frame the MOSR opening to 12 x 12 2 Fasten the MOSR frame to the interior side of the studs concrete or finished wall construction using a minimum of 4 screws 3 Insert the termination into the MOSR frame as shown here from the inside and attach to the MOSR by installing a min quantity of 4 b...

Page 13: ...termination Selectionofcomponentsanddetailsofventinglayoutshouldadhere to the following guidelines Vent terminations must not be recessed in walls or siding For Heat Shield requirements see Section 3 3 3 on page 16 Once the proposed venting layout has been determined refer to Figure 12 12a or 14 to ensure the layout is acceptable Notes Wall Mounted Terminations TOP VENT All measurements for vertic...

Page 14: ...s 138 this would be an acceptable installation Example B Unacceptable Installation If the vertical dimension from the hearth is 48 and the horizontal run to the wall flange of the vent termination is 72 this would not be an acceptable installation Example C Unacceptable Installation If the vertical dimension from the floor of the fireplace is 60 and the horizontal run to the wall flange of the ven...

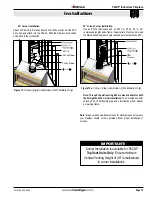
Page 15: ...desired degree of angle required but must not exceed 45 Note Through the wall venting kits are also available for both the Straight and the Corner Installation The Kit includes a heat shield a PFL 18 f f flexible pipe and a termination with or without a mounting frame PEL 45 Elbow PEL 90 Elbow PXT 18 IMPORTANT Corner Installation is available for P42DF Top Vent Units Only Ensure minimum Vertical V...

Page 16: ...r further recommendations Section 3 3 2 Venting Components The following components and associated Montigo part numbers for installation of a roof or wall mounted termination Use only Montigo Vent Components Use of non Montigo parts will VOID the warranty and may impede operation of the fireplace Use any combination of rigid and flex pipe as required and in any orientation Male connectors can face...

Page 17: ...within the parameters shown figure 16a To install the RHS101 Slide the Inner Section over the vent pipe that will connect to the fireplace Then fasten the vent pipe to the back of the fireplace with a minimum of three sheet metal screws From the outside slide the RHS101 outer section on see Figure 17 To complete the installation fasten the Heat Shield Outer Section Termination frame to the structu...

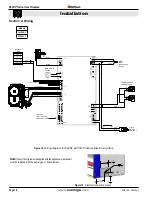
Page 18: ... 1 5V AA type 1 5V AA type 1 5V AA type 1 5V AA type BLACK WHITE WHITE BLACK BLACK WHITE GREEN VARIABLE SPEED COMFORT FANS Lights ON OFF CONTROL MAIN Power 120VAC 60 Hz 6 Amps SPARK SENSOR RED BLACK BATTERY PACK MAIN ON OFF SWITCH YELLOW GREEN 5 PROFLAME PILOT B RNER ORANGE GREEN BLACK BROWN YELLOW ORANGE 6 10 6 B B Wht Wht OPTIONAL CPI IPI SWITCH BL E WHITE 10 11 12 1 1 6 5 2 LED Lights LED1 Red ...

Page 19: ...have a provision to remove a 1 8 N PT plug to be fitted with a hose barb Montigo requires a service shut off valve be located in an accessible location to isolate the gas supply Only install gas shut off valves approved for use by the state province or other governing body in which the fireplace is being installed Section 5 3 GAS CONNECTION See Figure 20 for location of gas line access Flexible ga...

Page 20: ... abrasive cleaners on the glass they will permanently etch the surface Use an approved gas fireplace glass cleaner such as Kel Kem or White off NOTICE We recommend careful consideration be given to the effects of elevated mantel temperatures which may be in excess of product design for example candles plastic or pictures This can cause melting deformation discoloration or premature failure of T V ...

Page 21: ...To Install Screens Hold the screens at an angle away from the fireplace and locate the Screen BottomTabs at the lower corners of the screen Place the screen into the Screen Tab Receptacles in the lower section of the fireplace Make sure the tabs and screens are lowered all the way down into the Screen Tab Receptacles on the fireplace Then push each Upper Screen Stud on the top corners of the scree...

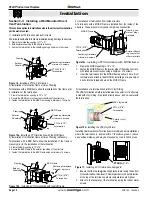
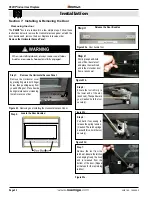
Page 22: ...t asshown Thenpulltoward you Caution hold the tool securely 3 Step 6 Pull hard if necessary to release the spring tension Caution The latch springs backwithforce holdthetool securely 4 Step 7 Remove the tool from the latch slot Ensure the latches are hanging freely the hook end is released from the bottom of the door Repeat all 4 steps for the remaining latches Figure 23c Figure 23d Figure 23e Doo...

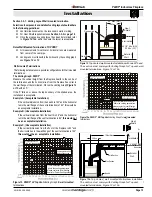
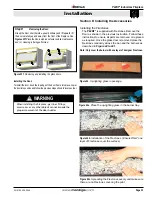
Page 23: ... firestones covering the pilot Figure 24 Up lighting glass in package Figure 24a Place the up lighting glass in the burner tray To install the door hook the top edge of the door frame into place Lower thedoorintopositionandfollowthepreviousstepsshowninreverseorder Installing the Door Step 8 Grasp the Door on either side usually midway and lift upward lift the door carefully up and away from the fr...

Page 24: ...f the firestones are not placed properly ONE LAYER ONLY on burners excessive sooting will result The firestones will get very hot while the fireplace is in operation and should not be handled until cool Figure 24d Completed firestone installation Figure24e Completed firestone installation Note DO NOT place ANY firestones on top of the pilot cover Figure 24f Gas fireplace with firestones CAUTION If...

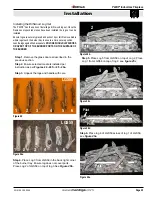
Page 25: ...n top of log 2 see figure 25c 2 1 5 LGS59 1 2 3 4 5 6 The P42DF has the option of installing a drift wood log set Once the firestones or speckled stones have been installed the log set can be installed Ensure logs are securely placed and will not tip or fall Remove media where logs touch the burner tray to ensure a more secure position Leanthelogsagainstthebackpanels NOLOGSSHOULDLAYACROSS OR OVER ...

Page 26: ...cross log 4 from LGS58 and log 4 from LGS59 see figure 26j 6 Step 11 Watch for sooting for 30 minutes If sooting is present adjust media and or logs to eliminate Step 7 Place log 5 from LGS59 in the back left corner of the burner behind the pilot Place Log 4 from LGS58 on top of log 5 Use stones to help stabilize log 4 See figure 26f Figure 26f Figure 26g Figure 26h Figure 26i Figure 26j Figure 26...

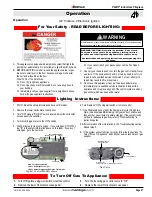
Page 27: ...Remove the lower Horizontal access panel 3 Turn ON manual ON OFF switch located below the horizontal access panel if available 4 Turn Incoming gas valve to the ON position 5 Wait 5 minutes to clear out any gas If you smell gas STOP Fol low B in the safety information above on this label If you don t smell gas go to the next step 6 Turn fireplace ON using wall switch or remote control 7 If the Fire...

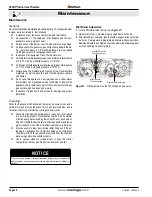
Page 28: ...ass This is a normal condition and is the result of burning of protective coatings on new metal Glass must be cleaned periodically to remove any film which is a normal by product of combustion which may be visible Film can easily be removed by removing the door as shown on Page20 Handlethedoorcarefully andcleanitwithnonabrasive glass cleaners One of the most effective products is Kel Kem Silicone ...

Page 29: ...ote control and backup battery pack if available 3 Check the 3 15A fuse in the control box and replace if necessary Pilot Igniter sparking but Pilot burner will not light 1 Verify the Inlet and Manifold Gas Pressure are within acceptable limits 2 Check all connections to gas valve 3 Check connection to stepper motor if available Pilot lights but Main burner will not Light 1 Checkandverifyallwiring...

Page 30: ...RP42 Designer Speckled Stones RR250SS Driftwood Log Set LGSPseries Replacement Parts Replacement Parts List SIT IPI Proflame 2 P42DF NG Gas Valve with stepper motor RGC3033 LP Gas Valve with stepper motor RGC3034 NG Pilot Assembly RPA035 LP Pilot Assembly RPA036 Ignitor Probe Assembly RGC3075 Flame sensor rod assembly RGC3076 Pilot Tubing RPTA03 Door RDRP42 Control Module RGC3061 Proflame Transmit...

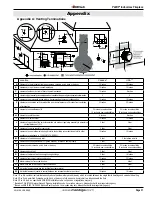
Page 31: ...o forced air supply inlet 6 feet 3 feet above air inlet N clearance above paved sidewalk or paved driveway located on public property 7 feet 7 feet P clearance under veranda porch deck or balcony 22 inches to combustibles 16 inches to non combustibles 22 inches to combustibles 16 inches to non combustibles Q clearance above roof 2 feet 2 feet R clearance to adjacent walls and neighboring buildings...

Page 32: ...iances are designed to burn gas only Burning conventional fireplace fuels such as wood coal or any other solid fuel will cause damage to the Gas Appliance will produce excessive temperatures and will result in a fire hazard Limitations On Liability It is expressly agreed and understood that The Companies sole obligation and purchaser s exclusive remedy under this Warranty under any other warranty ...

Page 33: ...tally vented gas fueled heating appliance or equipment The sign shall read in print size no less than one half 1 2 inch in size GAS VENT DIRECTLY BELOW KEEP CLEAR OF ALL OBSTRUCTIONS 4 INSPECTION The state or local gas inspector of the side wall horizontally vented gas fueled equipment shall not approve the installation unless upon inspection the inspector observes carbon monoxide detectors and si...

Page 34: ...XG0195 150204 2 P42DF Single Sided Gas Fireplace ...

Reviews: