Page 8
Part No. XG0512
Rio DX Cast Stove
Installation
Removing and Installing
the Door
Removing the door:
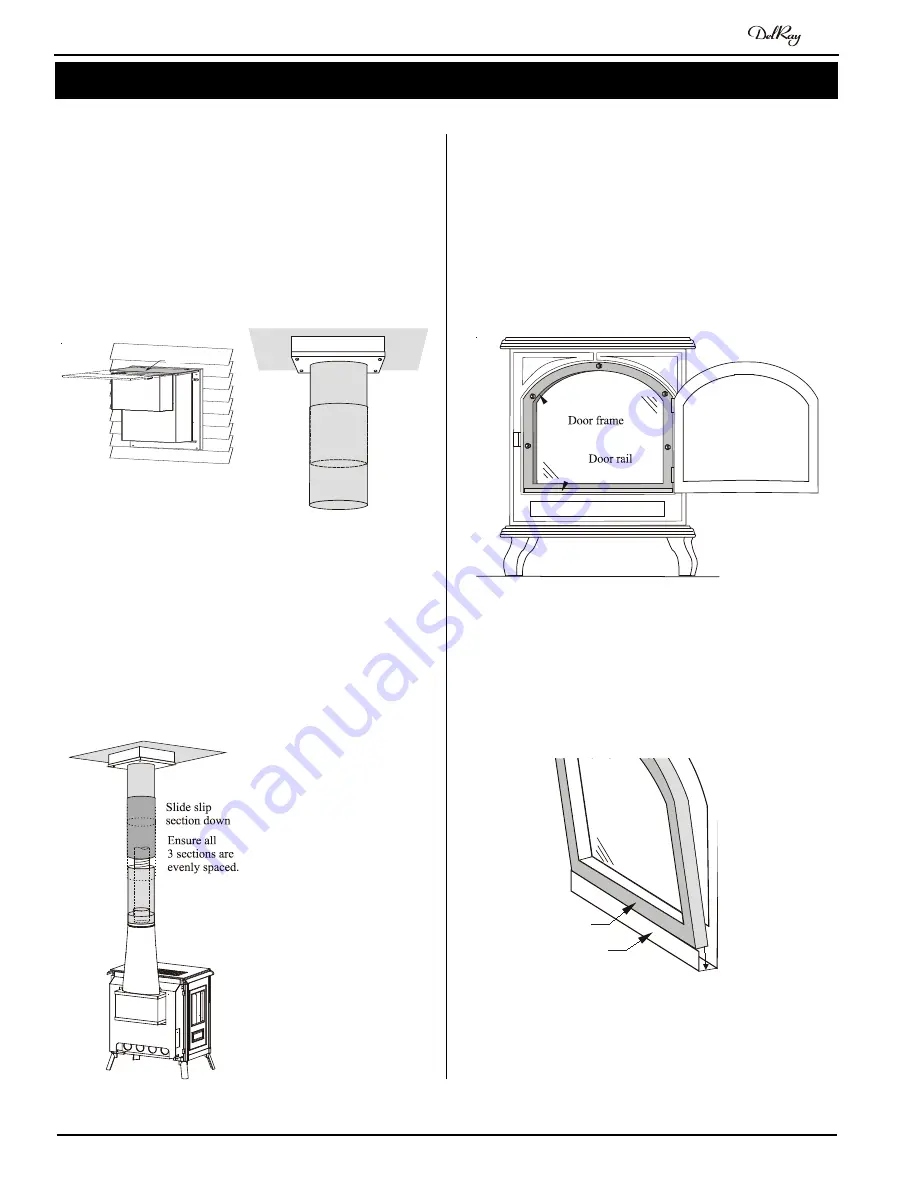
To access the glass door, open the outer doors on the front of the
casting. Remove the 5 nuts around the edge of the glass door, and
then pull the door outwards and upwards until it is clear of the door
rail.
(See Figure 20).
Figure 20.
Removing or installing the glass door.
Installing the door:
Slide the bottom of the glass door into the door rail. Be sure the door
is pushed all the way into the rail. See figure 21. Attach using the 5
hex nuts. Ensure that a good seal is maintained when re-installing the
Door rail
Door frame
Figure 21.
Detail of the door rail.
Attach the flex pipe to the inner collar of the FST12 ellipse and install
a spacer spring inside this section.
Slide the bottom section of stove pipe down over the collar on the
FST12 ellipse section. Adjust the position of the stove pipes so that
the joints are all equally spaced. Ensure that there is at least 1 1/2"
overlap between each section. See Figure 15.
Secure each stove pipe joint with at least three ½" hex screws spaced
approx. 3/4" from the joint (so that the brass ring will cover both the
joint and the screws).
Finishing
Install the ceiling collar over the
ceiling box to provide a finished
look.
Cover each joint in the stove pipes
with a brass decorator ring. The
rings should cover the joint as
well as the sheet metal screws.
Attach the ring using the black
3/8" screws provided. Make sure
the screw is facing the back of the
stove. See Figure 11.
Completing the Vent Run
Run additional components as
necessary to bring the venting up
through the roof, and install the
vertical termination.
Figure 15.
Positioning and fastening the stove pipes.
Rain shield
Figure 14.
Installing spacer springs.
Installing the slip section.
way. Install a spacer spring inside the slip section. Slide the last sec-
tion of standard stove pipe up inside the slip section, again overlap-
ping the two by at least half a pipe length.
First attach the inner pipe to the stove's flue collar using a bead of
high temp silicone. Attach the outer elliptical section as shown in
Figure 10. Secure it with four sheet metal screws.
Move the stove into position below the stove pipe.


