Power level
Default working timer (hour)
1
8
2
8
3
8
4
4
5
4
6
4
7
2
8
2
9
2
!
!
6
H
0
or
6
30
--
36
6.
00
If the Display Flashes “ ” Alternately with the Heat Setting
This means that:
• you have not placed a pan on the correct cooking zone o
r,
• the pan you’re using is not suitable for induction cooking o
r,
• the pan is too small or not properly centred on the cooking z
one.
No heating takes place unless there is a suitable pan on the cooking zone.
The display will automatically turn o
f
f after 1 minute if no suitable pan is placed on it.
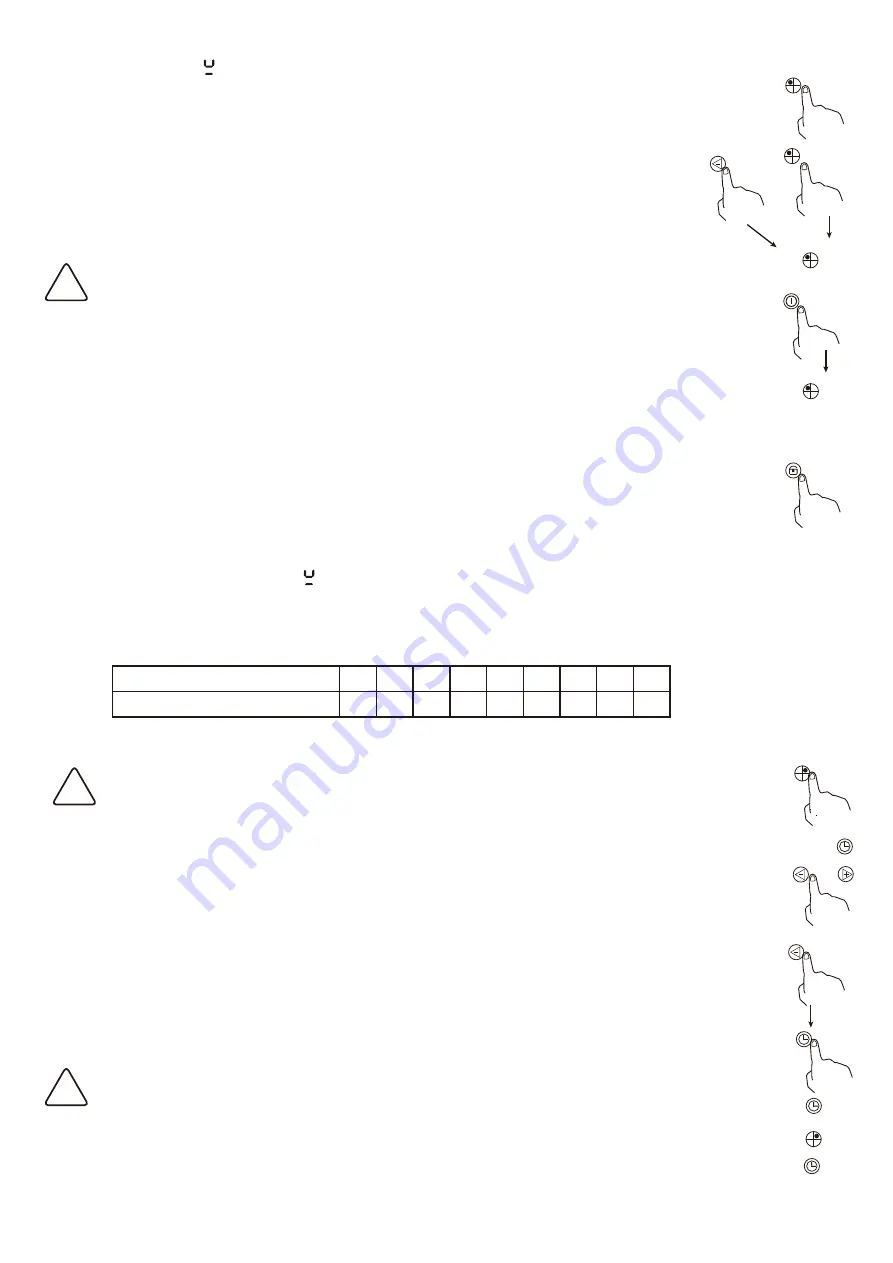
When You Have Finished Cooking
1. T
ouch the heating zone selection control that you wish to switch o
ff.
2. T
urn the cooking zone o
f
f by scrolling down to”0” . Make sure the display shows“0” and then “H”.
3. T
urn the whole cooktop o
f
f by touching the ON/OFF control.
4. Beware of hot surfaces indicator “H” will show which cooking zone is hot to touch. It will disappear when the
surface has cooled down to a safe temperature. It can also be used as an energy saving function - if you
want to heat further pans, use the hotplate that is still hot.
Locking the Controls
•
You
can
lock
the
con
trols to
preven
t unint
ended
use (for
example
children
acciden
t
ally
turning the
cooking
zones
on).
• When the controls are locked, all the controls except the ON/OFF control are disabled.
T
o lock the controls:
T
ouch the keylock control.
The timer indicator will show “Lo”.
T
o unlock the controls:
1. Make sure the induction hob is turned on.
2. T
ouch and hold the keylock control for a while.
3. Y
ou can now start using your induction hob.
When the hob is in lock mode, all controls are disabled, except the ON/OFF
. Y
ou can always turn the induction hob o
ff
with the ON/OFF control in an emergency, but you would have to unlock the hob first in the next operation.
Overheating Protection
The appliance is equipped with a temperature sensor which can monitor the temperature inside the induction hob.
When an excessive temperature is monitored, the Induction hob will stop operation automatically
.
Detection of Small Articles
When an unsuitably sized or non-magnetic pan (e.g. aluminium), or some other small item (e.g. knife, fork, key) has
been left on the hob, the display flashes “
” and the hob will automatically go in the standby mode in 1 mi
nute. The
fan will keep cooling down the induction hob for a further 2 mi
nutes.
Auto Shutdown Protection
Auto shutdown is a safety protection function for your induction hob. It will automatically turn o
f
f after a certain period of
time.
The default working times for various power levels are shown in the below table:
When a pot is removed, the induction hob can stop heating immediately and automatically switch o
ff after 1
minute.
People with a heart pacemaker should consult their doctor before using this unit.
Using the Timer
•
Y
ou can set it to turn one cooking zone o
f
f after the set time is up.
•
Y
ou can set the timer up to 99 minutes.
Setting the Timer to Turn off One Cooking Zone
1. T
ouch the heating zone selection control that you want to set the timer fo
r.
2. T
ouch timer control, the minder indicator will start flashing and “30” will show in the timer display
.
3.
Set the time by touching the “+” and “-” buttons.
Hint:
T
ouch the “-“ or “+” control of the timer once - time will decrease or increase by 1 minute.
T
ouch and hold the ”-“ or “+” control of the timer - time will decrease or increase by 10 minutes.
4. T
ouch the “-” control to reduce the time outstanding to zero or press the “timer control” when the “00”
shows in the minute display to cancel the time
r.
5. When the time is set, it will begin to count down immediately
.
The display will show the remaining time and the
timer indicator will flash for 5 seconds.
NOTE:
The red dot next to power level indicator will illuminate, indicating that zone is selected.
6. When cooking timer expires, the corresponding cooking zone will switch o
f
f automatically
.
!
Other cooking zones will keep operating if they have been turned on previously
.


