background image

9

STORING FROZEN FOOD

Prepacked commercially frozen food should be stored in accordance with the


frozen 

food manufacturer's instructions for a


frozen food storage


compartment.


To 

ensure that the high quality achieved by the frozen food manufacturer and the


food 

retailer is maintained, the following should be remembered:

1.

Put packets in the freezer as quickly as possible after purchase.

2.

Ensure that contents are labelled and dated.

3.

Do not exceed "Use By", "Best Before" dates on the packaging.

If there is a power failure do not open the door. Frozen food should not be

affected if the failure lasts for less than 

13

 hrs. If the failure is longer, then the

food should be checked and either eaten immediately or cooked and then re-

frozen.

STARTING

Final Check

Before you start using the fridge/freezer check that:

1.

The interior is dry and air can circulate freely at the rear of the cabinet.

2.

Clean the interior as recommended under "CLEANING AND CARE."

3.

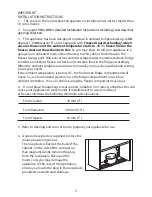
Insert the plug into the wall socket and switch on the electricity supply.

• When the door is open the fridge interior light will come on.

4.

You will hear a noise as the compressor starts up. The liquid and gases sealed

within the refrigeration system may also give rise to noise, whether the compressor

is running or not which is quite normal.

5.

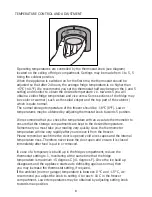
Set temperature setting knob half way between 

MIN

 and 

MAX

.

6.

Front edges of the cabinet may feel warm. This is normal. These areas are

designed to be warm to avoid condensation.

7.

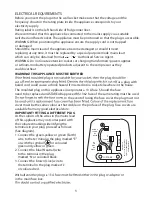
"Do not load the appliance immediately it is switched on. Wait until the

correct storage temperature has been reached. We recommend that you
check the temperature with an accurate thermometer (see

:

 Temperature

Control and Adjustment)"

FREEZING FRESH FOOD

Please observe the following instructions to obtain the best results.

Do not freeze too large a quantity at any one time. The quality of the food is best 

preserved when it is frozen right through to the core as quickly as possible.

Do not exceed the freezing capacity of your appliance in 24 h which is 

4

 kg (

8.8

 lb)

Placing warm food into the freezer compartment causes the refrigeration 

compressor to operate continuously until the food is frozen solid. This can 

temporarily lead to excessive cooling of the refrigeration compartment.

You may place fresh food to be frozen in any part of the freezer.

Take special care not to mix already frozen food and fresh food.

MAKING ICE CUBES

Fill the ice - cube tray 3/4 full with water. Loosen frozen trays with the handle of a 

spoon, never use sharp edged objects such as knives, forks.

Note: 

If freshly made ice cubes are not consumed for several weeks, they will slowly 

reduce in size and eventually disappear completely.

Summary of Contents for MIFF7301F

Page 1: ...instructions carefully before attempting to install or use this appliance We recommend that you keep these instructions in a safe place for future reference Installation and Operating Instructions TH...

Page 2: ...4 months prior to the date of claim What is not covered under the Guarantee Any appliance not correctly installed and operated in accordance with the manufacturer s instructions Any appliance that is...

Page 3: ...the best possible performance and trouble free operation from your appliance it is very important to carefully read these instructions Ensure that the plug remains readily accessible Do not use multip...

Page 4: ...THE FRIDGE FREEZER TEMPERATURE CONTROL AND ADJUSTMENT STARTING STORING FROZEN FOOD FREEZING FRESH FOOD MAKING ICE CUBES DEFROSTING CLEANING AND CARE REPLACING THE INTERIOR LIGHT BULB DO S AND DON TS E...

Page 5: ...ifying the terminals in your plug proceed as follows FITTED WITH BS 1362 13A FUSE ALWAYS FIT BS 1362 REPLACEMENT CARTRIDGE FUSE GREEN YELLOW OR GREEN N BLUE OR BLACK L BROWN OR RED 22mm 6mm 6mm 6mm 32...

Page 6: ...d parts and doors pipes wall coverings etc Do not move the appliance by pulling by the door 6 Empty any water in the drain tray before moving See section Defrosting and Care cleaning for further infor...

Page 7: ...to 38 degrees C 100 degrees F and is equipped with Freezer Guard technology which ensures that even if the ambient temperature falls to 15 C frozen food in the freezer does not thaw thanks to this So...

Page 8: ...S CABINET SHELVES TEMPERATURE SETTING KNOB INTERIOR LIGHT Audible Alarm where applicable BOTTLE SHELF DOOR SHELF DOOR SHELF SALAD CRISPER FREEZER FAN CFigures in this user manual are schematic and may...

Page 9: ...hot food and beverages to cool before placing them in the fridge Do not store explosive substances High proof alcohol must be stored upright in sealed containers Left over canned food should not be s...

Page 10: ...ecommend that you check the temperature with an accurate thermometer to ensure that the storage compartments are kept to the desired temperature Remember you must take your reading very quickly since...

Page 11: ...e compressor is running or not which is quite normal 5 Set temperature setting knob half way between MIN and MAX 6 Front edges of the cabinet may feel warm This is normal These areas are designed to b...

Page 12: ...be can be cleared by pushing the special plastic plunger provided down the drain tube 2 If the frost layer reaches about 1 4 7 mm reduce the setting i e from 4 to 1 to restart automatic defrosting B F...

Page 13: ...e have to withstand extreme physical conditions such as temperatures below 20 C ENERGY SAVING TIPS 1 Ensure your appliance is installed in a well ventilated area If the ambient temperature is low but...

Page 14: ...move ice cream from the freezer 10 20 minutes before serving Don t Store bananas in your fridge compartment Don t Store melon in your fridge It can be chilled for short periods as long as it is wrappe...

Page 15: ...king help from someone to slightly lift the refrigerator will facilitate this process If the subject parts are not included in the product you have purchased then it is valid for other models The back...

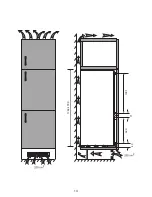
Page 16: ...14 1784 1788 629 40 71 1001...

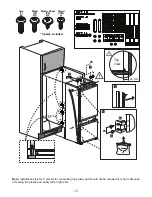
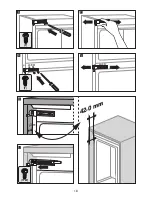
Page 17: ...for connecting top plastic part should not be screwed very hard because of moving the plastic part easily left or right side Spares included 90o 2 1 3 5 1 a 4 b PS PS 17 Torx T x6 Wood W x10 Plastic S...

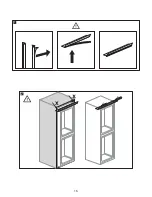
Page 18: ...16 1 2...

Page 19: ...17 3 4 5...

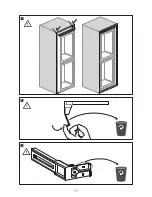
Page 20: ...18 6 7 8 10 9 11 T T 42 0 mm 42 0mm 1TW...

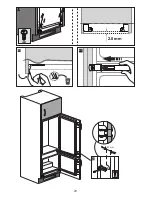
Page 21: ...19 14 12 13 T 42 0 mm 42 0mm 1TW 15 17 16 1TW 42 0 mm 42 0mm...

Page 22: ...20 W 2 0 mm 18 20 21 90 o 21 mm W 19...

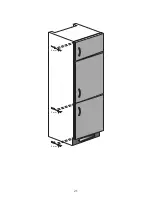
Page 23: ...2 mm 2 mm 2 mm 21...

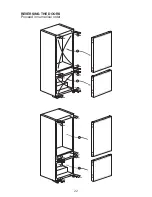
Page 24: ...22 REVERSING THE DOORS Proceed in numerical order 1 4 3 6 2 5 7 8 9 10 17 19 20 21 15 16 18 13 14 12...

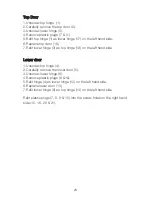
Page 25: ...it lower hinge 3 as top hinge 19 on the left hand side Lower door 1 Unscrew top hinge 4 2 Carefully remove the lower door 5 3 Unscrew lower hinge 6 4 Remove plastic plugs 9 10 5 Refit hinge 4 as lower...

Page 26: ...f the appliance fuses plugs or public electricity supply these can be covered by your standard home insurance or might require extra cover Check with your insurance provider Important Note This applia...

Page 27: ...l help prevent potential negative consequences for the environment and human health which could otherwise be caused by inappropriate waste handling of this product For more detailed information about...

Reviews: