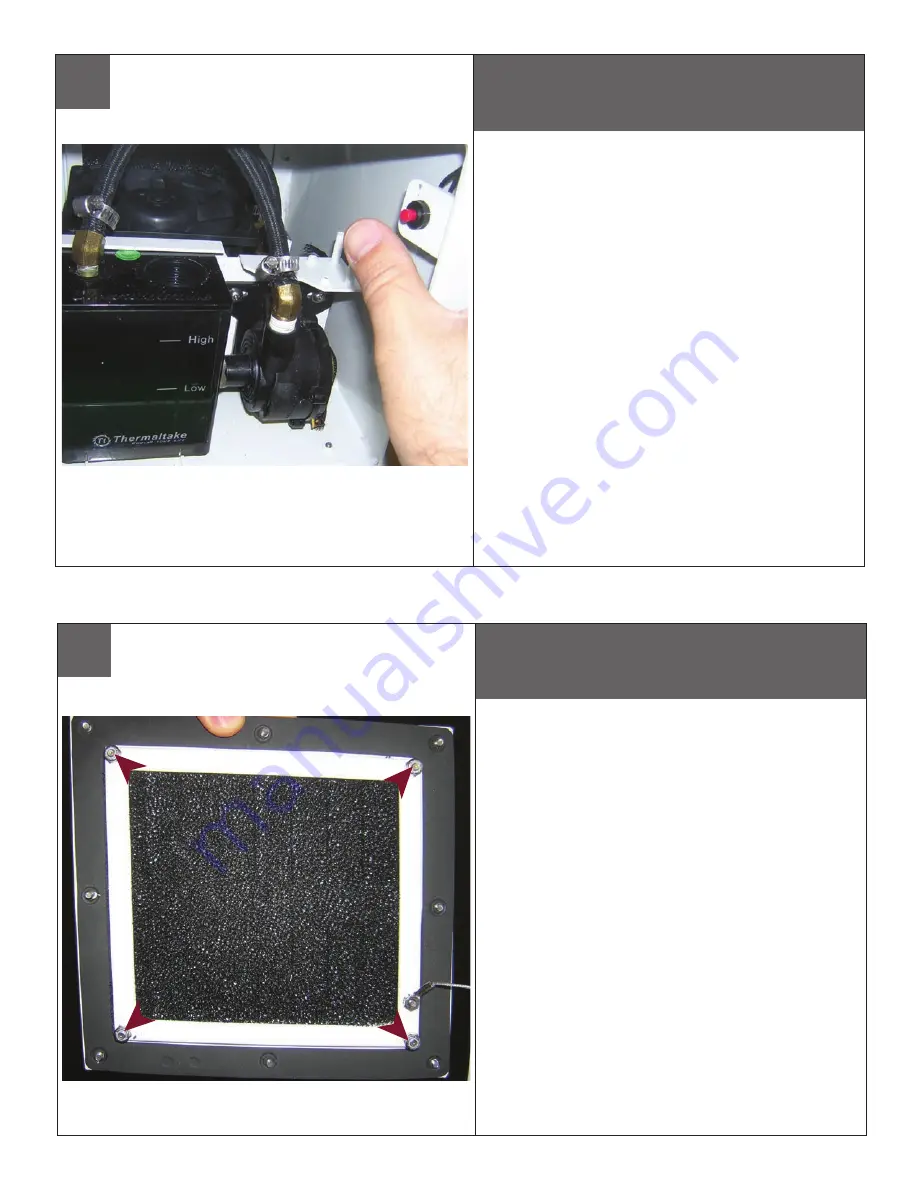
Power up the unit by activating the “Primer” button as
shown to circulate coolant through system. Add
coolant after system stabilizes-if required (should be
between the “High” and “Low” marker.
• Accione para arriba la unidad activando el botón de la “cartilla”
como se muestra para circular el líquido refrigerador a través de
sistema. Agregue el líquido refrigerador después de sistema estabilizar
-
si está requerido (debe estar entre “el marcador alto” y “bajo”.
• Mettez l'unité en actionnant le bouton de « amorce » comme montré
pour circuler le liquide réfrigérant par le système. Ajoutez le liquide
réfrigérant après système stabiliser-si requis (devrait être entre le « haut
» et « bas » marqueur.
• Treiben Sie oben die Maßeinheit an, indem Sie wie gezeigt den
„Zündkapsel“ Knopf aktivieren, um Kühlmittel durch System zu verteilen.
Fügen Sie Kühlmittel nach System hinzu, stabilisieren-wenn erfordert
(sollte zwischen der „hohen“ und „niedrigen“ Markierung sein.
• Pnha acima a unidade ativando a tecla da “primeira demão” como
mostrado para circular o líquido refrigerante através do sistema.
Adicione o líquido refrigerante após o sistema estabilizar-se exigido
(deve estar entre “o marcador elevado” e “baixo”.
• Alimenti in su l'unità attivando il tasto “dell'iniettore„ come indicato per
fare circolare il liquido refrigerante attraverso il sistema. Aggiunga il
liquido refrigerante dopo il sistema stabilizzare-se richiesto (dovrebbe
essere fra “l'alto„ ed indicatore “basso„.
This is what the typical path of illumination will look like with the setting at 30 degrees.
• Esto es lo que parecerá la trayectoria típica de la iluminación con el ajuste 30 grados.
• C'est ce qui ressemblera le chemin typique de l'illumination à avec l'arrangement 30 degrés.
• Dieses ist, was der typische Weg der Ablichtung wie mit der Einstellung bei 30 Grad aussieht.
• Este é o que o trajeto típico da iluminação olhará como com o ajuste em 30 graus.
• Ciò è che cosa il percorso tipico di illuminazione assomiglierà con alla regolazione 30 gradi
The air intake filters should be periodically checked.
They should be cleaned or replaced. To replace,
unfasten the nuts holding the filter frame. Replace and
remount using nuts as shown.
• Los filtros de la toma de aire deben ser comprobados periódicamente.
Deben ser limpiados o ser substituidos. Para substituir, desate la
tenencia nuts el marco del filtro. Substituya y remonte con tuercas
como se muestra.
• Les filtres d'entrée d'air devraient être périodiquement vérifiés. Ils
devraient être nettoyés ou remplacés. Pour remplacer, desserrez
l'exploitation nuts l'armature de filtre. Remplacez et remount à l'aide
des écrous comme montrés.
• Die Lufteintritfilter sollten regelmäßig überprüft werden. Sie sollten
gesäubert werden oder ersetzt werden. Um zu ersetzen, lösen Sie die
nuts Holding der Filterrahmen. Ersetzen Sie und remount mit Nüssen wie
gezeigt.
• Os filtros da entrada de ar devem periòdicamente ser verific. Devem
ser limpados ou substituído. Para substituir, desate a terra arrendada
nuts o frame do filtro. Substitua e remount usando porcas como
mostradas.
• I filtri dalla presa di aria dovrebbero essere controllati periodicamente.
Dovrebbero essere puliti o sostituiti. Per sostituire, sciolga la tenuta nuts
la struttura del filtro. Sostituisca e remount per mezzo dei dadi come
indicati.
This is what the typical path of illumination will look like with the setting at 30 degrees.
• Esto es lo que parecerá la trayectoria típica de la iluminación con el ajuste 30 grados.
• C'est ce qui ressemblera le chemin typique de l'illumination à avec l'arrangement 30 degrés.
• Dieses ist, was der typische Weg der Ablichtung wie mit der Einstellung bei 30 Grad aussieht.
• Este é o que o trajeto típico da iluminação olhará como com o ajuste em 30 graus.
• Ciò è che cosa il percorso tipico di illuminazione assomiglierà con alla regolazione 30 gradi
25
26


