7
UNPACKING AND INSPECTION
Use caution when unpacking your new Moog One, and be sure that nothing is lost or damaged. Moog
recommends saving the carton and all packing materials in case you ever need to ship the instrument
for any reason.
CONTENTS
In addition to the instrument itself, your new Moog One also ships with the following items:
Power adapter and connecting power cord
Owner’s Manual
Registration Card
SETUP AND CONNECTIONS
Before you begin exploring your Moog One, you will need to provide the instrument with power, and
connect it to an audio monitoring system so that you can hear it.
WHAT YOU WILL NEED
A stand or table capable of supporting Moog One (which weighs about 45 lbs.)
A properly wired and grounded AC outlet
Two 1/4” balanced TRS to TRS or TRS to XLR cables for connecting Moog One to an
audio monitoring system, or stereo headphones outfitted with a 1/4” TRS (Tip/Ring/
Sleeve) plug may be used in either of the front Headphone jacks.
NOTE:
Moog One is equipped with balanced outputs, so use either 1/4” TRS to 1/4” TRS cables or 1/4” TRS
to XLR cables for the best results. Unbalanced 1/4” TS to 1/4” TS instrument cables may also be used, but are
not recommended.
CONNECTING THE POWER SUPPLY
Moog One uses a universal power supply that can accommodate AC power sources ranging from 100
to 240 volts, and either 50 or 60 cycles (Hz). The included power supply features a detachable IEC-
style power cable.
Connect the included IEC power cable to the Moog One power supply.
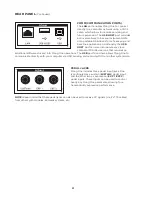
Connect the power supply cable to the 19-volt DC locking connector on the rear panel
of Moog One.
Connect the other end of the power cable to a suitable AC wall outlet with a protective
earth ground connection.
Finally, use the power switch on the rear panel to turn on your new Moog One.
NOTE:
The power supply connects to your Moog One using a locking connector. To release this connector
from the instrument, simply press the locking tab at the base of the connector and gently slide out the
connector plug. Never pull on the cable, only the plug.
AUDIO MONITORING
With the Moog One
MASTER VOLUME
knob turned all the way down, connect one 1/4” cable to the
MAIN L
output, and the other 1/4” cable to the
MAIN R
output, then connect the opposite ends to a pair of L/R
inputs on an amplified speaker system or mixing console. Adjust the Moog One volume level by slowly
turning the
MASTER VOLUME
knob clockwise while playing the keyboard.
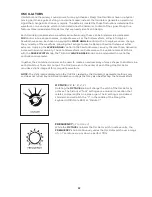
If you’re using headphones, turn the
HEADPHONES
knob all the way down before plugging them into
either of the two headphone jacks (located on the front edge of the Left Hand Controller panel). Adjust the
volume level by slowly turning the
HEADPHONES
knob clockwise while playing the keyboard.
NOTE:
It may take up to 5 minutes for Moog One to warm up before Oscillator tuning has stabilized,
especially if it has been outside in a car on a cold night. (Although its Oscillators are very stable,
Moog One is an analog synthesizer, after all.)
1.
2.
3.
1.
2.
3.
1.
2.
3.
4.
Summary of Contents for One
Page 2: ......
Page 6: ...This page left intentionally blank ...
Page 103: ...103 This page left intentionally blank ...
Page 113: ...113 This page left intentionally blank ...
Page 127: ...127 This page left intentionally blank ...
Page 146: ...146 ...


