background image

8

0721-SOM-00001-01

© Tritech International Ltd.

2.  Installations

2.1  Hardware Installation

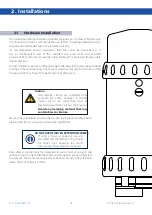
The sonar should be mounted using suitable pipe clamps, or similar to firmly secure 
it to the vehicle. Tritech recommends the use of 3mm  insulating rubber spacers to 
aid grip and prevent damage to the anodised coating.
It’s recommended, during installation, that the Sonar be positioned so it 
has an unobstructed view of the intended scan area, while also avoiding 


prop-wash from thrusters. Ensure the Super Seaking V7 is protected from possible 
impact damage.
During Installation, be sure to safeguard against damage to the protective anodised 
coating on the main housing. Any chips or scratches may lead to corrosion of the 
housing which may impact the performance of the system.

Caution

Non-metallic clamps are preferred when 
securing the Sonar, however, if metallic 
clamps are to be used they must be 
electrically insulated to protect the housing.

Avoid any clamping material that may  
contain brass or bronze.

Mate connectors/blanks ensuring the washers are in places and have been 
greased and the securing screws have been tightened.

DO NOT OVER-TIGHTEN RETENTION SCREWS.

If using a Seacon connector, you are 
reminded that the retention ring should 
be finger tight. Applying too much 
pressure risks damaging the connector.

Run cables to junction box for integration to your system, securing to the 
vehicle as you go. Check that the cables and connectors are not subjected 
to excessive strain and are not kinked or bent excessively. The safe bend 
radius of the V7 cables is 100mm.

Summary of Contents for Tritech Super SeaKing V7

Page 1: ...Outstanding Performance in Underwater Technology A Moog Inc Company Super SeaKing V7 Sonar Product Manual Document No 0721 SOM 00001 01...

Page 2: ...This page has deliberately been left blank...

Page 3: ...s 3 A clear fault description 4 Details of any remedial action implemented Contamination If the product has been used in a contaminated or hazardous environment you must de contaminate the product and...

Page 4: ...h a discharge occurring Caution This highlights areas where extra care is needed to ensure that certain delicate components are not damaged Warning DANGER OF INJURY TO SELF OR OTHERS Where this symbol...

Page 5: ...Diagrams 11 Tritech V7 Connector 12 SeaKing Magnetic Reset 12 Software Installation 13 System Requirements 13 Genesis Software Installation 13 Software Overview 13 Windows Setup 14 Genesis Comms Setu...

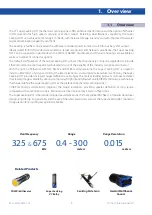
Page 6: ...ognised connector With the option of Ethernet ARCNET RS232 and RS485 communications the Super SeaKing DST is simple to install on ROV AUVs of all types Utilising the latest electronics and composite t...

Page 7: ...on 325kHz 50kHz centred on 650kHz Beamwidth 20 vertical 3 0 horizontal 40 vertical 1 5 horizontal Pulse length 400 s 200 s Range 0 4m 300m 0 4m 100m Source level 210dB re 1 Pa at 1m Display Character...

Page 8: ...may lead to corrosion of the housing which may impact the performance of the system Caution Non metallic clamps are preferred when securing the Sonar however if metallic clamps are to be used they mu...

Page 9: ...ions The Super Seaking V7 is supplied with a polyurethane jacketed cable whip as standard fitted with a Tritech connector at one end Depending on the specification of the system the cable will either...

Page 10: ...k congestion As standard we Tritech set the sonar IP address to 192 168 2 17 and subnet mask to 255 255 255 0 ARCNET Serial RS232 RS485 The Super Seaking V7 Sonar can be set to form part of an ARCNET...

Page 11: ...to equipment damage not covered under the warranty conditions Note Ethernet communications require the use of V7 cables ARCNET and Serial Communications are compatible with both V7 and Standard Tritec...

Page 12: ...0 5mm 20 AWG 4 VDC Black Black 0 5mm 20 AWG 5 N C RS232 GND NC RX_P Green Red UTP 2 0 22mm 24 AWG 6 Earth RX_N Screen White UTP 2 0 22mm 24 AWG Chassis Earth Connection Screen Drain Wire Foil Screen...

Page 13: ...memory sticks Ensure any previous version of Genesis has been uninstalled and the computer restarted prior to the installation of a new version Updates and latest versions of software can also be down...

Page 14: ...en the bandwidth allocation will be shared between devices and so the bandwidth per device will drop A network switch records the MAC addresses of the devices connected so when a frame of data is rece...

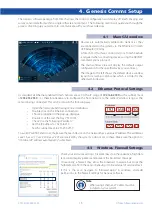
Page 15: ...255 255 255 0 It is therefore necessary to configure the host network to the same IP address range as the sensors being connected This can be setup in the following way Open the network and sharing c...

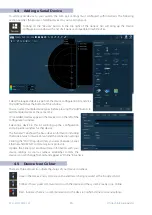
Page 16: ...eft of the configuration window Selecting a device in this list will bring up the configuration and properties window for that device The General Tab shows the basic device information including the N...

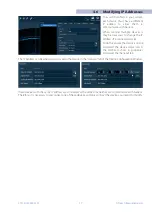
Page 17: ...connected device Todothis ensurethedeviceisonline and select the device status icon in the toolbar to show its properties and select the General tab The IP Address can be adjusted and saved to the de...

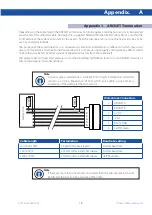
Page 18: ...e be felt by other sources of impedance such as from the cable itself The diagram below shows best practice to use when installing termination resistors on an ARCNET network of Tritech International L...

Reviews:

Related manuals for Tritech Super SeaKing V7