background image

K6862840

5-16-17

2

NOTE: IT IS RECOMMENDED TO READ THE INSTRUCTIONS THOROUGHLY BEFORE INSTALLING

THIS ACCESSORY.

CAUTION:

 XBM remote start can ONLY be installed on vehicles that have the following factory options: Automatic

Transmission, Remote Keyless Entry and Immobilizer. The XBM sales code must be added to the database and

the Restore Vehicle Configuration (using a diagnostic scan tool) must be performed prior to installing the new

RFHM module. Failure to do so will render the RFHM module remote start function inoperative. The technician

should wait 1/2 hour between adding XBM sales code in DealerConnect before performing the Restore Vehicle

Configuration. In the interim, the technician can install all components. The wiTECH software level must be at the

latest release to perform this procedure.

ADD SALES CODE TO VEHICLE IN DealerCONNECT

  1. Log on to https://dealerconnect.chrysler.com.

  2. In the "Service tab"-"Warranty Administration" box -"Vehicle Option Updates" screen, enter the vehicle VIN

      and add the sales code XBM (Remote start) as a "Dealer Installed Option".

  3. Confirm that the new sales code has been successfully added to the VIN.

RESTORE VEHICLE CONFIGURATION

  1. Using the WiTECH application, navigate to the Vehicle Preparations Screen, select the option

      “RESTORE VEHICLE CONFIGURATION”

  2. On the Confirmation Screen, select “CONTINUE”

  3. Confirm the VIN is correct for the vehicle, select YES, then select “CONTINUE”

  4. A confirmation will appear stating that the Restore Vehicle Configuration was successful, select “CLOSE”

PROCEDURE STEPS:

WARNING: 

To avoid serious or fatal injury on vehicles equipped with airbags, disable the Supplemental Restraint

System (SRS) before attempting any steering wheel, steering column, airbag, seat belt tensioner, impact sensor

or instrument panel component diagnosis or service. Disconnect and isolate the battery negative (ground) cable,

then wait two minutes for the system capacitor to discharge before performing further diagnosis or service. This

is the only sure way to disable the SRS. Failure to take the proper precautions could result in accidental airbag

deployment.

Obtain 4-digit temporary PIN number from authorized dealership personnel.

This PIN is only valid for 12 hours. If more than 12 hours have elapsed, a new PIN must be obtained.

www.mopar.com

IMPORTANT:

 After installing this kit, all the non-remote start FOBIKs (which have been programmed as outlined

below at the time of the installation of this kit) that came equipped with this vehicle will still be functional and can

be used as intended except to perform remote start function. 

DO NOT DISCARD ORIGINAL FOBIKs AFTER

INSTALLATION IS COMPLETE. RETURN ALL FOBIKs TO CUSTOMER.

INFORM THE CUSTOMER REGARDING ORIGINAL (NON-REMOTE START) FOBIKS

Prior to installing this kit, inform the customer that ALL ORIGINAL FOBIKs (non-remote start) must be programmed

to function with the installation of the Remote Start Kit.  Any FOBIKs which are not present at the time of installation

of this kit will not be functional.  Once original FOBIKs are programmed to function with the Remote Start Kit, they

can only be used in their original manner (cannot be used to remote start the vehicle).  

ONLY original FOBIKs

(non-remote start) that are programmed as outlined below will be functional. Any original FOBIK (non-remote start)

that is not programmed at the time of installation of this kit will not be functional.

Summary of Contents for 82215575AB

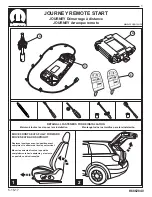
Page 1: ...ción Déplacez les sièges avant en position avant complète et le dossier de l assise est vertical Mover los asientos frente a la posición completamente hacia adelante y el asiento en posición vertical respalda JOURNEY Démarrage à distance JOURNEY Arranque remoto JOURNEY REMOTE START B A E C www mopar com MOVE FRONT SEATS FULLY FORWARD MOVE SEAT BACKS UPRIGHT ...

Page 2: ...equipped with airbags disable the Supplemental Restraint System SRS before attempting any steering wheel steering column airbag seat belt tensioner impact sensor or instrument panel component diagnosis or service Disconnect and isolate the battery negative ground cable then wait two minutes for the system capacitor to discharge before performing further diagnosis or service This is the only sure w...

Page 3: ...rrage à distance du module RFHM Le technicien doit attendre 1 2 heure après avoir ajouté le code de vente XBM dans DealerConnect avant d effectuer la configuration du véhicule Restaurer Dans l intervalle le technicien peut installer tous les composants Le niveau du logiciel wiTECH doit se situer à la plus récente édition pour exécuter cette procédue Ajoutez le code de vente au véhicule DealerCONNE...

Page 4: ...técnico debe esperar 1 2 hora después de añadir el código de venta XBM en DealerConnect antes de realizar la restauración de la configuración del vehículo Mientras tanto el técnico puede instalar todos los componentes El nivel del software de wiTECH debe ser el de la ltima versin para realizar este procedimiento Agregue el código de venta al vehículo en DealerCONNECT 1 Inicie sesión en https deale...

Page 5: ... batería del lado del conductor Appuyez sur le collier sur le goujon Presione el collar en el perno Côté passager Lado del pasajero 6 Couper le ruban et retirer ce connecteur Corte la cinta y extraiga el conector LOCATE EXISTING CONNECTOR AND CUT AWAY RETAINING TAPE Relâchez les clips de sécurité Suelte los clips de seguridad Attention Ne retirez pas ces deux clips dans la doublure supérieure Prec...

Page 6: ... PANEL VIEWED FROM ABOVE PANEL OPENING Appuyez sur ces clips pour relâcher la couverture Presione estos clips para liberar la tapa Vue d en haut Visto desde arriba Ouverture de panneaux Apertura del panel Le boulon se trouve à l intérieur du panneau Un outil magnétique est recommandé El perno se encuentra dentro del panel Se recomienda una herramienta magnética ...

Page 7: ...e du pilier en C Retire la tapa del pilar C Remarque relâchez ces clips Nota suelte estos clips REMOVE C PILLAR PANEL Retirer la couverture du pilier en C Retire la tapa del pilar C Répétez les étapes 8 à 13 du côté conducteur Attention Ne retirez pas le capot B Pillar à ce moment Repita los pasos 8 a 13 en el lado del conductor Precaución No retire la cubierta del pilar B en este momento Relever ...

Page 8: ...SE TWO CLIPS AT BOTTOM OF PANEL Remarque relâchez ces clips Nota suelte estos clips REMOVE B PILLAR PANEL Retirer la couverture du pilier en B Retire la tapa del pilar B Retirez délicatement le joint d étanchéité Tire con cuidado del sello del borde Répétez les étapes 16 à 20 du côté conducteur Repita los pasos 16 a 20 en el lado del conductor Retirez délicatement le joint d étanchéité Tire con cu...

Page 9: ...uvrant passez à l étape 25 Si el vehículo no tiene techo solar continúe con el paso 23 Si el vehículo tiene un techo solar continúe con el paso 25 Sans toit ouvrant Sin techo solar Débloquez le crochet pour l enlever Desbloquear el gancho para quitarlo Avec toit ouvrant Con techo solar Cette poignée est proche du pilier B Este mango está cerca del pilar B Répétez l étape 23 du côté conducteur Pass...

Page 10: ...SSISTANCE FOR THESE STEPS 2X NOTE BE SURE HANDS ARE CLEAN OR WEAR CLEAN GLOVES BEFORE HANDLING THE HEADLINER REAR EDGE OF HEADLINER WITH SUNROOF SUNROOF OPENING CAREFULLY RELEASE ALL HOOK AND LOOP LOCATIONS AROUND EDGES OF SUNROOF OPENING NOTE LOCATIONS OF HOOK AND LOOP FASTENERS AROUND THE SUNROOF OPENING SUNROOF OPENING Avec toit ouvrant Con techo solar Ouverture du toit ouvrant Apertura del tec...

Page 11: ...STANCE FOR THESE STEPS WITH AND WITHOUT SUNROOF TO DRIVER SIDE NOTE BE SURE HANDS ARE CLEAN OR WEAR CLEAN GLOVES BEFORE HANDLING THE HEADLINER Côté conducteur El lado del conductor Remarque appuyez sur le harnais dans les clips du support comme indiqué Nota Presione el arnés en los clips del soporte como se muestra Avec ou sans le toit ouvrant Con o sin el techo solar Remarque Assurez vous que vos...

Page 12: ...VE FACTORY MODULE C Déconnectez deux connecteurs et retirer le module d usine Desconecte dos conectores y extraiga el módulo de fábrica 3 1 1 C C C 2 2X 38 35 37 36 ROUTE HARNESS C TOWARDS REAR MODULE Acheminer le harnais C vers l arrière Coloque el arnés C hacia atrás ...

Page 13: ... 31 TO REINSTALL INTERIOR PANELS AND COMPONENTS PLUG ANTENNA CONNECTOR C INTO CONTROL MODULE B 3 1 3 2X 2 B PILLAR PANEL HEADLINER Connectez l antenne C au module de commande B Conecte la antena C al módulo de control B Doublure supérieure Revestimiento interior del techo Remarque Inspectez tous les bords pour être sûr que la garniture de pavillon est sous le joint en caoutchouc Nota Inspeccionar ...

Page 14: ...he first remote start FOBIK is programmed h Verify the FOBIK is functioning lock unlock start engine but do not use the remote start feature of the FOBIK at this time The ignition may have to be cycled after successful programming of each FOBIK i Repeat the steps above to program the second remote start FOBIK j Repeat the steps above to program any non remote start FOBIKs program only one FOBIK at...

Page 15: ...at the steps for the remaining windows TEMPORARY REMOTE START DISABLE NOTE The wiTECH software level must be at the latest release to perform this procedure CAUTION Read all notes and cautions for programming procedures 1 With the wiTECH diagnostic application perform the following steps a Select BODY CONTROL MODULE BCM b Select the MISC FUNCTIONS tab c Highlight and select TEMPORARY REMOTE START ...

Page 16: ...es étapes jusqu à ce que le premier démarrage à distance FOBIK soit programmé h Vérifiez que le FOBIK fonctionne verrouiller déverrouiller démarrer le moteur mais n utilisez pas la fonction de démarrage à distance du FOBIK en ce moment L allumage peut être cyclé après la programmation réussie de chaque FOBIK i Répétez les étapes ci dessus pour programmer le second démarrage à distance FOBIK j Répé...

Page 17: ...tantes Désactiver temporairement le démarrage à distance Remarque Le niveau du logiciel wiTECH doit être à la dernière version pour effectuer cette procédure ATTENTION lisez toutes les notes et les mises en garde pour les procédures de programmation 1 Avec l application de diagnostic wiTECH procédez comme suit a Sélectionnez BODY CONTROL MODULE BCM b Sélectionnez MISC FUNCTIONS c Sélectionnez TEMP...

Page 18: ...ue se programe el primer inicio remoto FOBIK h Verifique que el FOBIK esté funcionando bloqueo desbloqueo arranque del motor pero no utilice la función de inicio remoto del FOBIK en este momento El encendido puede tener que ser ciclado después de la programación exitosa de cada FOBIK i Repita los pasos anteriores para programar el segundo arranque remoto FOBIK j Repita los pasos anteriores para pr...

Page 19: ...antes Deshabilitar temporalmente el inicio remoto NOTA El nivel de software wiTECH debe estar en la versión más reciente para realizar este procedimiento PRECAUCIÓN Lea todas las notas y advertencias para los procedimientos de programación 1 Con la aplicación de diagnóstico wiTECH realice los siguientes pasos a Seleccione BODY CONTROL MODULE BCM b Seleccione MISC FUNCTIONS c Seleccione TEMPORARY R...

Reviews: