background image

K6859438

07/22/2005

Page 5 of 9

5) Place front mounting bracket (Item 2) inside con-

sole bin as shown.

6) Route the 12-way bracket connector through 

previously trimmed opening and snap connector
into two previously drilled holes.

7) Plug 10-way bracket connector into VES assembly (Item 3).

8) Install VES assembly to front and rear mounting brackets using four supplied screws (Item 4) as

shown below (8mm wrench).

9) Close VES assembly lid and re-install the floor console back cover.

10) Carefully rotate the floor console assembly upside down and re-install two back cover mounting

screws.

Front Mounting

Bracket

12-Way

Connector

VES

Assembly

Screws (2)

Front

Mounting

Bracket

VES

Assembly

Screws (2)

Rear

Mounting

Bracket

Summary of Contents for DVD REAR SEAT VIDEO SYSTEM

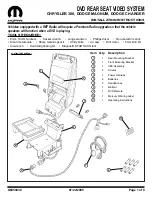
Page 1: ...SYSTEM CHRYSLER 300 DODGE MAGNUM DODGE CHARGER INSTALLATION INSTRUCTIONS Vehicles equipped with a REF Radio will require a Premium Radio upgrade so that the vehicle speakers will function when a DVD is playing TOOLS REQUIRED 8mm 10mm Sockets Socket wrench Long extension Phillips driver Non metal trim stick Small metal scale Sharp metallic pencil Utility knife Air saw Drill motor 6mm Drill bit Air ...

Page 2: ...radio four phillips screws 9 Open the floor console bin lid 10 Remove and discard bin mat 11 Remove and discard bin lid Save two phillips screws for re use 12 Remove 3 4 screws from bin floor 8mm wrench Save for re use NOTE Vehicles built before January 2005 will have 3 screws vehicles built after will have 4 screws 6 Remove center console rubber mat 7 Remove ash tray switch panel Unplug all conne...

Page 3: ...ole upside down on a clean pro tected surface K6859438 07 22 2005 Page 3 of 9 2 Measure mark as shown and trim out connector opening using a sharp utility knife or air saw 3 Measure mark as shown and drill two 6mm connector mounting holes Power Outlet Floor Console Floor Console Upside Down B Modify Floor Console 1 The two areas shown at left must be trimmed drilled to accommodate the VES front br...

Page 4: ...NOTE Step 4 applies only to vehicles built before January 2005 4 Trim out console bin floor as shown to accommo date the VES front mounting bracket Use an air wrench with a serrated grinding bit 4 Install rear mounting bracket Item 1 to top of console bin using two previously removed screws from the discarded console bin lid Floor Console Right Side Up Floor Console Back Cover Bin Lid Screws 2 Rea...

Page 5: ...ector into VES assembly Item 3 8 Install VES assembly to front and rear mounting brackets using four supplied screws Item 4 as shown below 8mm wrench 9 Close VES assembly lid and re install the floor console back cover 10 Carefully rotate the floor console assembly upside down and re install two back cover mounting screws Front Mounting Bracket 12 Way Connector VES Assembly Screws 2 Front Mounting...

Page 6: ...ning of center console as shown 3 Route power harness rearward and inside of carpet liner NOTE Keep harness clear of the spring operated cup holder in the center console 4 Position power harness 12 way connector in the location shown NOTE Secure harness away from any heat sources sharp edges or moving parts 12 Way Connector View A Power Harness Power Harness ...

Page 7: ...connector label them with the connector cavity numbers c Remove the three wires from connector and discard it NOTE Connector wires in vehicle with factory installed satellite radio will all be dark green Make sure to insert them into the correct matching cavities of the power harness connector Reference service manual if needed d Lift up the 10 way power harness connector locking wedge slightly e ...

Page 8: ... way power harness connector and 3 way power outlet connector NOTE Make sure the power harness remains under the carpet liner to prevent rattles E Finalize the installation 1 Open the VES assembly lid and re install 3 4 pre viously removed screws through the VES front mounting bracket and console bin floor 2 Re install two floor console mounting screws at the center console 3 Re install all other ...

Page 9: ...e a diagnostic STARSCAN tool so that the Front Control Module FCM is reconfigured and recognizes the Video Entertainment System VES Follow the procedure shown below 3 Insert a known good DVD into the player 4 Verify function of headphones and DVD remote using supplied Operating Instructions Item 11 5 Place Operating Instructions in the vehicle s glove box IN THE INITIAL START UP SCREEN PRESS VEHIC...

Reviews: