background image

16

ENGLISH

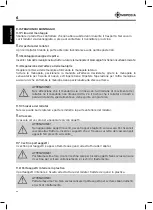
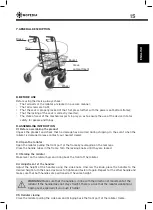
9.6 Tray 
The tray serves only to support small objects. 

WARNING! Do not place hot objects, sharp or heavy on the tray. 
To fix the tray to the frame, insert the support that are on the back of the tray in 
the corresponding slots on the seat.


9.7 Basket 
The shopping basket is hung by two hooks to the rollator frame. 

WARNING! Maximum capacity for bag 5 kg. Use the basket for small items only. Do not 
overload the basket to prevent imbalances and the risk of overturning.

9.8 The glove compartment
The lower glove compartment is fixed to the rollator frame by means of plastic hooks.

WARNING!  Maximum  capacity  for  the  glove  compartment  is  7  kg.  Use  it  for  small 
items only. Do not overload the compartment to prevent imbalances and the risk of 
overturning.

9.9 Seat 
Before sitting, place the rollator on a flat and solid surface and then lock the brakes. Make sure the 
brakes are securely locked and that the rollator is in a stable position. 

WARNING! Sit down distributing your weight on the seat. Do not sit by pushing only on 
one side. 

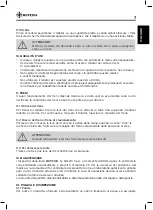
10. HOW TO USE

•  Start pushing when you are in an upright position with both hands on the handle; 
•   Make sure your hands are dry before using the rollator to avoid the risk of slipping; 
•   Walking maintaining an upright position with his eyes facing forward and not down; 
•  Do not push the rollator too far away from the body, this may cause falls and loads inadequate; 
•   Do not use the rollator to overcome steps higher than 20mm; 
•   When using outdoors, prefer the sidewalks properly prepared in accordance regulations for the 
 

removal of architectural barriers.

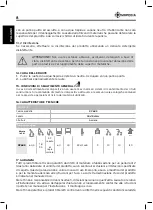
11. BRAKES

The  good  functioning  of  the  brakes  depends  on  the  wear  and  the  dirt  accumulated  on  the  wheels. 
Check the condition of the brakes and wheels before each use.

11.1 Brake use 
To brake the rollator pull the brake lever with your fingers upwards until the rollator slows down or 
stops. To continue to move the rollator, release the brake handles. 

11.2 To lock the wheels 
Press down on the brake lever with the palm of your hand, when you hear a “click” wheels are locked. 


Summary of Contents for Dyone 1.0

Page 1: ...MA RP689 01 A_12 2018 ITALIANO ROLLATOR IN ACCIAIO MANUALE DI ISTRUZIONI...

Page 2: ...elle maniglie pag 6 9 5 Chiusura del rollator pag 6 9 6 Vassoio pag 6 9 7 Cestino portaoggetti pag 6 9 8 Portaoggetti inferiore pag 6 9 9 Sedile pag 7 10 MODALIT D USO pag 7 11 FRENI pag 7 11 1 Utiliz...

Page 3: ...serva il diritto di apportare modifiche al dispositivo e al seguente manuale senza preavviso allo scopo di migliorarne le caratteristiche 3 DESTINAZIONE D USO Questo rollator destinato a persone con d...

Page 4: ...Verificare sempre il corretto funzionamento del freno dopo ogni regolazione in altezza per evitare una flessione libera ed eccessiva del cavo 3 Il mancato rispetto di queste semplici avvertenze pu pr...

Page 5: ...ne Leggere il manuale per le istruzioni Condizioni di smaltimento 7 DESCRIZIONE GENERALE Vassoio Cestino Portaoggetti inferiore Ruota Freno 8 PRIMA DI OGNI USO Prima di utilizzare il dispositivo verif...

Page 6: ...sia in linea con la direzione di movimento del rollator Se il manubrio non rimane dritto c il rischio che il rollator si ribalti o perda di stabilit specialmente se viene spinto con pi forza 9 5 Chiu...

Page 7: ...ruote prima di ogni utilizzo 11 1 Utilizzo del freno Per frenare il rollator tirare le leve dei freni con le dita verso l alto fino a quando il rollator rallenta o si ferma Per continuare a muovere il...

Page 8: ...altire il dispositivo attraverso le comuni isole ecologiche comunali per le previste operazioni di riciclo dei materiali utilizzati 16 CARATTERISTICHE TECNICHE DYONE 1 0 Codice prodotto RP689 Seduta 3...

Page 9: ...opera e di spedizione relativi a una riparazione non coperta dalla garanzia saranno completamente a carico del cliente o del rivenditore Le riparazioni su prodotti non coperti dalla garanzia sono gara...

Page 10: ...___________________________________________ Acquistato in data____________________________________________________ Rivenditore __________________________________________________________ Via __________...

Page 11: ...ENGLISH MA RP689 01 A_12 2018 STEEL ROLLATOR INSTRUCTION MANUAL...

Page 12: ...g 15 9 4 Adjustment of the handles pag 15 9 5 Rollator closing pag 15 9 6 Tray pag 16 9 7 Basket pag 16 9 8 The glove compartment pag 16 9 9 Seat pag 16 10 HOW TO USE pag 16 11 BRAKES pag 16 11 1 Brak...

Page 13: ...arm even by people with balance problems The rollator can be used inward and outward We recommend using on flat surface where the wheels can reach the land It can t be used on rock ground or on slante...

Page 14: ...All wheels must be in contact with the floor at any time during use to ensure the proper balancing of the rollator and maximum safety 10 The brake must be engaged before using the seat Note When the...

Page 15: ...e rollator Open the rollator pulling the front part of the frame by leveraging on the rear legs Place the handle tubes in the frame Turn the locking knobs until they are locked 9 3 Folding the rollato...

Page 16: ...stable position WARNING Sit down distributing your weight on the seat Do not sit by pushing only on one side 10 HOW TO USE Start pushing when you are in an upright position with both hands on the hand...

Page 17: ...amage that is caused by using materials that could damage the product surface or corrosive chemicals during cleaning 13 2 Disinfection If you need to disinfect the product use a common disinfectant ne...

Page 18: ...retti dealer or with own base Labor cost can be in charge to Moretti if the repair is cover from warranty A repair or a replacement doesn t extend the warranty 18 2 Repair not cover from warranty A pr...

Page 19: ..._______________________________________________ Street_______________________________Place____________________________ Sold to_______________________________________________________________ Street____...

Page 20: ......

Reviews: