Page 22
CREASING
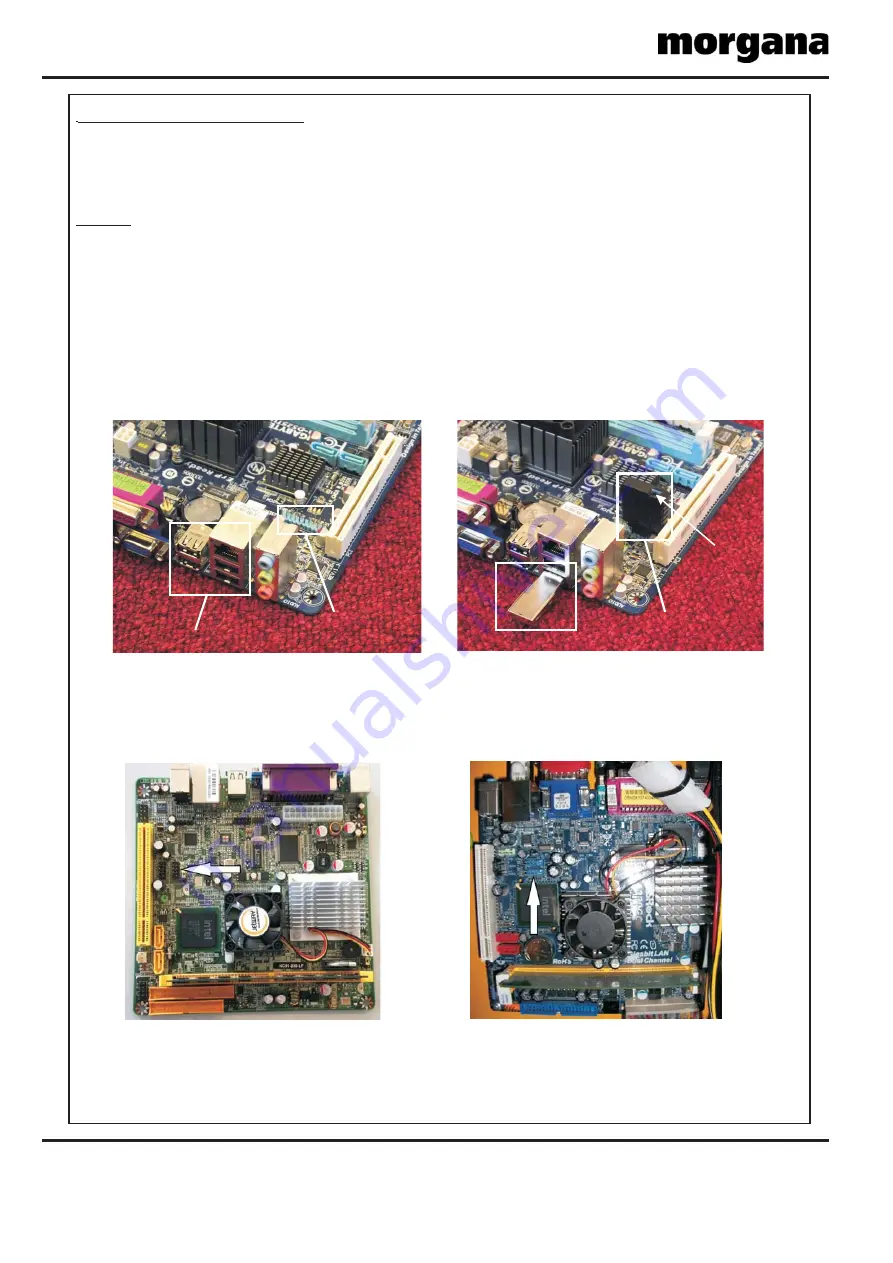
External USB Sockets
Internal USB Headers
Installation Procedure.
1. Note the current machine calibration settings.
2. Power down the machine and remove the power cord.
3. Change the USB Flash Drive (Red or Green depending on what is currently fitted).
It is important to choose the right colour in accordance with the machine you are
upgrading. See TB2705 for further information on when to use Red or Green USB Flash
Drives. As a general rule replace like for like (i.e. Green for Green and Red for Red).
4. Power the machine up.
5. To access the machine menu, open the calculator and type 608888; then press X to exit
the calculator screen.
6. Choose the machine type from the list and perform a power cycle when prompted.
7. Re-enter the calibration settings.
NOTE.
FIG.1 and FIG.2 above show the Internal USB Flash Drive position for the current
Gigabyte ATX mother board. FIG.3 and FIG. 4 below show the Internal USB Flash Drive
positions for the previously used Jetway and Asrock ATX mother boards.
FIG.1
FIG.2
FIG.3
FIG.4
Asrock ATX Mother Board
Jetway ATX Mother Board
External USB Flash Drive
Internal USB Flash Drive
Lock
Recess


