Page 35
SYSTEM
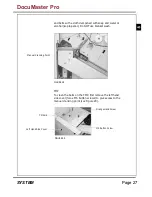
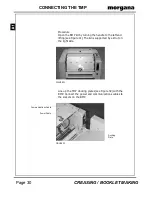
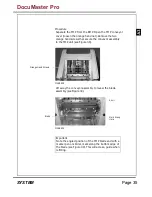
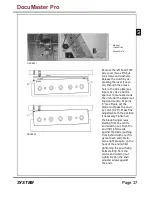
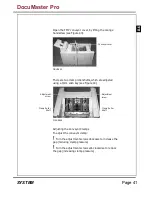
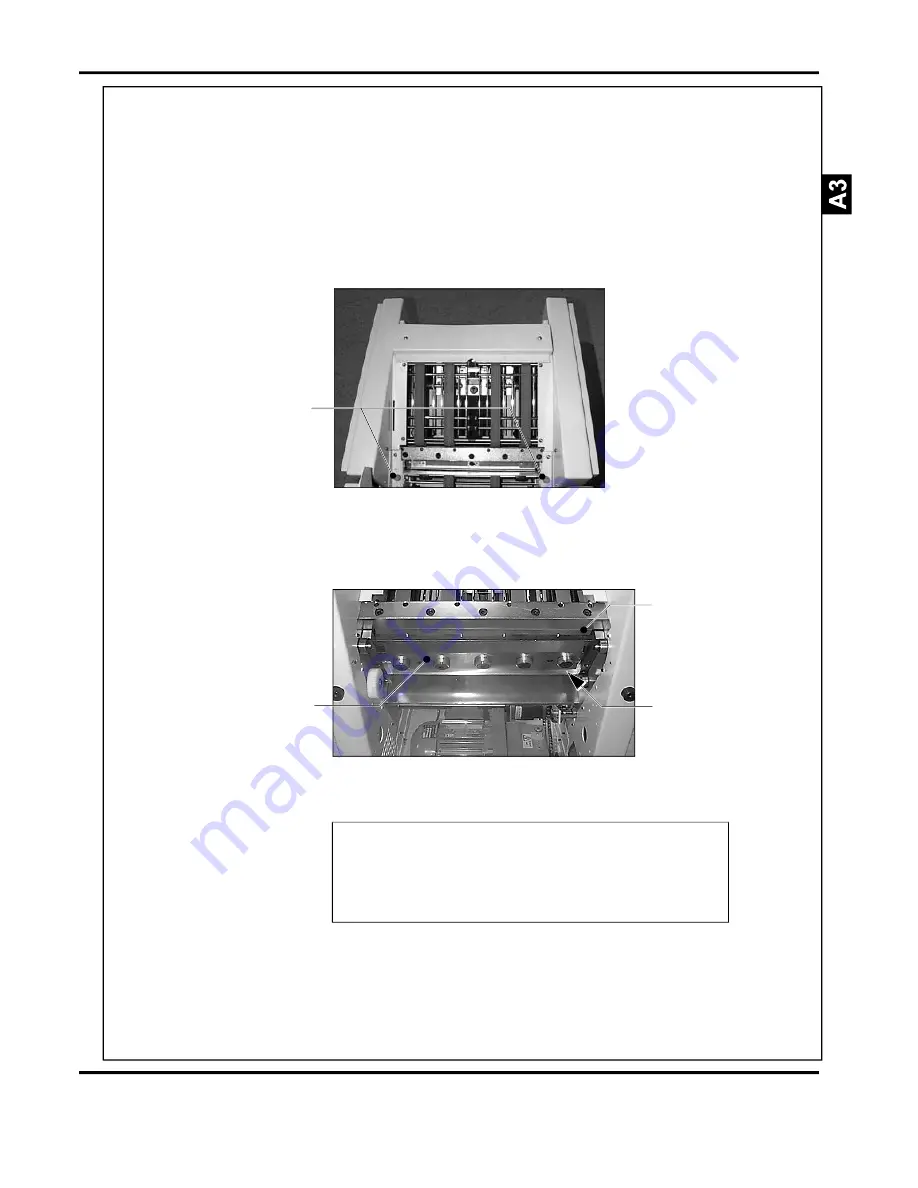
FIGURE 38
Orange Hand Screws
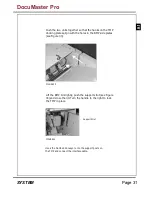
FIGURE 39
Blade
Anvil
Mark Along
Here
Procedure
Separate the TMP from the BMP. Open the TMP conveyor
cover (loosen the orange hand nut). Remove the two
orange hand screws that secure the conveyor assembly
to the TMP unit (see Figure 38).
Lift away the conveyor assembly to reveal the blade
assembly (see Figure 39).
Important
Note the angled position of the TMP blade and with a
marker pen or similar, mark along the bottom edge of
the blade (see Figure 39). This will act as a guide when
refitting.
DocuMaster Pro
Summary of Contents for Documaster Pro
Page 11: ...Page 9 SYSTEM THIS PAGE IS INTENTIONALLY BLANK DocuMaster Pro ...
Page 15: ...Page 13 SYSTEM THIS PAGE IS INTENTIONALLY BLANK DocuMaster Pro ...
Page 19: ...Page 17 SYSTEM THIS PAGE IS INTENTIONALLY BLANK DocuMaster Pro ...
Page 23: ...Page 21 SYSTEM THIS PAGE IS INTENTIONALLY BLANK DocuMaster Pro ...
Page 27: ...Page 25 SYSTEM THIS PAGE IS INTENTIONALLY BLANK DocuMaster Pro ...
Page 31: ...Page 29 SYSTEM THIS PAGE IS INTENTIONALLY BLANK DocuMaster Pro ...
Page 35: ...Page 33 SYSTEM THIS PAGE IS INTENTIONALLY BLANK DocuMaster Pro ...
Page 45: ...Page 43 SYSTEM THIS PAGE IS INTENTIONALLY BLANK DocuMaster Pro ...
Page 47: ...Page 45 SYSTEM DocuMaster Pro ...

