background image

9

www.morphyrichards.com

YOUR FIVE YEAR 
GUARANTEE

For UK customers only

This 5 year guarantee is only valid when registered
directly with Morphy Richards. If you do not
register your product it is guaranteed for 2 years

To validate your 5 year
guarantee, there are 2 easy
ways to register:

1

Telephone our consumer helpline

0870 060 2609

.

Once you have registered your
product you will receive written
confirmation from Morphy Richards,
please retain this information.

2

Alternatively, log on to

www.morphyrichards.com

and

register online.
You will receive an email
confirmation, please print off and
retain this information.

YOUR TWO YEAR 
GUARANTEE

It is important to retain the retailers
receipt as proof of purchase. Staple
your receipt to this back cover for
future reference.
Please quote the following
information if the product develops a
fault. These numbers can be found
on the base of the product.

Model no.

Serial no.

All Morphy Richards products are
individually tested before leaving the
factory. In the unlikely event of any
appliance proving to be faulty within
28 days of purchase it should be
returned to the place of purchase for
it to be replaced.
If the fault develops after 28 days
and within 24 months of original
purchase, contact your local service
centre at the address shown. You
will be asked to return the product
(in secure, adequate packaging) to
the address below along with a copy
of proof of purchase.
Subject to the exclusions set out
below (see Exclusions) the faulty
appliance will then be repaired or
replaced and dispatched usually
within 7 working days of receipt.
If for any reason this item is replaced
during the 2 year guarantee period,
the guarantee on the new item will
be calculated from original purchase
date. Therefore it is vital to retain
your original till receipt or invoice to
indicate the date of initial purchase.

To qualify for the guarantee the
appliance must have been used
according to the instructions
supplied. 

Exclusions

Morphy Richards shall not be liable
to replace or repair the goods under
the terms of the guarantee where:

1

The fault has been caused or is
attributable to accidental use,
misuse, negligent use or used
contrary to the manufacturers
recommendations or where the fault
has been caused by power surges
or damage caused in transit.

2

The appliance has been used on a
voltage supply other than that
stamped on the products.

3

Repairs have been attempted by
persons other than our service staff
(or authorised dealer).

4

Where the appliance has been used
for hire purposes or non domestic
use.

5

Morphy Richards are not liable to
carry out any type of servicing work,
under the guarantee.

This guarantee does not confer any
rights other than those expressly set
out above and does not cover any
claims for consequential loss or
damage. This guarantee is offered
as an additional benefit and does
not affect your statutory rights as a
consumer.

8

www.morphyrichards.com

g

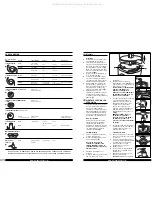
IMPORTANT: Never use the whisk
attachment for dough kneading.

Slicing & Chopping 

There is a choice of blades; slicing,
shredding and chipping (only on
certain models).

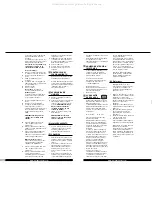
1

Fit the processor bowl as before on
the motor drive.

2

Fit detachable drive shaft.

3

Place the blade of your choice on
top of the detachable drive shaft,
holding the blade by the centre grip.
Ensure that the teeth are facing
upwards.

WARNING: Use extreme caution
- the blades are sharp.

4

Fit the lid and click into place as
detailed in ‘Setting up’.

5

Fit the large food pusher into the
tube on the processor lid.

6

Use the small food pusher to add
food into the processor bowl
through the feeder tube.

Mini processor bowl

Use the mini processor bowl to
chop herbs and small quantities of
ingredients.

1

Fit the mini chopping bowl on the
processor body, as detailed
previously in ‘Setting up’.

2

Slot the mini processor bowl into the
main processor bowl, ensuring that
the locators on the processor bowl
align with the slots in the mini
processor bowl.

3

Using only the small blade, place on
top of the motor drive. This fits in
the hole in the mini processor bowl.

4

Add the food.

5

Fit the lid, ensuring that it is
correctly located.

6

Operate the processor for 2 to 5
seconds only.

OPERATING CONTROLS

The processor control has 1 speed
and a pulse button.

Using the pulse button allows
greater control over the texture of
the food produced. It is only
intended to be used for short
‘bursts’ of processing or blending.

CLEANING ACCESSORIES

1

Switch the processor off and unplug
from electrical socket.

2

All accessories and processor tools
can be washed in hot soapy water
except for the processor body.

WARNING: Extreme care must
be taken when washing the
metal blades as these are
extremely sharp.

3

Clean the processor body with a
damp cloth.

WARNING: Always unplug the
appliance body before cleaning.

STORAGE

Place the protective cover on to the
chopping blade and small blade and
place into the storage container. 

TOP TIPS

For coarser chopping, use the pulse
button for a few seconds and
monitor food texture.

Pre-cut larger pieces to make them
fit into the feed tube. When
chopping hard foods(eg meat,
cheese) cut into 1 inch/2.5cm
cubes.

For shredding and chipping, place
food horizontally into the feed tube.
For slicing, place food vertically.

When slicing carrots, place 2 at a
time in the feeder tube to keep
upright.

DEDICATED HELPLINE

For UK customers

If you have any difficulty with your
appliance, do not hesitate to call.
We are more likely to be able to help
than the store from where you
bought it. 

Please have the following
information ready to enable our staff
to deal with your enquiry quickly:

Name of the product

Model number as shown on the
underside of the appliance or rating
plate

Serial number

All manuals and user guides at all-guides.com

Summary of Contents for 48950

Page 1: ...ntamente y gu rdelas Keukenmachine Lees en bewaar deze instructies zorgvuldig Processador de Alimentos Leia e guarde estas instru es Robot da cucina Leggere e conservare le presenti istruzioni Foodpro...

Page 2: ...rom the mains supply when not in use before taking off attachments and before cleaning Do not operate any appliance with a damaged cord or plug or after the appliance malfunctions or has been damaged...

Page 3: ...Slicing shredding blade Whisk attachment Storage case Unpacking and using your appliance for the first time Carefully unpack your new appliance and all its attachments and tools checking them against...

Page 4: ...are correctly fitted Detachable drive shaft Insert attachments over the top of the detachable drive shaft and ensure that they are securely clicked into place Then remove the blade covers if applicabl...

Page 5: ...r consequential loss or damage This guarantee is offered as an additional benefit and does not affect your statutory rights as a consumer 8 www morphyrichards com g IMPORTANT Never use the whisk attac...

Page 6: ...rit Autres consignes de s curit D branchez l appareil au secteur lorsque vous ne l utilisez pas avant de d monter les accessoires et avant de le nettoyer N utilisez jamais un appareil dont le cordon o...

Page 7: ...pour vous familiariser avec ses diff rentes pi ces Lavez toutes les pi ces que l on peut plonger dans l eau Ne plongez jamais le corps de l appareil dans de l eau ou dans un autre liquide Vous pouvez...

Page 8: ...ssoir lorsque vous mettez des aliments dans le tube N introduisez jamais d aliments en utilisant vos doigts ou des ustensiles autres que les poussoirs 6 Introduisez les gros aliments avec le gros pous...

Page 9: ...s de fabrication ou de mat riels pendant une p riode de deux ans Il est important de conserver votre bon d achat comme preuve Agrafez votre ticket cette notice d installation Veuillez mentionner ces i...

Page 10: ...aux instructions du fabricant Par exemple les appareils doivent tre d tartr s et les filtres doivent tre tenus propre selon le mode d emploi Morphy Richard ne sera pas dans l obligation de remplacer...

Page 11: ...n werden Kl ren Sie Kinder immer ber Gefahrenstellen in der K che auf und weisen Sie darauf hin dass Kinder ber ihrer Augenh he bzw au erhalb ihrer Reichweite abgestellte Gegenst nde nicht von der Arb...

Page 12: ...n Raspeln Schneebesen Anbauteil Aufbewahrungskasten Auspacken Ihres Ger ts und erster Gebrauch Packen Sie Ihr neues Ger t und alle Schneidaufs tze und eins tze vorsichtig aus Vergleichen Sie sie dann...

Page 13: ...ioniert pr fen Sie den korrekten Sitz des K chenmaschinendeckels Warnung Beim Einf llen von Zutaten in den Einf llschacht muss aus Sicherheitsgr nden immer der Stopfer verwendet werden Niemals von Han...

Page 14: ...durch Transportsch den verursacht wurde 2 das Ger t mit einer Spannung versorgt wurde die nicht auf dem Typenschild abgedruckt ist d 26 www morphyrichards com 4 Stecken Sie nun den Netzstecker der K c...

Page 15: ...ungszwecke oder nicht allein f r private Zwecke gebraucht wurde 5 Morphy Richards kann nicht daf r haftbar gemacht werden Reparaturarbeiten im Rahmen der Garantieleistung auszuf hren Diese Garantie er...

Page 16: ...ue las conexiones el ctricas est n secas Este aparato no est destinado a uso infantil ni de personas enfermas sin la adecuada supervisi n de una persona responsable que garantice su segura utilizaci n...

Page 17: ...orte y rebanado grueso Cuchilla de corte y rebanado Accesorio batidor Caja para guardar Desembalaje y uso de su aparato por primera vez Desembale con cuidado su nuevo aparato y todos sus accesorios y...

Page 18: ...s D MONTAJE Y USO DE LOS UTENSILIOS Por lo general todos los accesorios a excepci n del mini recipiente del robot y la cuchilla peque a encajados en el recipiente del robot deben quedar firmemente suj...

Page 19: ...ra cortar y picar introduzca los alimentos en posici n horizontal en el tubo alimentador Para rebanar 36 www morphyrichards com www morphyrichards com e introduzca los alimentos en posici n vertical P...

Page 20: ...ieuwe apparaat optimaal gebruiken Veiligheid Tijdens het gebruik moeten de mengkom en het deksel juist geplaatst zijn anders werkt de aan uit pulse schakelaar niet Bediening De aandrijfas moet voor AL...

Page 21: ...e elektrische aansluitingen altijd droog Dit apparaat is niet bedoeld voor gebruik door jonge kinderen of zwakke personen tenzij ze goed onder toezicht staan van een verantwoordelijke persoon die ervo...

Page 22: ...den en raspen Garde I Opbergdoos Apparaat uitpakken en eerste gebruik Pak uw nieuwe keukenmachine en alle accessoires en hulpstukken zorgvuldig uit en kijk hierbij steeds naar de illustraties aan het...

Page 23: ...stukken voedsel verwerkt dient u de kleine stamper te ontgrendelen en te gebruiken waarbij de grote stamper in het deksel blijft zitten H WAARSCHUWING Gebruik de kleine stamper niet als de grote stam...

Page 24: ...sthoudt aan de middengreep Ga na of de tanden omhoog staan WAARSCHUWING Wees zeer voorzichtig het mes is scherp 4 Plaats het deksel op de kom en klik het vast zoals beschreven in het onderdeel Opstell...

Page 25: ...iverem sido adequadamente supervisionadas por uma pessoa respons vel para garantir que o aparelho utilizado com seguran a Outras considera es de seguran a Desligue o aparelho da tomada de alimenta o q...

Page 26: ...ecipiente para picar fl Tampa do processador de alimentos Calcador grande Calcador pequeno Mini recipiente para picar Esp tula L mina para massas L mina para picar Eixo rotativo amov vel L mina de apa...

Page 27: ...a utilize sempre o calcador de alimentos quando introduzir alimentos no tubo de alimenta o Nunca introduza os alimentos ou utens lios com as m os 6 Introduza os alimentos grandes com o calcador de al...

Page 28: ...por pessoas que n o os t cnicos da Morphy Richards ou o seu representante autorizado p 54 www morphyrichards com 3 Encaixe a tampa e a ranhura certificando se de que emite um clique 4 Ligue agora o pr...

Page 29: ...atore di velocit funzioni Funzionamento L albero motore rimovibile deve essere montato con TUTTE le lame tranne con la mini lama per tritare e con la frusta che devono essere montati direttamente sull...

Page 30: ...i capelli indumenti nonch spatole e altri utensili lontani dalle lame del robot durante il funzionamento per evitare lesioni personali e o danni all elettrodomestico AVVERTENZA per non essere esposti...

Page 31: ...attugiare Frusta Contenitore per alloggiare gli accessori Disimballaggio e primo utilizzo dell elettrodomestico Rimuovere con attenzione il nuovo elettrodomestico e tutti gli accessori dalla scatola P...

Page 32: ...n altri utensili 6 Inserire gli alimenti pi grandi con il pressino grande Il pressino piccolo deve essere bloccato in posizione durante l uso Quando si lavorano piccoli pezzi di alimenti sbloccare e u...

Page 33: ...richards com sicurezza lasciare sempre il pressino nel proprio alloggiamento mentre il robot in funzione Frusta 1 Collocare la tazza come descritto nella sezione Operazioni preliminari 2 Collocare l a...

Page 34: ...k ud af stikkontakten n r det ikke anvendes f r du afmonterer tilbeh r eller reng r apparatet Anvend ikke et apparat med en beskadiget ledning eller stik Apparatet m heller ikke bruges n r det ikke fu...

Page 35: ...ringsblad Piskeris Opbevaringskasse Udpakning og f rste brug Pak forsigtigt din nye maskine samt alt tilbeh r og v rkt j ud og kontroller dem i forhold til illustrationerne i begyndelsen af h ftet fo...

Page 36: ...e skubber l snes og bruges Den store skubber skal blive siddende i l get H ADVARSEL Brug aldrig den lille skubber hvis den store skubber ikke er monteret i l gets doseringsr r 7 N r forarbejdningen af...

Page 37: ...evet i afsnittet Opstilling 5 S t foodprocessorens stik i stikkontakten 6 T nd for foodprocessoren VIGTIGT Piskeriset m aldrig bruges til at lte dej Snitning og hakning Du kan v lge mellem flere forsk...

Page 38: ...Koppla ur matberedaren fr n v gguttaget n r den inte anv nds innan du tar av tillbeh ren och f re reng ring Anv nd inte en hush llsapparat med skadad sladd eller kontakt och ej heller en apparat med...

Page 39: ...Uppackning och anv ndning av din beredare f r f rsta g ngen Packa f rsiktigt upp din nya hush llsapparat och alla dess tillbeh r och redskap Bekanta dig med produkten genom att kontrollera delarna mot...

Page 40: ...p sin plats n r den inte anv nds Vid beredning av sm matbitar lossa och anv nd den lilla p mataren och f st den stora p mataren d r den ska sitta i locket H VARNING Anv nd ej den lilla p mataren utan...

Page 41: ...p mataren och s tt p plats enligt beskrivningen i avsnittet Installation 5 Anslut matberedaren 6 S tt p matberedaren VIKTIGT Anv nd aldrig vispskivan f r att kn da deg Skivning och hackning Det finns...

Page 42: ...e Urz dzenie to nie jest przeznaczone do u ytkowania przez ma e dzieci lub osoby niedo ne o ile nie przebywaj pod odpowiednim nadzorem osoby odpowiedzialnej kt ra zapewni bezpieczne u ytkowanie tego u...

Page 43: ...nymi na pocz tku niniejszej instrukcji obs ugi co pozwoli Ci zapozna si z urz dzeniem Umyj wszystkie cz ci sk adowe robota kt re mo na bezpiecznie zanurzy w wodzie Nigdy nie zanurzaj podstawy w wodzie...

Page 44: ...odpowiednio zamontowana Ostrze enie Ze wzgl d w bezpiecze stwa podczas podawania ywno ci przez podajnik produkt w zawsze korzystaj z urz dzenia do przyciskania produkt w Nigdy nie stosuj w tym celu d...

Page 45: ...w celach innych ni przewidziane w gospodarstwie domowym 5 Firma Morphy Richards nie wykonuje adnych czynno ci serwisowych w 88 www morphyrichards com produkt w a jeszcze przed wyci gni ciem ich z misk...

Page 46: ...w filtr w czy szklanych karafek Niniejsza gwarancja nie nadaje adnych praw innych ni te wyra nie okre lone powy ej oraz nie pokrywa roszcze zwi zanych ze stratami lub uszkodzeniami wynikaj cymi z eks...

Page 47: ...www morphyrichards com 92 www morphyrichards com Morphy Richards Morphy Richards All manuals and user guides at all guides com...

Page 48: ...www morphyrichards com 700 15 20 over texture 700 20 600 10 15 350 1 1 1 600 20 400 2 6 1 2 2 6 570 40 50 20 2 5 94 www morphyrichards com fi fl fi fi fl All manuals and user guides at all guides com...

Page 49: ...www morphyrichards com H 7 1 2 3 4 5 6 30 2 1 2 3 4 5 6 1 2 3 4 5 6 1 96 www morphyrichards com 1 2 A 3 B 4 5 C 6 D E 1 2 F 3 4 5 1 G 6 A C B D E F H G All manuals and user guides at all guides com...

Page 50: ...morphyrichards com C Morphy Richards 24 2 Morphy Richards 1 98 www morphyrichards com 2 3 4 5 6 2 5 1 2 3 1 2 5 MorphyRichards orphy Richards 7 095 720 60 92 All manuals and user guides at all guides...

Page 51: ...rphyrichards com 100 www morphyrichards com 2 3 4 5 1 MorphyRichards 2 MorphyRichards 2 3 4 a b c d e f g h i 5 a b c d MorphyRichards 6 All manuals and user guides at all guides com a l l g u i d e s...

Page 52: ...is Vraag bij uw lokale overheid of in uw winkel waar u daarvoor terecht kunt p Para produtos el ctricos vendidos na Comunidade Europeia Quando os produtos el ctricos atingirem o final da sua vida til...

Page 53: ...84 1322 AS Almere Nederland T 31 0 36 538 70 40 F 31 0 36 538 70 41 Service 31 0 36 538 70 55 E info glendimplex nl www morphyrichards nl b Les produits Morphy Richards sont con us pour un usage exclu...

Reviews: