Thank you for buying your new Morphy Richards Clipper
set. Please read these instructions carefully before use
and keep in a safe place for future reference.
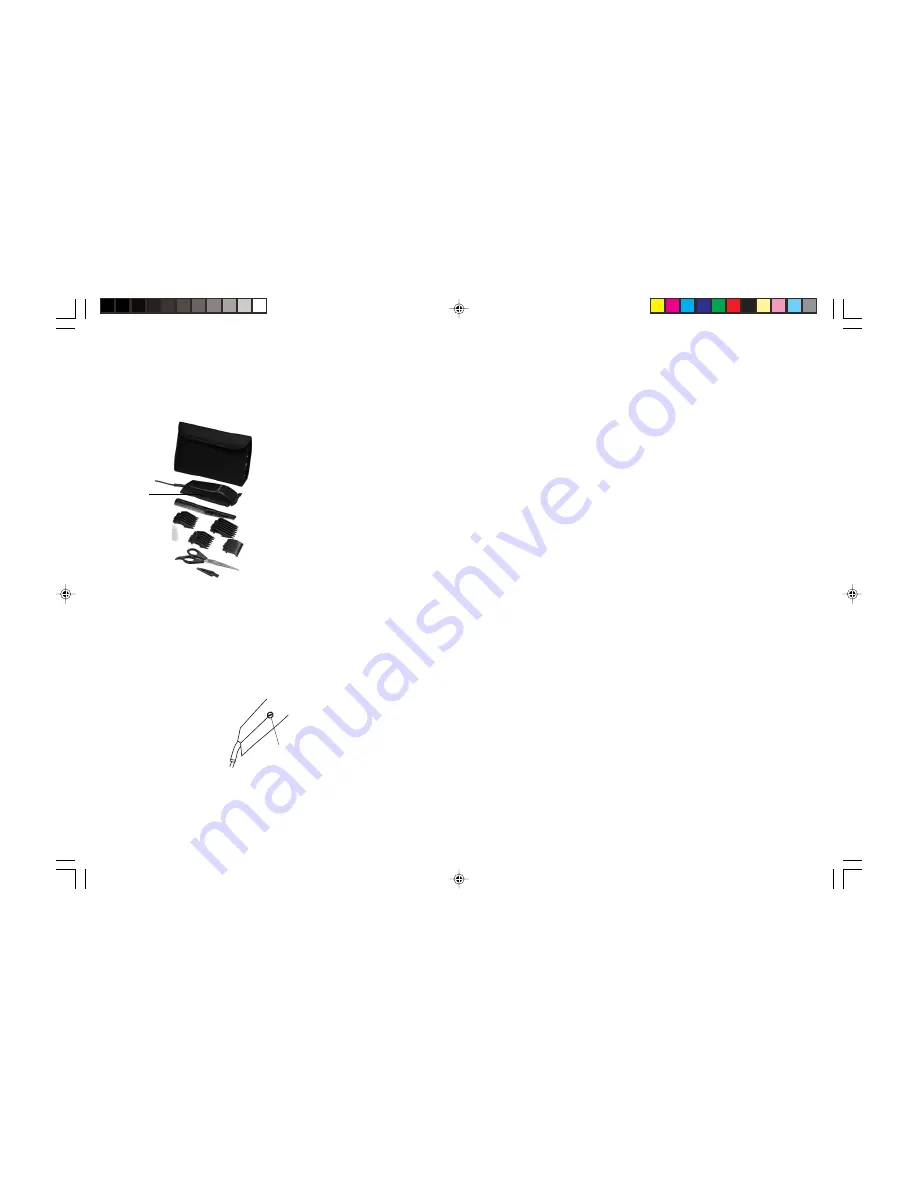
Key features
A
Mains powered
B
4 black attachments
C
Includes: brush, scissors, oil, comb
D
Accessory carry case
Cutting guide
Never use the product to cut wet hair. It is designed to
work on dry hair only.
Tips
Make sure that the clipper is clean, properly oiled and in
perfect working condition.
Place a towel around the neck of the person, to prevent
hair from falling down inside the collar.
Position the person whose hair is to be cut on a chair
so that his/her head is at your eye level.
Comb the hair to remove all tangles.
Cutting hair with attachments
(for medium to long cut)
To attach combs, hold comb with teeth up, snap comb
attachment firmly to the bottom of the clipper blade.
Attachment comb 1 Leaves hair approx.
1
/
8
” in length
Attachment comb 2 Leaves hair approx. ¼” in length
Attachment comb 3 Leaves hair approx.
3
/
8
” in length
Attachment comb 4 Leaves hair approx. ½” in length
At the beginning, cut only a small amount of hair until
your hair becomes accustomed to the length each comb
attachment leaves the hair.
Comb the hair into its natural direction.
Place the largest, attachment comb onto your clipper
and start by trimming the sides from the bottom
upwards.
Hold the clipper lightly against the hair with teeth of
the attachment comb pointing up but flat against the
head. Slowly lift the clipper up and outward through
the hair, cutting only a small amount at a time.
Repeat around the sides and back of the head.
If you require short hair, change to a lower number
attachment comb or apply more pressure and less lift
away from the head with the present attachment comb.
Outlining
Outlining does not require any attachments. Take the
clipper and push the lever up to the close cut-position.
Comb hair into the style. Position clipper between the
side burns and the ear. Make sure the corner edge of
the blade is against the hairline. With the outline of
the hair as your guide, slowly move the clipper over,
around and behind the ears.
For the back of the neck and side burns, hold the
clipper upside down and holding it against the skin at
the desired length, move downwards.
Short cuts to perfect crew cuts
Always cut from the back of the neck to the crown,
using the longest attachment comb. Holding it flat
against the head, slowly move the clipper up through
the hair. Using the same technique for the sides,
cutting from the bottom to the upper side of the head.
Maintenance
Your clippers were examined to ensure that the blades
were oiled and aligned before leaving our factory.
Blades must be realigned if they have been removed for
cleaning or replacement.
To realign the blades, simply match the upper and
bottom blades teeth up, point for point.
If blade alignment is incorrect, add a few drops of oil to
the blades, turn the clipper on for a few moments, turn
off and unplug. Loosen screws slightly and adjust.
Tighten screws after blade is aligned.
To maintain the clipper in peak condition, the blades
should be oiled every few haircuts. Simply place a few
drops of oil on the teeth of the blades. Use only oil
included in the pack. Due to the high speed of the
clipper the correct oil must be used. Do not use hair oil,
grease, oil mixed with kerosene or any other solvent.
Solvent will evaporate and leave the thick oil, which
may slow down the blades. Clipper oil is a very thin,
natural oil which will not evaporate and will not slow
down the blades.
Adjustable lever
The lever is conveniently located near your thumb (if
you are right handed), so that it can be easily adjusted
while the clipper is in your hand.
The lever adds versatility to your clipper by allowing
you to gradually change the closeness of your cut
without an attachment comb.
When the lever is in the uppermost position, the blades
will give you the closest cut and leave the hair very
short. Pushing the lever downwards gradually
increases the cutting length.
B
brush
oil
scissors
comb
carry
case
Power screw
The power screw has been adjusted for peak efficiency
before leaving the factory. However, if the voltage in
your home is low, you may
need to re-adjust it. To adjust
power, use a screwdriver or a
thin coin to turn the power
screw in a clockwise direction
until the arm strikes the coil,
making a noise. Then, slowly
turn the power screw out
(counter-clockwise) just until
noise stops. This is the
maximum power setting.
power
screw
power
screw


