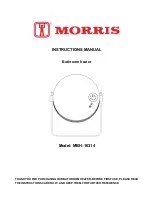
INTRODUCTION
•
Before using your new heater, please carefully read through the following instructions.
•
KEEP THIS BOOKLET IN A SAFE PLACE SO THAT YOU MAY CONSULT IT LATER.
•
After removing the packaging, make sure that the appliance is in good condition.
•
The packaging materials may contain plastic, nails etc., which may be hazardous and therefore should not be left within
the reach of children.
IMPORTANT SAFETY INFORMATION
•
Installation MUST be carried out by a qualified electrician.
•
Avoid installation behind a door.
•
Use only the voltage specified on the rating plate of the heater.
•
Do not cover or restrict airflow to the inlet or exhaust grilles in any manner as the appliance may overheat and become
a fire risk (for Fan Heaters).
•
Do not cover grilles, block entry or exhaust of airflow by placing appliance against any surface. Keep all objects at least
1 meter from the front and sides of the appliance. With exception of appliances designed for wall-mounting, maintain
a 1-meter gap from the rear of the unit as well.
WARNING: FIRE RISK EXISTS IF THE HEATER IS COVERED BY / OR IF IT IS
POSITIONED CLOSE TO CURTAINS OR OTHER COMBUSTIBLE MATERIALS
•
Do not place appliance close to a radiant heat source.
•
Do not operate in areas where gasoline, paint or other flammable liquids are used or stored.
•
This appliance heats up when in use. To avoid burns, do not let bare skin touch hot surfaces. Switch off and use
handles where provided when moving.
•
Do not use the appliance to dry clothes.
•
Do not leave the appliance unattended whilst in use.
•
Do not insert or allow foreign objects enter any ventilation or exhaust opening, as this may cause an electric shock, fire
or damage to the appliance.
•
Do not immerse in liquid or allow liquid to run into the interior of the appliance, as this could create an electrical shock
hazard.
•
Do not use this appliance on a wet surface, or where it can fall or be pushed into water.
•
Do not reach for an appliance that has fallen into water. Switch off at supply and unplug immediately.
•
Do not operate any appliance with a damaged cord, plug or after the appliance malfunction or has been dropped or
damaged in any manner. Return to a qualified electrical person for examination, electrical or mechanical adjustment,
service, or repair before further use.
•
Do not operate appliance with wet hands.
•
This appliance is intended for household use only and not for commercial or industrial use.
•
Use this appliance only as described in this manual. Any other use is not recommended by the manufacturer and may
cause fire, electric shock, or injury.
•
A common cause of overheating is deposits of dust or fluff in the appliance. Ensure these deposits are removed
regularly by unplugging the appliance and vacuum-cleaning air vents and grilles, where available.
•
Do not use this appliance in a window as rain may cause electric shock.
•
Do not use abrasive cleaning products on this appliance. Clean with a damp cloth (not wet) rinsed in hot soapy water
only. Always remove plug from the mains supply before cleaning.
•
Do not connect the appliance to the mains source until it has been installed in its final location and adjusted to the
position it will be used in.
•
This appliance is not intended for use in bathrooms, laundry or similar locations which may be exposed to water,
moisture or humidity.
•
Always operate on a flat horizontal surface.


