12
13
DK ENG
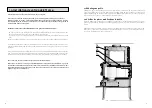
In the US, floor protection must be constructed of a non-combustible material and installed
to extend beneath the heater and 16’’ to the front and 8’’ to the sides of the fuel loading
door and ash removal openings. In Canada, floor protection must be constructed of a non-
combustible material and installed to extend beneath the heater and 450 mm.(16’’) to any
side with a door and 200 mm.(8’’) beyond the appliance on the other sides.
Distance to furniture
The recommended minimum distance from stove to furniture is 30 inches. Note that some
furniture is more easily affected by heat and may need to be moved to a greater distance.
This is your responsibility.
In addition other combustible materials, away from the stove. In general, a distance of 30
inches must be maintained between the stove and moveable combustible item such as dry-
ing clothes, newspapers, firewood etc.
DO NOT INSTALL IN A MOBILE HOME
Note:
Acid Protection
If acid-washing the masonry around the stove, protect the stove surface with an acid-proof
cover.
Fresh Air Inlet
Unless there is deemed to be sufficient ambient leakage of air into the room via doorways, windows
and the like, a dedicated fresh air inlet will be needed. This inlet should have 2 square inches (1250
square mm) of free air space. This is particularly important where the room is well sealed, or where
an extractor hood or ventilation system disturbs the natural air pressure. Such an inlet should not
be on a wall that is usually subject to negative pressure from normal wind pattern. Avoid placing the
inlet directly across the room from the stove, thus causing a cold air draft.
2.0 Operation
2.1 Before you start firing
For use with solid wood fuel only.
Do not overfire; if heater or chimney connector glows, you are overfiring.
Inspect and clean chimney frequently. Under certain conditions of use, creosote buildup
may occur rapidly. Because of risk of smoke and flame spillage, operate only with door
fully closed.
Caution:
Hot while in operation.
Keep children, clothing and furniture away.
Contact may cause skin burns.
Do not use chemicals or fluids to start the fire.
Do not burn garbage or flammable fluids.
Do not use gasoline, gasoline-type lantern fuel, kerosene, charcoal lighter or fluid or simi-
lar liquids to start or freshen up a fire in this heater. Keep all such liquids away from the
heater while it is in use.
Choosing your fuel
All types of natural wood can be burned on your stove, but they must be well-seasoned and
dry. Once the wood is cut to length, it should be split down middle - to suit the dimensions giv-
en below - to allow moisture to evaporate.Cut the wood to a length of max 12 inches (30cm)
and approx. 3 to 3.5 inches (7-8 cm) in section. If you can weigh your wood, aim for around
2 lbs. For correct combustion and heat output, wood fuel should contain no more than 20%
moisture; this can easily be checked by using the Morsø Moisture Meter (part no. 62929900)
To naturally season wood fuel, stack and store it under cover in an airy location where fresh air
can move through each piece. Some soft woods may take as little as one good summer to sea-
son whereas harder woods such as oak, maple, and elm may require seasoning up to 18 months.
Avoid overly dry wood that is gray in color as under certain conditions it can cause performance
problems, such as back-puffing and sluggishness. Well seasoned wood will be light to hold and
will show signs of cracking from the center-out in the ends. If your wood spits or sizzles when
burnt, and your stove’s door glass persistently mists up, your wood is not properly seasoned.
Never use drift wood (from the sea), whose salt content may cause corrosion, nor construction
wood that may have been impregnated with chemicals.
To optimize efficiency:
Burning wet wood has a negative impact on efficiency
Caution: Do not place fuel within the installation clearances for the stove or within the
space required for loading fuel and ash removal.
Starting the First Fire
The initial fire should be small, so that the stove paint can cure and the main plates of the
stove can settle into position. Some fumes will be given off by the paint. Ventilate the room
during this phase. The setting of the air control, lighting techniques and loading intervals
will depend on chimney draft, the fuel used, the heat required and so on. Some basic tech-
niques are outlined below.
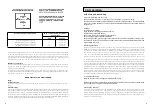
Floor protection requirements
Non-combustible materials be-
neath stove
USA
Canada
A. Extending distance, back
B. Extending distance, right side
C. Extending distance, left side
D. Extending distance, front
-
6”
6”
16”
200 mm
200 mm
200 mm
450 mm
Summary of Contents for 2B Classic 2020
Page 90: ......
Page 122: ......
Page 128: ......
Page 134: ......
Page 138: ......
Page 139: ......
Page 140: ......
Page 141: ......
Page 142: ......
Page 143: ......
Page 144: ......
Page 145: ......
Page 146: ......
Page 147: ......
Page 148: ......
Page 149: ......
Page 150: ......
Page 151: ......
Page 152: ......
Page 153: ......
Page 154: ......
Page 155: ......
Page 156: ......
Page 157: ...å ...
Page 158: ......
Page 159: ......
Page 160: ......
Page 161: ......
Page 162: ......
Page 163: ......
Page 164: ......
Page 165: ......
Page 166: ......
Page 167: ......
Page 168: ......
Page 169: ......
Page 170: ......
Page 171: ......
Page 172: ......
Page 173: ......
Page 174: ......
Page 175: ......
Page 176: ......
Page 177: ......
Page 178: ......
Page 179: ......
Page 180: ......
Page 181: ......
Page 182: ......
Page 183: ......
Page 184: ......
Page 185: ......
Page 186: ......
Page 187: ......
Page 188: ......
Page 189: ......
Page 190: ......
Page 191: ......
Page 192: ......
Page 193: ......
Page 194: ......
Page 195: ......
Page 196: ...æ æ å å æ å æ æ æ å æ æ æ å æ æ æ æ å ø å ø å å Ø ...
Page 298: ......
Page 299: ......
Page 300: ......
Page 315: ......
Page 316: ......
Page 317: ......
Page 332: ......
Page 333: ......
Page 334: ......
Page 354: ......
Page 359: ......
Page 364: ......
Page 369: ......
Page 384: ......
Page 385: ......
Page 386: ......
Page 387: ......
Page 397: ......
Page 398: ......
Page 399: ......
Page 400: ......
Page 410: ......
Page 411: ......
Page 412: ......
Page 413: ......
Page 423: ......
Page 424: ......
Page 425: ......
Page 426: ......
Page 441: ......
Page 442: ......
Page 447: ......
Page 448: ......
Page 453: ......
Page 454: ......
Page 459: ......
Page 460: ......
Page 471: ......
Page 474: ...Annex 27 a 60 pages ...
Page 475: ......
Page 476: ......
Page 477: ......
Page 478: ......
Page 480: ......
Page 481: ......
Page 483: ......
Page 484: ......
Page 491: ......
Page 492: ......
Page 495: ......
Page 496: ......
Page 497: ......
Page 499: ......
Page 501: ......
Page 503: ......
Page 512: ......
Page 523: ......
Page 526: ... 0 0 0 0 0 0 12 ...
Page 574: ...Annex 30 2 pages ...
Page 575: ......
Page 611: ......
Page 624: ......
Page 625: ......
Page 626: ......
Page 627: ......
Page 628: ......
Page 629: ......
Page 630: ......
Page 631: ......

