16
17
DK ENG
3.0 Maintenance
When perfoming maintenance on your stove, always protect yourself, using safety gog-
gles and gloves
3.1 Exterior Maintenance
The stove surface is painted with heat-resistant Senotherm paint. It is best kept clean by
vacuuming with a soft brush attachment or by wiping with a lint-free cloth.
Over a period of time, the painted surface may become slightly grey. A can of Morsø touch-up
spray paint should be available from your stove supplier. This can be applied - in accordance with
the instructions - in just a few minutes. When first firing after touching up, the stove will give off a
slight smell as the paint cures. Make sure to ventilate the room well during this phase.
3.2 Internal maintenance
Glass
If the stove is generally run at the correct temperatures, there should be little or no dirt on
the glass. If dirt does settle during lighting, most will burn off as temperatures increase.For
heavier deposits that will not burn off, use Morsø glass cleaner, applied when the glass is
cold, in accordance with the instructions. Never use abrasive cleaners on the glass surface.
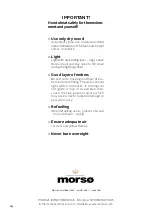
Reasons for dirty glass
- Fuel too wet
- Logs too large or not split
- Combustion temperatures too low
Replace broken glass immediately.
Do not operate your stove if the glass in the door is damaged.
If you need to replace the glass, it should be replaced with the high temperature ceramic
class supplied by Morsø, contact your Morsø dealer.
Installing the glass
Never install the glass when the stove is in function.
Ceramic glass replacement
Ceramic glass cannot be recycled because it has a higher
melting point that ordinary glass. If ceramic glass is mixed
with ordinary glass, the raw material is spoiled, and the
reclaiming process may be halted. Take care that the ov-
enproof glass does not end up among ordinary recycled
waste. That will be a great benefit to the environment.
Note: Should be handed in to a recycling station as ce-
ramic glass.
The maximum recommended weight of wood fuel per load is 3.5 kg/7 Ibs (approx 5 split
logs).
Under normal firing, the average flue temperature in the stove pipe, measured 20 cm above
the stove, is approx. 300° C (550°F). The maximum flue temperature in the stove pipe must
not exceed 450° C (750°F). If the flue temperature exceeds 450°C (750°F), it is considered
as over firing and may cause premature wear and tear of the stove.
To help gauge the correct running temperature of your stove, we recommend you use the
Morsø Flue Gas Thermometer (part no. 62901200). The Flue Gas Thermometer magneti-
cally attaches onto the stove pipe approx 20 cm (8”) above the stove’s top plate and mea-
sures the surface temperature of the stove pipe. Please see your authorized Morsø Dealer
for availability.
Draft conditions
If smoke or fumes come out of your stove when lightning up and reloading, or if the fire simply
will not respond, a poor draft is almost certainly to blame. (In a very few cases, there may be
insufficient fresh air getting into the room - see installation advice above). Take advice from
your stove supplier on how best to upgrade your flue system to improve draft.
Rules of woodburning
If you want less heat, put fewer logs on the stove and reduce the amount of air. It is still impor-
tant to maintain a good layer of embers.
Less heat - less wood - less air
Greater heat - more wood - more air
Soot deposits will settle on the glass if the stove is run too slowly or if your wood is not well
seasoned.
Carbon monoxide detectors
It is required in some jurisdictions to install smoke and carbon monoxide detectors where
heaters are installed. Install at least one smoke detector on each floor of your home
to ensure your safety. It should be located away from the wood appliance and close to
the sleeping areas. Locating a smoke detector too close to a wood appliance can cause the
smoke detector alarm to sound if a puff of smoke is emitted while the wood appliance door
is open during reloading. Follow the smoke detector manufacturers placement, installation,
and maintenance instructions
Revisions
Rev.
Sign.:
Title:
Drawing no.:
1:20
Reservedelstegning
2B Classic NA
Morsø 2B Classic
RSV
28.11.2008
A3
Exploded Diagram
Date of print: 15-12-2009
U:\udv\Tegninger\1B&2B\2B Classic & 2B Standard Assembly.SLDASM
2B-509 b
Itemno.:
This drawing is Morsø Jernstøberi A/S' property and must not be sold, lended or copied without any written authorization from the company.
Material:
Weight:
Model no.
Drawingtype:
Location of file:
Scale:
Format:
Released:
Construction:
Date:
b Tilføjet pos. 56 dæksel til overdel. RSV 25.11.2009
ALWAYS USE ORIGINAL MORSØ SPAREPARTS
Summary of Contents for 2B Classic 2020
Page 90: ......
Page 122: ......
Page 128: ......
Page 134: ......
Page 138: ......
Page 139: ......
Page 140: ......
Page 141: ......
Page 142: ......
Page 143: ......
Page 144: ......
Page 145: ......
Page 146: ......
Page 147: ......
Page 148: ......
Page 149: ......
Page 150: ......
Page 151: ......
Page 152: ......
Page 153: ......
Page 154: ......
Page 155: ......
Page 156: ......
Page 157: ...å ...
Page 158: ......
Page 159: ......
Page 160: ......
Page 161: ......
Page 162: ......
Page 163: ......
Page 164: ......
Page 165: ......
Page 166: ......
Page 167: ......
Page 168: ......
Page 169: ......
Page 170: ......
Page 171: ......
Page 172: ......
Page 173: ......
Page 174: ......
Page 175: ......
Page 176: ......
Page 177: ......
Page 178: ......
Page 179: ......
Page 180: ......
Page 181: ......
Page 182: ......
Page 183: ......
Page 184: ......
Page 185: ......
Page 186: ......
Page 187: ......
Page 188: ......
Page 189: ......
Page 190: ......
Page 191: ......
Page 192: ......
Page 193: ......
Page 194: ......
Page 195: ......
Page 196: ...æ æ å å æ å æ æ æ å æ æ æ å æ æ æ æ å ø å ø å å Ø ...
Page 298: ......
Page 299: ......
Page 300: ......
Page 315: ......
Page 316: ......
Page 317: ......
Page 332: ......
Page 333: ......
Page 334: ......
Page 354: ......
Page 359: ......
Page 364: ......
Page 369: ......
Page 384: ......
Page 385: ......
Page 386: ......
Page 387: ......
Page 397: ......
Page 398: ......
Page 399: ......
Page 400: ......
Page 410: ......
Page 411: ......
Page 412: ......
Page 413: ......
Page 423: ......
Page 424: ......
Page 425: ......
Page 426: ......
Page 441: ......
Page 442: ......
Page 447: ......
Page 448: ......
Page 453: ......
Page 454: ......
Page 459: ......
Page 460: ......
Page 471: ......
Page 474: ...Annex 27 a 60 pages ...
Page 475: ......
Page 476: ......
Page 477: ......
Page 478: ......
Page 480: ......
Page 481: ......
Page 483: ......
Page 484: ......
Page 491: ......
Page 492: ......
Page 495: ......
Page 496: ......
Page 497: ......
Page 499: ......
Page 501: ......
Page 503: ......
Page 512: ......
Page 523: ......
Page 526: ... 0 0 0 0 0 0 12 ...
Page 574: ...Annex 30 2 pages ...
Page 575: ......
Page 611: ......
Page 624: ......
Page 625: ......
Page 626: ......
Page 627: ......
Page 628: ......
Page 629: ......
Page 630: ......
Page 631: ......

